Guitar wood dye can be a great way to change the look of your instrument. Whether you are looking for a new color or want to darken the wood, using dye can achieve the look you want. In this blog post, we will discuss five tips for using guitar wood dye successfully.
Can I Dye My Guitar?
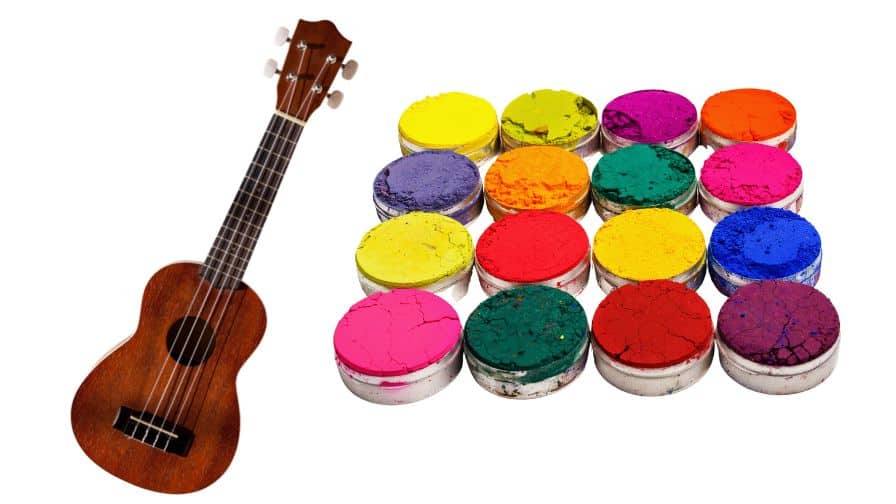
Yes, you can definitely dye your guitar! In fact, there are a few different ways that you can go about doing it. The first and most common way is to simply use a guitar dye. These come in a variety of colors, and all you need to do is apply them to your guitar with a cloth or brush.
Another is to use a guitar stain. This is a type of product that is specifically designed to change the color of your guitar without affecting the finish.
Another option is to use guitar paint. This is a slightly more involved process, but it will allow you to completely change the color of your guitar.
Finally, if you really want to get creative, you can always use a combination of both stains and paints to create a truly unique look for your instrument. Just be sure to test any products on a small area of the guitar first to make sure that they will not damage the finish.
5 Tips For Using Guitar Wood Dye
Using guitar wood dye can help bring out the natural grain pattern of your wood and make it pop.
Here are five tips to get the most out of using guitar wood dye:
1. always test the dye on a small, hidden area first to ensure you like the results.
2. When applying the dye, use a soft brush or cloth and work in the direction of the grain.
3. To achieve consistent color, it’s best to apply several thin coats rather than one thick coat.
4. Allow the dye to dry completely between each coat.
5. If you’re not happy with the results, sanding down and starting over is always an option.
There you have it! Five tips for using guitar wood dye to get the best results.
Subscribe to BlackStang 1302
What Is Guitar Wood Dye And What Are Its Benefits
Dyeing your guitar with wood dye is a great way to change the color of your instrument without obscuring the grain. Dyes come in a wide variety of colors, so you can really get creative with your design. Plus, dye penetrates the wood deeper than stain, so you’ll get more vibrant colors.
Applying dye to your guitar also has some functional benefits. First, it can help to reduce scratches. And second, a little goes a long way—so you don’t have to worry about using too much and making a mess.
Overall, dye is the best option for dense and figured woods. So if you want to show off the natural beauty of your instrument, wood dye is the way to go.
Is Wood Dye Better Than Stain?
There’s no doubt that a fresh coat of stain can make wood look great. But if you’re looking for something that penetrates deeper and offers a wider selection of colors, wood dye might be the better option.
Wood dye penetrates the wood fibers more deeply than stain, which means it can produce deeper, more vibrant colors without obscuring the grain. However, unlike stains, wood dye does not provide a protective layer. So if you’re using it on outdoor furniture or other surfaces that will be exposed to the elements, you’ll need to apply a sealer after applying the dye.
How To Prepare The Wood For Dyeing
One of the most important steps in dyeing wood is to prepare the wood properly. If you don’t prep the wood, the dye will not adhere properly and you’ll end up with a mess.
Here’s how to do it:
1. Sand the wood thoroughly. You want to remove any existing finishes and smooth out any rough spots.
2. Clean the wood with a tack cloth or similar product. This will remove any dust from sanding.
3. Apply a pre-stain conditioner, following the manufacturer’s instructions. This will help the stain to be absorbed evenly.
4. Dye the wood, following the manufacturer’s instructions. Be sure to work in a well-ventilated area.
5. Apply a topcoat, if desired. This will protect the finish and keep it looking its best.
There you have it! If you follow these steps, you’ll be on your way to beautifully dyed wood.
Subscribe to Crimson Custom Guitars
How Do You Color Stain A Guitar?
Staining a guitar is a great way to add color and style to your instrument. There are a few things to keep in mind when staining your guitar, however.
First, always test the stain on an inconspicuous area of the guitar to make sure you like the color. Second, be sure to apply a clear coat of lacquer after staining to protect the finish.
Here are the steps to follow when staining your guitar:
1. Start by sanding the guitar body with medium-grit sandpaper. This will help the stain to adhere evenly.
2. Wipe down the body with a damp cloth to remove any dust.
3. Apply the stain evenly with a clean cloth.
4. Wipe away any excess stains with a clean, dry cloth.
5. Allow the stain to dry for at least 24 hours before applying a clear lacquer finish.
Enjoy your newly-colored guitar!
How Many Coats Of Stain Do You Need On A Guitar Body?
At least three coats. This will give you the best protection against wear and tear, and it will also help to bring out the natural beauty of the wood. Applying more than three coats is a matter of personal preference, but three coats is the minimum that you should use.
Finishing The Dyed Wood
Subscribe to ELEGEE CUSTOM GUITARS
Once you’ve applied the dye and allowed it to dry, you’ll need to apply a topcoat to protect the finish. Use acrylic lacquer for the best results.
1. Apply a thin layer of lacquer with a clean, dry brush. Be sure to work it into all the nooks and crannies.
2. Allow the lacquer to dry for at least 24 hours.
3. Apply a second coat of lacquer, if desired.
4. Allow the lacquer to dry completely before enjoying your newly-dyed guitar!
What Is The Best Way To Color Wood?
There are three ways to color wood: staining, painting, and dyeing. Each has its own set of benefits and drawbacks.
Staining is the process of adding pigment to the surface of the wood. Stains can be applied with a brush, spray, or rag. They penetrate the surface of the wood, giving it a new color.
Paints are made up of pigment and a binder. The binder helps the paint adhere to the surface of the wood. Paints can be applied with a brush, spray, or roller.
Dyeing is the process of adding color to the wood by soaking it in a solution of dye. Dyeing penetrates the wood, giving it a new color.
Which method is best for coloring wood? It depends on the look you are going for and the type of wood you are working with.
How Do You Use Keda Wood Dye?
Keda Wood Dye is a water-based, non-toxic wood stain that is safe for use on all types of wood. The best way to use Keda Wood Dye is to apply it with a sponge or brush, and then wipe it off with a clean cloth.
1. Begin by sanding the wood to create a smooth surface.
2. Next, apply the Keda Wood Dye with a sponge or brush.
3. Allow the dye to sit for 3-5 minutes.
4. Wipe away the excess dye with a clean cloth.
5. Allow the wood to dry completely before moving on to the next step.
Keda Wood Dye is a great way to add color to your woodworking projects. It’s easy to use and gives you great results. Give it a try the next time you’re looking to add some color to your wood!
Subscribe to Brad Angove
Can You Use Rit Dye To Stain A Guitar?
Yes, you can use Rit Dye to stain a guitar. You will need to follow the instructions on the Rit Dye package, and be sure to test the dye on a small area of the guitar first to make sure that it will give you the color that you want. Be very careful when applying the dye, as it can easily damage the finish on your guitar if you’re not careful. Once the dye is applied, you will need to seal it with a clear finish to protect it from wear and tear.
Recommended Posts:

