There are a lot of questions out there about what finishes to put over other finishes.
In this blog post, we will try to answer one of the most common questions: Can you put Danish oil on top of boiled linseed oil? Yes. However, it is important to keep in mind that not all Danish oils are created equal. Some will work better than others depending on the type of wood you are using. We will discuss the different types of Danish oils and how to use them. Stay tuned!
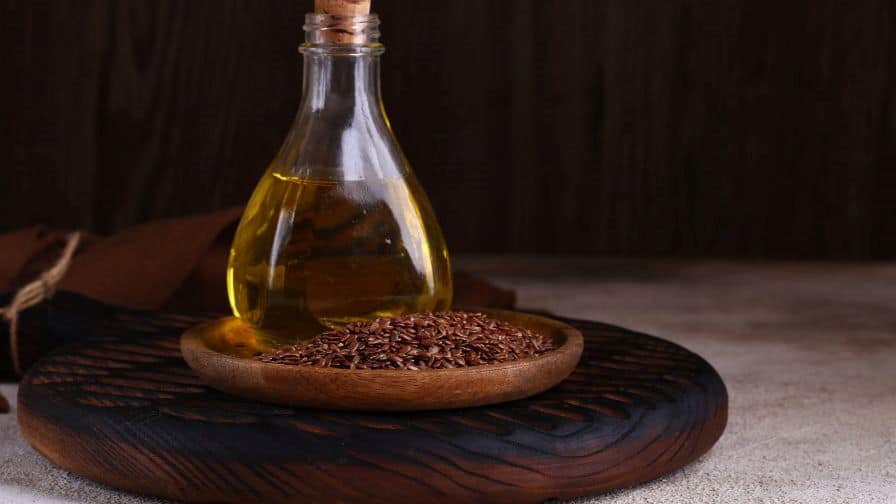
Can You Put Danish Oil On Top Of Boiled Linseed Oil On Wood?
It’s perfectly fine to add Danish oil on top of boiled linseed oil as long as you wait for the latter to cure first. This will ensure that your woodworking project has a smooth and professional finish.
Here’s what you need to do:
-Apply boiled linseed oil to your woodworking project according to the manufacturer’s instructions.
-Let the project dry for the recommended amount of time.
-Once it’s dry, apply Danish oil on top of the boiled linseed oil.
-Follow the manufacturer’s instructions for both products to ensure optimal results.
What Is Danish Oil?
Danish oil is a wood finish that can apply to many types of wood. It is a blend of natural oils and resin that penetrates deep into the wood. Provide both protection and a beautiful lustrous finish.
Danish oil is available in a variety of colors, from light to dark. So you can choose the perfect shade to complement your woodworking project.
Applying Danish oil is easy.
-Wipe it on with a clean cloth.
-Let it soak in for a few minutes, then wipe off any excess.
-For best results, apply several thin coats, allowing each one to dry completely before putting the next.
Danish oil will safeguard your wood from everyday wear and tear, while still allowing it to breathe. So it is an ideal choice for both indoor and outdoor projects.
Give your woodworking project a pleasing finish with Danish oil. It is simple to put and will shelter your project for years to come.
What Are The Benefits Of Danish Oil On Wood?
Subscribe to Mad Nerd Workshop
Danish oil is a type of wood finish that penetrates the wood surface and hardens to create a durable and water-resistant finish. It can apply to bare wood or over an existing finish.
Danish oil can suit a variety of wood surfaces, including timber furniture, worktops, flooring, and more. It is also compatible with non-wood surfaces like metal and concrete.
The main benefits of using Danish oil are:
-Enhances the natural beauty of the wood grain
-Protects the wood from water damage and wear and tear
-Prevents staining and fading
-Easy to apply and maintain
Danish oil is a great way to safeguard your wood surfaces and enhance their natural beauty. It is simple to put and maintain, and it will keep your surfaces looking like new for years to come.
How To Apply Danish Oil To Wood
Applying Danish oil to wood is a simple process that you can do in a few easy steps. Danish oil is a type of highly refined teak oil that contains no driers or solvents. It is also known as “teak oil” because it was originally used on teak decks and other outdoor furniture. Danish oil penetrates deep into the wood, nourishing and protecting it from the inside out.
To put Danish oil into the wood,
-Start by sanding the surface of the wood with medium-grit sandpaper until it is smooth.
-Then, wipe away any dust with a clean cloth.
-Next, pour a small amount of Danish oil into a clean cloth and rub it into the wood in a circular motion.
-Continue doing this until the entire surface is coated with a thin layer of oil.
-Let the oil soak into the wood for about 15 minutes. Wipe away any excess with a clean cloth.
-Allow the Danish oil to cure for 24 hours before using the item.
Danish oil is ideal for use on wood that will expose to the elements, such as outdoor furniture or decks. It is also great for use on wood that you will handle often, such as cutting boards or salad bowls.
Teak oil is used on outdoor furniture since it does such a great job of repelling water.
It’s important not to use too much oil because it can build up on the surface and make the wood sticky.
In accidentally using too much oil, sand it down and start again. It’s that simple!
When applying Danish oil to wood, it is important to work in a well-ventilated area. Danish oil fumes can get harmful as inhaled for prolonged periods. If possible, do it outdoors or in a garage with the door open. Since you must do it indoors, open windows, and use a fan to ventilate the area.
Wearing gloves is also recommended to keep your hands clean and free of Danish oil.
Now that you know how to apply Danish oil to wood, give it a try! You’ll get amazed at how easy it is and the beautiful results you’ll achieve.
Types Of Danish Oils And Their Uses
Danish oil is a type of oil used to treat wood. It is a natural product made from linseed oil and other ingredients.
Danish oil is available in different sheens, from satin to high-gloss. It can also create a custom finish by mixing varied sheens.
Danish oil is simple to apply and dries quickly. It is also water resistant, making it ideal for use in high-moisture areas such as kitchens and bathrooms.
Danish oil can apply with a brush, cloth, or spray gun. You can also put it with a rag for a more hand-rubbed finish.
Danish oil is ideal for finishing furniture, cabinets, countertops, and other woodwork. You can also use it on metal and concrete.
Danish oil is available in clear and tinted formulas. Tinted Danish oil will darken the wood slightly and is ideal for use on light-colored woods such as maple and birch.
Danish oil is a long-lasting finish that does not require frequent reapplication. However, it can need to touch up as needed.
Danish oil is easy to repair when it becomes scratched or damaged. Sand the area lightly and apply more Danish oil.
When using Danish oil, always follow the manufacturer’s instructions. You should also take proper safety precautions, such as wearing gloves and a respirator, to avoid inhalation of fumes.
There are many types of Danish oil available on the market. Choose one that is right for your project.
Danish oil is a great way to finish off your woodworking project and make it look its best.
Which Danish Oil Should You Use For Your Wood Project?
Subscribe to Mad Nerd Workshop
So, you’re thinking about using Danish oil on your woodworking project. But which Danish oil should you use?
Each Danish oil available on the market has its advantages and disadvantages. We’ll take a look at some of the most popular Danish oils and help you decide which one is right for your project.
Danish Oil Finish
A Danish oil finish is a blend of oil and varnish that penetrates deep into the wood grain, providing both protection and enhanced color.
Danish oil is applied with a soft cloth or brush and then wiped off, leaving a thin film that dries to a hard and satin finish.
Danish oil is available in both natural and synthetic formulations. Natural Danish oil is made from polymerized linseed oil, while synthetic Danish oil has a variety of resins and petroleum-based solvents.
Tips And Tricks For Using Danish Oil On Wood
Danish oil is a great way to protect and enhance the beauty of wood. You can use it on a variety of wood types.
Here are some tips for using Danish oil:
-Start by sanding the wood with medium-grit sandpaper. This will create a smooth surface for the oil to adhere to.
-Next, wipe down the wood with a damp cloth to remove any sawdust or debris.
-Apply the Danish oil to the wood using a clean and soft cloth. Work in small sections and rub the oil into the grain of the wood.
– Allow the oil to soak into the wood for a few minutes before wiping off any excess.
– Repeat this process until you achieve the desired look.
Danish oil is a great way to protect your wood and keep it looking its best. With a little bit of care, you can keep your wood furniture and floors looking like new for years to come.
Troubleshooting Tips When A Thing Goes Wrong With Your Danish Oil Wood Finish
When you take the time to apply a Danish oil wood finish to your furniture, you must do so properly to achieve the desired look. However, even when you follow all of the instructions, things can still go wrong. As you’re troubleshooting your Danish oil wood finish and trying to figure out what went wrong, keep these tips in mind:
One of the most common problems with Danish oil wood finishes is that they can become sticky. This is due to either not enough oil in use, or the oil not allowed to dry properly before the next coat is applied. When your finish is too sticky, you can try thinning it down with some mineral spirits or naphtha. If that doesn’t work, you may need to start over from the beginning.
Another common problem is that the Danish oil wood finish can become cloudy. As your finish is drying, the solvents in the oil can start to evaporate, which will cause the finish to become cloudy. To fix this problem, you can add more oil to the mixture or apply a thinner coat.
Since your Danish oil wood finish is peeling, it’s due to one of two things: either you didn’t allow the previous coat to dry long enough, or you put too much finish. When you didn’t let the previous coat dry long enough, the new coat won’t adhere properly and will start to peel. To fix this problem, sand down the area until it’s smooth, and then place a new coat of Danish oil.
When you put too much Danish oil on your furniture, it can start to run. This happens when the oil is too thick and did not penetrate the wood properly. To fix this problem, you need to remove the excess oil with a clean cloth. Once you did that, apply a new coat of Danish oil.
After you troubleshot your Danish oil wood finish and found the problem, you can now enjoy your beautiful furniture. Take your time and follow the directions on the label to ensure that you get the best results. With a little patience, you’ll have a finish that looks great and lasts for years.
Recommended Posts:

