If you are a woodworker, then you have probably heard of Titebond 2. It is a popular wood glue that is known for its strength and durability. But can you sand it? In this blog post, we will answer that question and give you some tips on how to sand Titebond 2 properly.
Table of Contents
What Is Titebond 2 And Why Is It So Popular Among Woodworkers?
Titebond 2 is a type of wood glue specifically designed for interior woodworking projects. It provides an extra-strong bond that can withstand the rigors of everyday use, making it one of the most popular wood glues among woodworkers. Its slow setting speed allows for ample time to make adjustments and ensure a tight fit between joints, while its water resistance makes it perfect for exterior use. And not only is Titebond 2 strong and durable, but it’s also safe to use – it’s FDA approved for indirect food contact.
On top of all this, Titebond 2 is easy to use and clean up, with excellent sandability and no effect on finishes. This makes it ideal for a variety of woodworking projects, whether they’re in the living room or out in the garden – because thanks to its weatherproof qualities, Titebond 2 is up for any job. So if you’re working on a project that requires ultimate strength and durability, then Titebond 2 is a perfect choice – it’s no wonder why it’s so popular among woodworkers!
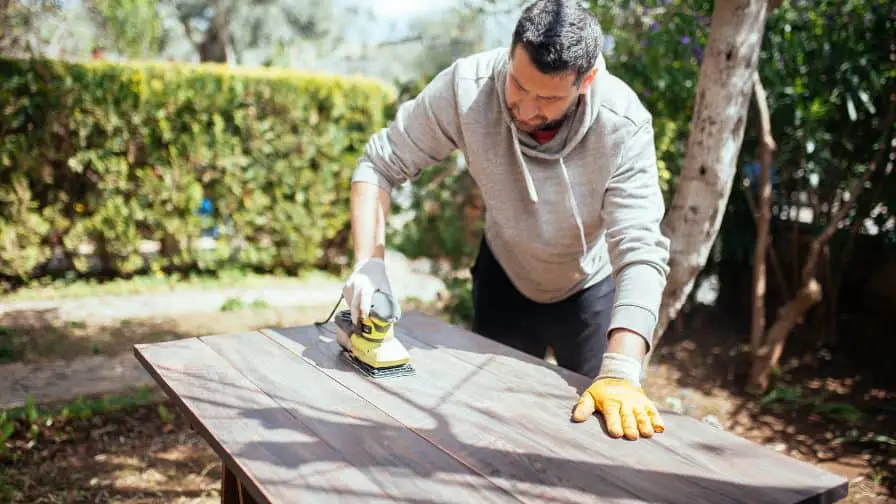
Can You Sand Titebond 2?
Yes, you can sand Titebond 2. It sets up quickly and sands easily, making it the ideal choice for many woodworking projects. It’s great for gluing hardwoods, softwoods, plywood, particle board and other porous materials together securely. You can sand this adhesive once it has cured completely (typically within 24 hours) with any type of sandpaper to ensure a smooth finish. Be sure to use a dust mask when sanding Titebond 2, as it contains chemicals that can be harmful if inhaled. With the proper safety precautions and careful application, you’ll have your project looking great in no time!
How Long Before You Can Sand Titebond 2?
Subscribe to Titebond
If you are using Titebond 2 to create a woodworking project, you may be wondering how long it will take before you can start sanding the adhesive. The answer depends on your specific situation and the type of material that was used. Generally speaking, most glues require 24 hours to fully cure, so if you applied Titebond 2, you should wait at least 24 hours before sanding.
However, if the material is porous, such as wood or concrete, you may need to wait a bit longer than 24 hours for the glue to completely set and become sandable. You should also make sure that you are using the appropriate sandpaper grade for the project; sanding too aggressively can damage the material, which is why it’s important to use the right grit.
If you want to be absolutely sure that your Titebond 2 project is ready for sanding, you can test a small area or corner with light sanding pressure. If the glue does not come off easily, then it is likely not fully cured yet and should be allowed to cure for a few more hours before sanding again.
What Grit Should I Use When Sanding With Titebond 2?
When sanding with Titebond 2, you should use higher than 50-grit abrasives. This will help ensure that the surface is perfectly smooth, and it will also make sure that any glue residue from your project has been completely removed. If you’re looking for a finer finish, then consider using 120-220 grit abrasives – this will help you achieve a really smooth surface that is perfect for finishing. It’s important to keep in mind that the higher the grit of the abrasive, the finer the finish will be. So if you want a really smooth finish, use a higher grit!
Can I Paint Over Titebond 2 After Sanding?
Absolutely! Titebond 2 is a great adhesive for many DIY projects and when properly sanded, it provides an ideal surface to paint on. Whether you choose to use water-based paint or oil-based paint, both will adhere nicely to the Titebond 2 after it has been sanded down. When using an oil-based paint, be sure to use a high-quality brush and apply the first coat with a light touch. This will help give you an even finish that lasts and looks great for years. With water-based paints, it is important to use several thin coats instead of one thicker coat. Doing this allows the product to dry thoroughly in between each coat, and will give you a more even finish. So go ahead, sand down that Titebond 2, and start painting! Your project is sure to look amazing.
How Do You Sand Titebond 2 Properly So That You Don’t Damage The Wood Or The Glue Itself?
Subscribe to WoodWorkWeb
To ensure that you sand Titebond 2 properly and avoid damaging the wood or the glue itself, be sure to follow these steps:
1. Begin by lightly sanding the area with rough-grit sandpaper (40-80) in a circular motion until all of the glue has been removed. Be sure not to sand too aggressively, as this could damage the wood or the glue itself.
2. Once all of the glue has been removed, switch to medium-grit sandpaper (80) and repeat the process until the area is smooth and even. Again, be sure not to press too hard when sanding – gentle pressure and circular motions will suffice.
3. Once the area is even, switch to fine-grit sandpaper (100-120) and finish up by sanding the area in long, straight strokes until it is completely smooth.
4. Finally, use a vacuum or brush to remove any remaining dust from the area.
By following these steps, you can ensure that your Titebond 2 sanding project is successful and doesn’t damage the wood or the glue itself!
What Are Some Tips For Avoiding Common Mistakes When Sanding Titebond 2?
Sanding Titebond 2 can be a tricky endeavor. Here are some tips for avoiding common mistakes when sanding:
1. Always start with the coarsest grit sandpaper available and gradually work your way up to finer grits as you get closer to the final finish. This will help ensure that any rough edges or scratches left behind by the coarser grit are eliminated.
2. Make sure to keep the sandpaper flat against the surface of the wood you are working on, as this will help ensure an even finish and prevent accidental gouging or other damage.
3. Change out your sandpaper frequently to avoid excessive wear and tear that could lead to a less-than-desirable finish.
4. Use a dust mask and eye protection when sanding with Titebond 2 to protect yourself from particles of the product in the air.
5. When you’re finished sanding, wipe off all the dust and debris before applying any finish or sealant to ensure that the surface is completely clean and free of debris.
Following these tips will help ensure that you get a smooth, even finish when sanding with Titebond 2.
Are There Any Other Ways To Remove Titebond 2 From the Wood Besides Sanding It Away?
If you’re looking for an alternative to sanding away Titebond 2 from wood, then you may want to consider using nail polish remover. Nail polish remover contains acetone which is effective at breaking down most types of adhesive. Before applying the nail polish remover to the surface though, be sure to test it on a small area to ensure it won’t damage the wood. If all goes well, simply apply a few drops of nail polish remover to the glue and let it sit for 5-10 minutes before wiping it away with a clean cloth. This should help dissolve and remove the Titebond 2 from your woodwork.
However, you should always exercise caution when using nail polish remover or any chemical solvent, as it can be quite caustic and cause serious damage if used incorrectly. Be sure to wear proper safety gear such as gloves and protective eyewear, and work in a well-ventilated area to help prevent any accidents or injuries. With these precautions in place, you’ll be able to safely remove Titebond 2 from wood with relative ease.
Recommended Posts:


