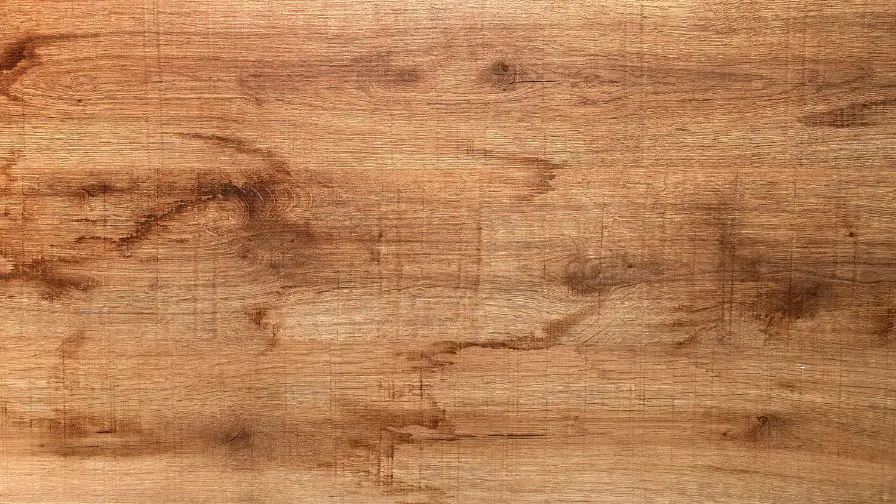
When you are planning on using wood filler in a project, you may wonder when it is possible to stain it. The answer is yes – you can stain wood filler! However, there are a few things to keep in mind before doing so.
In this blog post, we will discuss the best way to stain wood filler so that you get the best results possible.
Table of Contents
Can You Stain Over Wood Filler?
Yes. The trick is the wood filler has completely dried before staining. When the wood filler isn’t dry, the humidity or moisture of the wood filler can cause problems with your staining process and result in an uneven finish.
To ensure you get a smooth and even finish, allow the wood filler to dry completely before you begin. Once it has dried, you can proceed with staining without any problems.
The best way to make sure everything is well-matched is to use a damp cloth and rub the area down with some sandpaper after staining. This will create an even finish that won’t have obvious differences.
When you’re staining over wood filler that’s already been stained, use a light coat of stain to ensure the original color doesn’t come through. Any type of stain can use on top of wood filler, as long as it’s completely dry beforehand.
Keep in mind that wood filler is for filling in gaps and holes, not for refinishing or staining an entire piece of wood. If you’re wanting to stain the whole surface, use a wood conditioner first before applying your chosen color.
Do your best to get an even finish with the wood filler and stain to achieve the best results. With a little patience and the right products, you’ll have a beautiful piece of furniture or woodwork in no time!
What Is Wood Filler?
Wood filler is an essential tool for anyone who works with wood. It’s a paste-like material made of sawdust, lacquer, and other materials that bond together when it dries. Used to fill in chips, gaps, and cracks in unfinished or stripped wood surfaces, wood filler gives the appearance of a solid and unified surface without having to completely replace the wood.
It’s also used for repairing the furniture, patching gouges in wood floors, and creating a smooth surface before painting or staining. While there are different types of fillers available, all work similarly to give you a professional-looking finish.
When selecting wood filler, choose one that matches the type of wood you’re working with. In patching a pine floor, use a filler that matches the tone and texture of the wood, such as yellow pine or mahogany. For furniture repair, choose a darker color to blend in with existing finishes.
In applying wood filler, always wear protective gloves and work in a well-ventilated area. Put the filler with a putty knife, smoothing it in the direction of the wood grain and pressing firmly to ensure that it is deeply embedded into any gaps or cracks. Allow ample drying time before sanding with medium-grit sandpaper.
For small projects, a ready-made premixed product is all you need. But for larger projects or repairs, mixing up your custom batch can ensure that you get the exact color and consistency you need for the job. For a homemade wood filler, mix sawdust with epoxy resin and stir until it’s completely blended and has a creamy, putty-like texture.
Wood filler is often an overlooked tool in the workshop but is a great addition for any do-it-yourselfer. With it, you can fix chips and cracks, create a smooth surface for painting or finishing, and make furniture repairs that look like new. So don’t forget to include wood filler in your next project!
Use the proper safety gear and follow the instructions when working with wood filler. When you need help, there are plenty of tutorials available online to walk you through the process step-by-step.
With a bit of practice and patience, you’ll have professional-looking wood repairs that will last for years!
What Are The Uses Of Wood Filler?
Subscribe to TMBRMAN TV
Wood filler is a versatile tool that can fill a variety of cracks, crevices, and holes in wood surfaces. It’s useful for repairing gouges or scratches in furniture and other wooden items.
This filler is also great for filling different types of joints, such as dovetails and mortise-and-tenon joints. It can also fill in gaps between pieces of wood that don’t fit perfectly together.
Wood filler is also awesome for refinishing furniture and cabinetry, as it can stain to match the surrounding wood and give a uniform appearance. It’s also useful for hiding imperfections such as nail holes, dents, and scratches.
Finally, the wood filler can also fill nail holes in trim work or wainscoting, adding a more finished look. It’s even wonderful for filling cracks in walls and ceilings before painting them.
So the next time you have some wood surfaces that need fixing or refinishing, don’t forget the power of wood filler! With a few simple tools and some patience, you can give your furniture and other wooden items a much-needed facelift.
Does Stain Penetrate Wood Filler?
Wood filler is a great way to fix minor imperfections in wood surfaces. But it can get tricky to know how to properly stain the filler. The good news is that you can stain over most kinds of wood fillers without any problems. However, some types of wood fillers are not meant to have stains and should remain unstained for a natural look. Always check the product label before applying a stain.
To put a stain over wood filler,
-Let any newly applied filler dry for at least 24 hours before beginning.
-Then, sand the area with fine-grit sandpaper, paying special attention to any ridges or bumps that the filler creates.
-Next, use a tack cloth to remove any sawdust from sanding and wipe the area with a damp cloth for added smoothness.
-Finally, place your stain of choice following the manufacturer’s instructions. Let it dry thoroughly before applying additional coats or sealant.
With a few simple steps, you can transform your wood filler to create a beautiful stained finish. So go ahead and give it a try! You might get surprised at the results.
How Do You Stain Wood Filler Darker?
You can darken wood filler with a variety of products. But we recommend starting with a dye or stain. Use the right type of product for the material you’re working with.
Wood fillers come in different colors and grades. So it’s best to choose a product that will work well with the type of wood you have. When the filler is made from a different material than the rest of your wood, such as plastic or epoxy, then you should use a compatible stain or dye.
-Before staining, your surface is clean and dust-free.
-Apply a thin coat of the stain or dye with a brush, and let it dry.
-Once the stain is dry, sand the surface to even out any rough spots.
When you want an even darker color, you can use a wood filler tint that’s made specifically for this purpose. It will darken the existing color without altering the texture of your wood filler. The tint dries quickly and is easy to apply.
You can also use paint or a gel stain for a professional and durable finish. The key is to follow the manufacturer’s instructions carefully and test it on an inconspicuous spot first to make sure you get the color you want.
Finally, remember that no matter what product you use, protect your wood filler from the elements. A sealant or varnish will ensure that the color remains vibrant for many years.
How To Stain Wood Filler For The Best Results
Subscribe to Fixing Furniture
Staining wood filler is a superb way to make it blend in better with the surrounding wood. Whether you’re using wood filler for small cosmetic repairs or major structural reinforcements, learning how to stain wood filler correctly will become certain that your project looks professional and lasts for years.
Before you begin staining the wood filler,
-The area is clean, dry, and dust-free.
-Then you can start staining with a brush or cloth.
-For best results, use an oil-based stain rather than a water-based one. This will penetrate deep into the wood filler to give a rich color.
-To get even coverage on your wood filler, use a brush to gently and evenly apply the stain.
-Work in small sections at a time, allowing each section to dry before proceeding to the next one. -When you find that the area needs more coverage, you can add additional coats of stain until it is darkened to your desired shade.
-Once you’re done staining, let the area dry completely before moving on to the next step.
-For maximum protection and longer-lasting results, apply a coat of clear sealer or varnish over the stained wood filler. This will safeguard your repair from damage and wear for years to come!
With these tips, you can easily stain wood filler for the best results. Add a little practice, you’ll make any repair look like it came straight from the factory!
Tips For Using Wood Filler In Your Projects
When you’re like many DIYers, you know how tedious it can get to fill nail holes and cracks in the wood. But using wood filler is a desirable way to get the job done quickly and easily.
Here are some tips for getting the most out of wood filler:
1. The surface is clean and dry: Before applying wood filler, the surface is thoroughly cleaned of dirt, dust, and oil. When you’re working with an unfinished surface, use a vacuum cleaner to remove any loose debris. As you’re handling a finished surface, like lacquer or paint, use a cloth dipped in mineral spirits to clean away any grease or dirt.
2. Choose the right type of wood filler for the job: Depending on the situation, you will want to select a wood filler that best suits your needs. For large holes, use an epoxy-based filler; for small crevices and nail holes, choose a latex-based wood putty; for exterior projects, select an acrylic-based filler.
3. Use a putty knife for easy application: To put wood filler, use a putty knife and press the filler firmly into the hole or crevice you want to fill. Spread it out evenly and remove any excess material that is left behind on the surface.
4. Allow enough time for the filler to dry: When you’re using wood filler, allow it plenty of time to set and dry before sanding or painting it. Latex-based fillers should have at least 24 hours to completely dry, while epoxy and acrylic-based fillers will take up to 48 hours.
5. Sand and paint the surface: After the filler has dried, it is ready to sand and paint or stain to match the existing wood tone. For a smooth finish, use fine-grit sandpaper and gently rub away any edges that are sticking up above the surface of the wood. Once you’re done sanding, you can then apply the sealer or paint of your choice.
With these tips in mind, using wood filler becomes an easy task that anyone can do with a bit of practice. So why not give it a try today? You’ll get surprised by how quickly and easily you can get the job done.
Examples Of Projects That Can Use Wood Filler
Wood filler can use in a variety of projects around your home. Use wood filler to repair and fill small cracks, nail holes, and gouges in wood furniture, floors, trim, cabinets, doors, and more. You can also use it to create unique artistic effects on furniture and accent pieces.
Here are some examples of projects in that you can use wood filler:
– Repairing small cracks in furniture and trim.
– Filling nail holes in floorboards.
– Creating an artistic distressed look on furniture, doors, and accent pieces.
– Concealing gouges or dents in hardwood floors.
– Sealing gaps between pieces of trim or molding.
– Filling gaps between floorboards to prevent drafts.
– Repairing cracks in doors and window frames.
– Reattaching broken trim pieces, such as chair legs and table edges.
– Patching small holes in decks and outdoor furniture.
No matter what projects you’re tackling around your home, the wood filler is a marvelous tool to have in your arsenal. With a little bit of patience and the right tools, you’ll repair, fill and build attractive projects with ease.
Recommended Posts:


