If you’re looking for a beautiful, smooth finish on your woodworking projects, then you need to use polycrylic. This product can be used on both indoor and outdoor projects, and it gives a high-gloss shine that is unmatched by other finishes. In this blog post, we will teach you how to get the best results with polycrylic. We’ll show you how to apply it properly, and we’ll also give you some tips for avoiding common mistakes.
How To Apply Polycrylic For A Smooth, Glossy Finish
Subscribe to SimpleCove
Applying polycrylic is not difficult, but there are a few steps you need to follow to ensure a smooth, glossy finish.
Here’s what you need to do:
1. Start with a clean, dry surface. Polycrylic will not adhere properly to a dirty or wet surface.
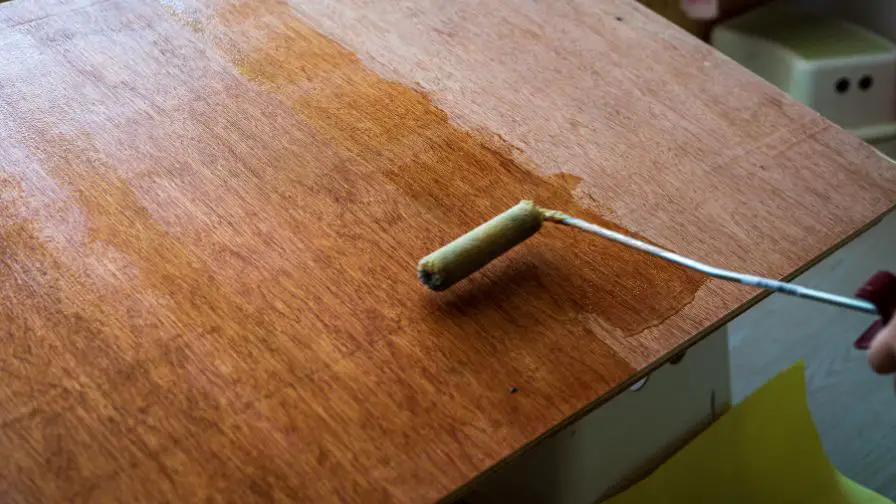
2. Apply polycrylic with a brush or roller.
3. Use even strokes and don’t overwork the product.
4. Apply several thin coats rather than one thick coat.
5. Allow each coat to dry completely before applying the next.
6. When you’re finished, clean your tools with water.
Polycrylic is a great product for giving your furniture and other surfaces a smooth, glossy finish. Follow these simple tips and you’ll be sure to get a beautiful result.
What Is Polycrylic And What Are Its Benefits
Polycrylic is a water-based clear finish that is often used as an alternative to polyurethane. Polycrylic provides a similar level of protection and durability as polyurethane, but it is much easier to apply and clean up. Polycrylic also dries much faster than polyurethane, so you can usually apply multiple coats in a single day.
One of the biggest benefits of polycrylic is that it does not yellow over time like polyurethane can. This makes it a great choice for light-colored woods or for finishes that will be exposed to sunlight. Polycrylic is also resistant to scratches and stains, so it is ideal for high-traffic areas.
With so many benefits, it is no wonder that polycrylic is such a popular choice for finishing projects. If you are looking for a smooth, durable finish, polycrylic is a great option.
Does Polycrylic Make Wood Shiny?
Polycrylic is a clear finish that goes on smoothly and dries quickly, so it’s ideal for giving wood surfaces a gleaming, protective coating. But does polycrylic make wood shiny? The short answer is yes, it can.
However, the level of shine will depend on how you apply it and how many coats you use. If you’re looking for a high-gloss finish, you’ll need to apply several thin coats, allowing each one to dry completely before adding the next. For a more muted sheen, you can apply fewer coats or buff the finish with a soft cloth after it dries.
Polycrylic is also available in a variety of sheens, from high-gloss to satin. So if you know you want a shiny finish, you can start with a product that’s designed to give you the level of shine you’re looking for.
No matter what kind of finish you’re going for, remember that polycrylic is a clear coating, so it will highlight any imperfections in the wood surface beneath it. If you’re not happy with the way your wood looks, sand it down before you start applying polycrylic. Once the finish is dry, you can also buff out any flaws with a soft cloth.
With a little effort, you can get a smooth, shiny finish on your wood surfaces that will protect them from wear and tear. Polycrylic is the perfect product to use to get the job done.
Is It Better To Brush Or Roll Polycrylic?
Subscribe to Sara Taylor
There’s no doubt that a smooth, even finish is the goal when applying polycrylic (or any other type of paint or finish). The question is, what’s the best way to achieve that goal? Is it better to brush or roll polycrylic?
The short answer is that both methods can work well, but there are some things to keep in mind with each method.
Brushing polycrylic can give you more control over the direction of the brushstrokes and how much finish is applied. It’s also a good option if you’re working in a small area or if you need to apply a thin coat of finish. Make sure to use a synthetic bristle brush and brush in the direction of the grain.
Rolling polycrylic can be a good option if you’re looking for a fast way to apply a smooth, even coat of finish. It’s also a good choice if you’re working in a large area. Be sure to use a high-quality roller and roll in one direction only.
In general, either method can produce good results. The best way to decide which method to use is to experiment and see what works best for you in a particular situation.
What Will Happen If I Don’t Sand Between Coats Of Polycrylic?
If you don’t sand between coats of polycrylic, the finish will be more likely to bubble and peel. Sanding helps to rough up the surface so that the next coat can bond better. Without sanding, you run the risk of a poor bond and an inferior finish.
Subscribe to paulsDIYsolutions
Why Does My Polycrylic Look Streaky?
It’s common for polycrylic to look streaky when first applied. This is usually due to one of two reasons: either you’re applying too many coats over a very dark surface, or the surfaces you’re coating aren’t completely clean.
To avoid streaks, make sure to clean your surfaces thoroughly before applying polycrylic. If you’re applying it over a dark surface, start with a lighter coat and build up to the desired opacity. Finally, make sure to evenly distribute each coat for the best results.
How Do You Apply Polycrylic Without Streaks?
When applying polycrylic, always remember to use long, even strokes in a well-ventilated area. To avoid streaks, work in sections and overlap your brushstrokes by about 50%. When you’re finished, allow the polycrylic to dry for at least two hours before moving on to the next step.
If you’re still unsure of how to apply polycrylic without streaks, consult a professional or watch a video tutorial. With a little practice, you’ll be a pro in no time!
Tips For Avoiding Common Mistakes
Applying polycrylic is not as difficult as it may seem, but there are a few things to avoid when applying it to your project.
1. Applying polycrylic too thickly – This will result in a “milky” appearance and can also chip easily. Use thin, even coats for the best results.
2. Not sanding between coats – This will result in an uneven surface that is more prone to chipping and peeling. Be sure to sand lightly between each coat for the best results.
3. Applying polycrylic in direct sunlight or on a hot surface – This can cause the polycrylic to dry too quickly and will result in an uneven finish. Apply in a cool, well-ventilated area for best results.
4. using a brush that is too stiff – This will cause brush strokes in the finish. Use a soft, synthetic brush for the best results.
5. Not allowing enough time for the polycrylic to dry – This will cause the finish to be tacky and more susceptible to damage. Allow plenty of time for each coat to dry completely before applying the next one.
By following these simple tips, you can avoid common mistakes when applying polycrylic to your project. With a little practice, you’ll be able to achieve a professional-looking finish that will last for years to come.
Recommended Posts:

