When you have a large stack of logs that need to be milled, you may be wondering how long they can sit before milling. The answer to this question depends on the type of wood and the environmental conditions. In this blog post, we will discuss the factors that affect how long logs can sit before milling. We will also provide some tips for keeping your logs in good condition until they are ready to be milled.
How Long Can Logs Sit Before Milling?
You might be surprised to learn that logs can sit for a long time before milling. As a rule of thumb, there will be a measurable loss in four to six weeks of warm (over 50 F) weather. It is just a rule of thumb. If the logs are in good shape when cut, and if they are cut during the winter months and stored under cover, then it may be two years or more before any significant loss occurs.
So, if you’re thinking about buying lumber, don’t worry too much about how long the logs have been sitting. They can sit for a while without affecting the quality of the lumber. Just make sure to buy from a reputable source and you’ll be fine.
What Factors Affect How Long Logs Can Sit Before Milling?
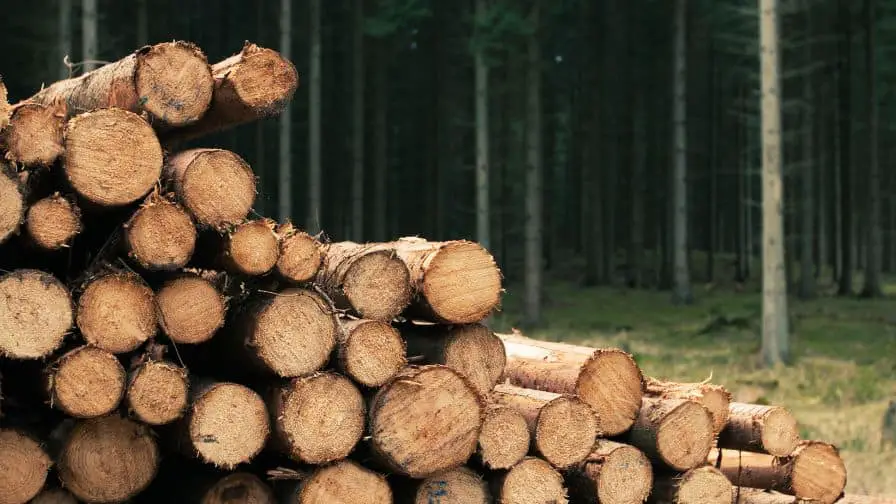
Many variables will affect how long your logs will last.
The biggest factor is probably the moisture content of the wood when it was cut. If the tree was felled during the winter months, when the sap is down, it will have a lower moisture content than if it were cut in the spring or summer. The moisture content of the wood will also be affected by how long it was allowed to dry before being milled. If you can get your logs to a mill as early as possible, that is ideal.
Another factor that will affect how long your logs will last is the storage conditions. If the logs are stored in a dry, well-ventilated place, they will last longer than if they are stored in a damp or humid environment.
How To Keep Logs In Good Condition Until They Are Ready To Be Milled
Subscribe to Matthew Cremona
You’ll want to keep your logs in the best possible condition until you’re ready to mill them.
Here are a few tips:
- Store them off the ground on racks or pallets to prevent moisture damage and rot.
- Cover them with something to protect them from the sun and weather.
- Inspect them regularly for signs of damage, decay, or insects.
By following these simple tips, you can be sure that your logs will be in good condition when it’s time to mill them. And that means you’ll get the best possible lumber for your projects. So don’t delay – get those logs ready for milling today!
Tips For Milling Wood That Has Been Sitting For A While
If your wood has been sitting for a while, there are a few things you can do to make sure it mills properly.
First, check the moisture content of the wood. If it is too high, it will cause the lumber to warp and twist as it dries, making it difficult to mill.
Second, if the lumber is very old, it may be brittle and dry. In this case, you will need to soak the lumber in water for a few days to rehydrate it before milling.
Finally, if the wood is very hard, you may need to pre-drill holes for your nails or screws. With a little preparation, you can mill wood that has been sitting for a while without any problems.
If you’re looking to do some woodworking, it’s important to choose the right lumber. Milling your lumber can be a great way to get exactly what you need, but it’s important to know how to properly care for the wood.
Benefits Of Milling Your Own Lumber
Milling your own lumber has many benefits. By milling your lumber, you can get exactly the boards you need for your project. You don’t have to worry about finding lumber that is the right size or thickness.
There are several key benefits to milling your own lumber:
- You have complete control over the quality of the lumber.
- You can produce lumber for a fraction of the price of a lumber dealer.
- Milling your lumber is a great way to add value to your property.
- You can use your mill to produce lumber for a variety of purposes.
Milling your lumber is a great way to save money and control the quality of the lumber you use for your projects. If you’re looking for a way to add value to your property, milling your lumber is a great option. With a little bit of planning and some basic equipment, you can produce high-quality lumber for a fraction of the cost of purchasing it from a dealer.
Should Logs Dry Before Milling?
Subscribe to Red Tool House – Homestead
It is generally best to allow logs to dry before milling them. This allows the moisture content of the lumber to stabilize, which prevents warping and twisting as the lumber dries. It can take several months for a log to fully dry, so it’s important to plan if you want to mill your own lumber. If you can’t wait for the logs to dry, you can kiln-dry them to speed up the process. However, this is generally not necessary if you’re planning to use the lumber soon after milling.
How Do You Preserve Logs For Milling?
You can extend the life of your logs by following these simple guidelines:
Keep them clean and free of debris
Logs that are covered in dirt, leaves, and other debris will rot faster. Be sure to clean them off before storing them.
Store them in a cool, dry place
Heat and humidity accelerate the decaying process, so it’s important to store your logs in a cool, dry place. If possible, cover them with a tarp or plastic to keep them dry.
Cover them with a tarp or other protective material
This will help keep them dry and protected from the elements.
By following these simple guidelines, you can extend the life of your logs and make sure they’re ready for milling when you are.
How Long Does A Log Need To Dry Before Cutting?
It’s important to know how long logs need to dry before cutting. If you cut them too soon, they’ll be too wet and won’t burn well. If you wait too long, they’ll be too dry and will produce a hard-to-control fire.
Logs that have been sitting for six to nine months are usually ready to be cut. If the logs are from a hardwood tree, they may need to dry for up to a year.
Once the logs have been cut, they need to be split into smaller pieces. This can be done with an axe or a log splitter. If you’re using an axe, make sure to wear safety goggles to protect your eyes from flying wood chips.
After the logs have been split, they need to be stacked in a dry, well-ventilated place. The logs should be stacked so that they’re not touching each other. This will allow air to circulate and prevent the logs from rotting.
Can You Mill Logs In Winter?
Subscribe to Adventurous Way
There’s no question that winter sawing can be the most demanding for your sawmill. The cold weather can take a toll on your equipment and your body. But with the right preparation, you can mill logs in winter without any problems.
Here are a few tips to help you get started:
- Dress warmly and in layers. This will help you stay comfortable while you’re working.
- Make sure your sawmill is in good condition and that all the moving parts are well-lubricated.
- Keep an eye on the weather forecast and be prepared to stop sawing if the temperature drops too low.
With these tips in mind, you can mill logs in winter without any problems. So don’t let the cold weather stop you from getting the job done!
Recommended Posts:

