When you are dyeing wood, one of the questions you may ask yourself is whether or not you need to sand it afterward. The answer to this question depends on a few factors, including the type of dye that you are using and the finish that you want to achieve. In this blog post, we will discuss when you should sand after wood dyeing and provide some tips for how to do it correctly.
Table of Contents
Should I Sand After Wood Dye?
If the grain of your wood has risen after applying wood dye then you should sand it. This will help to level out the wood and make sure that it is smooth. If you are looking for a glossy finish, sanding can also help to create an even sheen across the surface of your project.
What Is Wood Dyeing And Why Might You Want To Do It
Wood dyeing is the process of adding color to wood. Unlike paint, which simply coats the surface of the wood, the dye penetrates deep into the pores of the wood, resulting in a more durable and long-lasting color.
There are several reasons you might want to dye your wood furniture. Maybe you have an old piece of furniture that you want to refresh, or perhaps you’re looking for a way to add some personality to a new piece. Whatever the reason, dyeing your wood furniture is a relatively simple process that anyone can do.
Subscribe to Keda Wood Dye
The Different Types Of Dyes That Are Available
There are a few different types of dyes that you can use on your woodworking project, and each has its own advantages and disadvantages. In this article, we’ll take a look at the different types of dyes that are available so that you can decide which one is right for you.
- Dye Powder: Dye powder is a type of wood dye that comes in a dry, powdered form. It’s easy to mix and apply, and it produces very vibrant colors. The downside is that it can be difficult to get an even color across the entire surface of your project.
- Non-grain Raising Dye: Non-grain raising dye is a type of dye that does not raise the grain of the wood. This makes it ideal for getting an even, consistent color across your project. The downside is that non-grain raising dyes don’t penetrate as deeply into the wood as other types of dyes, which can lead to fading over time.
- Dye Concentrates: Dye concentrates are a type of dye that comes in a concentrated form. They are easy to mix and apply, but they can be expensive compared to other types of dyes. The upside is that the color produced by these dyes is often more vibrant than other types of dyes.
How To Dye Wood With A Brush Or Cloth
When it comes to dying wood, there are a lot of different methods that you can use. You can use a brush, cloth, sponge, or even a spray bottle. Each method has its own advantages and disadvantages. In this article, we will be discussing how to dye wood with a brush or cloth.
The first thing that you need to do is decide what type of dye you want to use. There are two main types of dyes: water-based and oil-based. Water-based dyes are the most common type of dye. They are easy to use and clean up, and they dry quickly. However, they can be difficult to control, and they can raise the grain of the wood. Oil-based dyes are less common, but they are easier to control and they don’t raise the grain of the wood. However, they are more difficult to use and clean up, and they take longer to dry.
Once you have decided on the type of dye you want to use, you need to choose the right brush or cloth. For water-based dyes, you will want to use a natural bristle brush. For oil-based dyes, you will want to use a lint-free cloth.
Now that you have the supplies that you need, it’s time to start dying the wood. First, you need to make sure that the wood is clean and free of any dirt or dust. Next, you need to apply the dye to the brush or cloth. If you are using a brush, you will want to start at the top of the wood and work your way down. If you are using a cloth, you will want to start in the middle of the wood and work your way out.
Once you have applied the dye, you need to let it dry. Water-based dyes will dry quickly, but oil-based dyes will take longer. Once the dye is dry, you can apply a topcoat if you desire. And that’s it! You’ve successfully dyed the wood.
The Importance Of Prepping The Wood Before Dyeing
One of the most important things to do before adding any kind of dye to wood is to sand it. This will help the dye evenly distribute across the surface of the wood and provide a better overall finish. If you don’t sand your wood first, you run the risk of having an uneven finish that could look blotchy or patchy.
Another thing to keep in mind is the type of wood you’re working with. Softer woods like pine or cedar will absorb dyes more readily than harder woods like oak or maple. This means that you may need to use more dye on softer woods to achieve the same color as you would on harder woods.
Finally, it’s important to consider the type of finish you want before applying any dye. If you’re going for a natural look, it’s best to use a water-based dye. But if you want a more durable finish, an oil-based or gel stain would be a better option.
So, before you start dyeing your woodworking project, make sure to prep the wood first by sanding it and choosing the right type of dye. This will help you achieve the best possible finish for your project.
Subscribe to Bailey Line Road
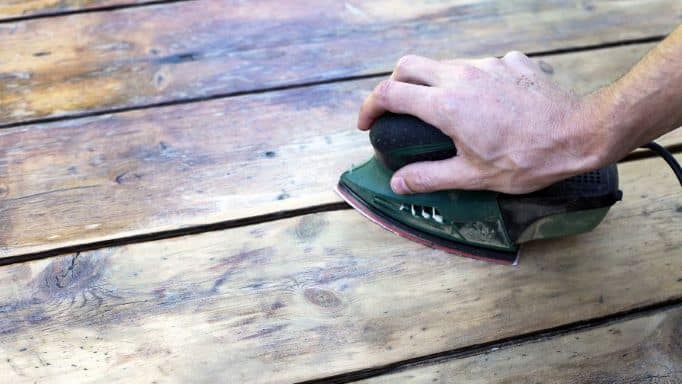
How To Sand Wood After Dyeing For A Smooth Finish
The best way is to use fine-grit sandpaper (at least 220 grit) and to sand in the grain`s direction. Start with a light touch and gradually increase the pressure if you need to. If you sand too hard, you risk damaging the wood.
Once you’re finished sanding, you can apply a clear finish to your project if you like. This will help to protect the color and keep it from fading over time.
So there you have it! Now you know how to sand wood after dyeing it. Just remember to use fine-grit sandpaper and go slowly. And don’t forget to apply a clear finish when you’re done! Thanks for reading.
Tips For Keeping Your Wood Looking Great For Years To Come
No matter what kind of wood you have in your home, it’s important to take care of it so that it will last for years to come.
Here are some tips for keeping your wood looking great:
- Dust regularly with a soft cloth or vacuum with the soft brush attachment.
- Wipe up spills immediately.
- Use coasters, placemats, or trivets under hot dishes and glasses.
- Avoid using harsh chemicals or cleaners on your wood.
- Polish wood occasionally with quality furniture polish.
- Be careful when moving furniture so you don’t scratch the floors.
By following these simple tips, you can keep your wood looking great for years to come.
Recommended Posts:


