Do you want to know how to stain the wood a beautiful yellow color? If so, you’ve come to the right place! In this blog post, we will discuss everything you need to know about staining the wood a sunny shade of yellow. We will talk about the different types of yellow stains available, as well as how to apply them. By the end of this post, you will be able to achieve the perfect yellow wood stain every time!
What Is Yellow Wood Stain And Why Should You Use It?
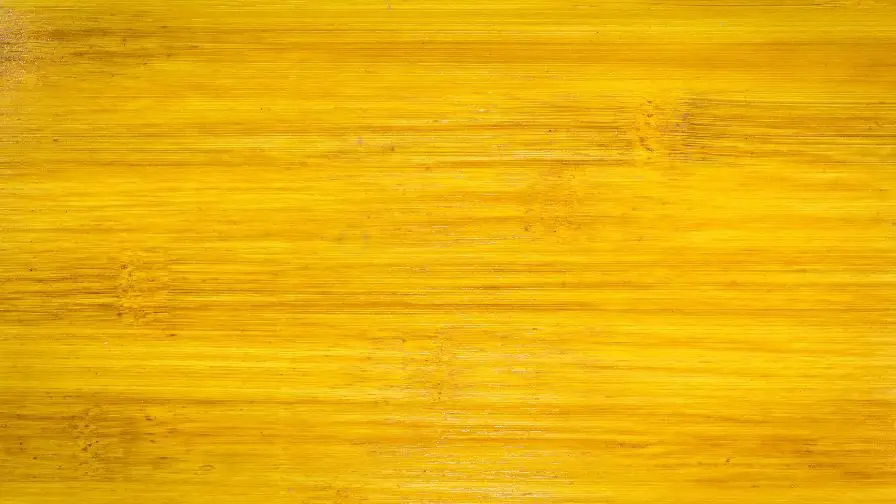
Yellow wood stain is an excellent choice for your outdoor wooden furniture and other wooden items. It has a buttery hue that brings a summery feel all year round, giving an illusion of sunshine and light throughout your garden. This hue looks great on any type of wood, from fences to decks. With its bright, sunny hue, it will add a pop of color to your outdoor décor and provide long-term protection for your wood.
In addition to its cheerful appearance, yellow wood stain is available in water and oil-based formula which are also incredibly durable and easy to maintain. It offers strong protection against harsh weather elements like rain, snow, heat, and sunlight. Plus, the sun-resistant formula helps prevent fading and discoloring, so your outdoor furniture will stay looking vibrant and fresh for years to come.
With yellow wood stain, you can enjoy the summery look of your outdoor space year-round. It’s a great way to brighten up your yard while also protecting your wooden furniture from the elements.
Can You Stain Wood Yellow?
Absolutely! If you’d like to give your wood a vibrant yellow hue, there are several ways to go about staining it. Staining wood yellow can add a fresh, vibrant look to any project. With the right preparation and materials, you’ll be able to achieve beautiful results in no time at all!
Types Of Yellow Wood Stains Available
Subscribe to Two Right Hands
If you’re looking for a way to add a splash of color to your wood projects, yellow wood stain is a great option! You can find many different shades and tones of yellow wood stain on the market today, from bright sunshine yellows to more subdued vintage hues. Here are just some of the types of yellow wood stains available:
1. Water-Based Stains – If you’re looking for a type of yellow wood stain that is easy to apply, try a water-based formula. These offer great coverage and typically dry quickly. They also tend to be less smelly than their oil-based counterparts and are often among the least expensive types of stains available.
2. Oil-Based Stains – For a longer-lasting, richer finish, consider an oil-based yellow wood stain. This type of stain penetrates deep into the grain, creating a more durable and vibrant look that is sure to last for years to come. You will need to take extra steps when cleaning up after using oil-based stains, but the result is well worth the extra effort.
3. Gel Stains – If you’re looking for a more controlled and uniform finish, then gel stains are a great choice. These come in an easy-to-use paste form and can be applied easily over larger surfaces without dripping or running like other types of stains. The gel formula also won’t penetrate too deeply into the wood, creating a slightly lighter finish than oil-based stains.
No matter what type of yellow wood stain you choose, make sure to allow plenty of time for drying before moving on to your next project! With these tips in mind and a little bit of experimentation, you’ll be sure to find the perfect shade of yellow wood stain for your project.
Who Makes Yellow Wood Stain?
When it comes to achieving the perfect yellow wood stain, there are several companies that you can choose from to purchase your product. Some of the most popular brands in this category include Minwax, Varathane, Cabot, and Rust-Oleum. Each brand has its own unique formulation for creating yellow stains, so be sure to do your research to find the one that best suits your needs.
Once you’ve settled on the right brand for yellow wood staining, take into account the type of wood you are working with and the desired color intensity. If you are going for a light shade of yellow, opt for a stain that is specifically designed for lighter woods, such as pine or birch. For a darker yellow hue, use a stain formulated for darker woods like walnut or mahogany.
Finally, consider the finish you would like to achieve after applying the wood stain. There are dozens of finishes available in various sheens including satin, gloss, semi-gloss and matte. All of these finish options, along with the color intensity of the yellow wood stain, will contribute to achieving the perfect shade of yellow you are looking for. So don’t forget to consider all three factors in order to get your desired results!
Now that you know who makes yellow wood stains and what factors need to be considered when choosing the right product for you, it’s time to get started. With the help of these tips and a little bit of patience, you can easily achieve the perfect shade of yellow wood stain in your next DIY project.
How Should I Apply Yellow Wood Stain?
Applying yellow wood stain can be a challenge, but with the right preparation and technique, you can achieve stunning results. Before you start staining, make sure to sand down your surface for maximum adhesion. Wipe off any sawdust or other debris that may have accumulated during the sanding process. Be sure to wear protective gear—including gloves, a dust mask, and protective eyewear—while sanding and staining.
Once your surface is prepped, you’re ready to start applying the yellow wood stain. Start by laying down either plastic sheeting or paper to protect any other surfaces from getting stained. Then pour out some of the stains onto a cloth or brush and start to apply it in a thin, even layer across the surface. As you work, make sure to keep your strokes consistent—in both direction and pressure—to avoid any inconsistencies in the result.
Once you’ve applied the stain, let it sit until dry before wiping away the excess with a clean cloth or brush. Be careful not to rub too hard, as this can remove the stain and leave patches of uneven color on your surface. Once you’ve wiped away the excess, let it dry completely before applying any additional coats of stain or other finishes.
With a little patience and attention to detail, yellow wood stain can be an incredibly effective way to add depth and character to your woodworking projects.
How Long Should Wood Stain Sit Before Wiping Off?
Subscribe to Doug Lacina
You should always take the time to properly prepare and test your stain before applying it. This means being mindful of how long you let the stain sit on your wood before wiping it off.
Generally speaking, you should leave the wood stain on for at least five to 10 minutes before wiping it off. This will give the stain time to penetrate and set into the wood so that you get an even finish. You can test a small area of the wood and then decide if you need to leave the stain on longer or wipe it off sooner depending on how dark you want the final color to be.
After the wood stain has been sitting for five to 10 minutes, use a clean cloth or brush and wipe away any extra stain that may have pooled on the surface of the wood. Make sure you wipe with the grain of the wood and not against it, as this can cause streaks in the finished product.
Should You Do 2 Coats Of Wood Stain?
The answer to this question really depends on the type of stain you are using and the end result you want to achieve. If you’re looking for a deeper, richer color, then more coats of wood stain is usually recommended. This will help ensure that your piece looks just as beautiful when it’s finished as it did before you started.
However, it’s important to note that some wood stains require more time between coats. This can make the process a bit more labor-intensive than just applying one coat. To get an even finish, you may need to wait before applying the second coat of stain. So if you’re pressed for time, you may want to stick with just one coat.
It’s also worth considering the type of wood you’re staining before committing to two coats. Some woods absorb stain more quickly than others and will require less time between each coat. The same goes for the type of finish you’re looking for — some finishes require multiple coats in order to achieve the desired look.
Finally, consider your time when deciding how many coats of wood stain to apply. Two or more coats can be more time-consuming although it is more recommended — so it pays to research different options and find one that fits your needs without too much time to be consumed.
Do I Need To Sand Before Applying Yellow Wood Stain?
The answer is a resounding yes! Applying wood stain without sanding first can leave you with an uneven finish and blotchy color. If you take the time to properly prepare your surface, however, you will be rewarded with a beautiful, lasting finish.
Before applying yellow wood stain, make sure to use fine-grit sandpaper and focus your efforts on smoothing out any rough edges or splinters. Sanding also helps to remove old layers of paint, dirt, and residue that can interfere with the wood stain’s performance.
Once you have finished sanding the wood project thoroughly, use a vacuum or cloth to remove all the dust and leftover particles. This will ensure that the wood stain adheres evenly and doesn’t get chunky or lumpy.
After you’ve sanded the wood, you can begin applying the yellow wood stain to the surface. Make sure to start in a small area and work your way out for an even-looking finish. Apply a thin coat of wood stain and let it dry completely before adding another. As always, make sure to wear protective gear (gloves, goggles, etc.) when working with wood stain so that you don’t accidentally get any on your skin or in your eyes.
When it comes time to apply yellow wood stain, make sure you don’t skip the sanding step. Taking the time to properly prepare your surface will ensure that your project looks great and lasts for years to come!
How Long Should I Wait After Applying Yellow Wood Stain Before Applying A Sealant Or Finish?
Subscribe to Brad Angove
When staining wood, it’s important to allow the stain to dry thoroughly before applying a sealant or finish. Depending on humidity levels and other environmental factors, you should wait at least 24 hours after applying yellow wood stain before sealing the surface with a clear coat of polyurethane or another protective coating.
It is also important to note that some stains may require more than 24 hours to dry. If you have used a particularly thick or heavy coat of yellow wood stain, it could take up to 48 hours for the stain to fully dry before you apply a sealant or finish. To be on the safe side, it’s best to consult the manufacturer’s instructions and follow their recommendations for drying times.
Tips For Achieving The Perfect Yellow Wood Stain Color
Staining wood yellow can add a beautiful, bright hue to the look of any furniture piece or surface. But it’s important to get the color just right for your project. Here are some tips for achieving the perfect yellow wood stain color:
1. Choose the right type of yellow: Not all yellows are created equal and it’s important to choose the right yellow for your project. If you want a brighter, more vibrant hue, opt for lemon or golden yellows. For something a bit deeper and warmer, try burnt sienna or honey amber tones.
2. Test it out first: Always test out any wood stain color on a scrap piece of wood before working on your actual project. This will tell you if the color is right and give you a chance to make any adjustments as needed.
3. Allow adequate drying time: Once you’ve applied the yellow wood stain, allow for sufficient drying time before applying a sealant or finish. Depending on the type of stain you’ve used, this could be anywhere from several hours to a few days.
4. Apply multiple coats: If one coat isn’t enough to get the color you want, don’t be afraid to apply additional coats of yellow wood stain until it looks just right. You can always sand down any excess for a more even look.
By following these tips, you can ensure that your yellow wood stain looks perfect for your next project. Just don’t forget to wait until it’s completely dry before applying a sealant or finish!
Does Yellow Wood Stain Require Special Maintenance?
The answer is yes. While yellow wood stain does not require any special maintenance during the staining process, it requires some extra attention after it has been applied. If you’re aiming for a deep and vibrant yellow tone, you need to give your project extra care. This means regular dusting and wiping away surface dirt. You should also clean your project with a wood cleaner every few months to ensure the stain is not fading. Additionally, you should apply additional coats of yellow wood stain regularly to keep the beautiful hue that made you fall in love with it in the first place.
Doing this will help you maintain your yellow wood stain color and also extend its lifespan–ensuring that your project looks great for many years to come.
Recommended Posts:

