Do you have a tile floor with grout that’s seen better days? If so, don’t worry – we can help! In this blog post, we will provide tips on how to soften the grout so it can be removed more easily. Grout is notorious for being difficult to remove, but with the right tools and techniques, it can be done. Stay tuned for our tips on how to get the job done quickly and efficiently!
What Is Grout And Why Is It So Difficult To Remove?
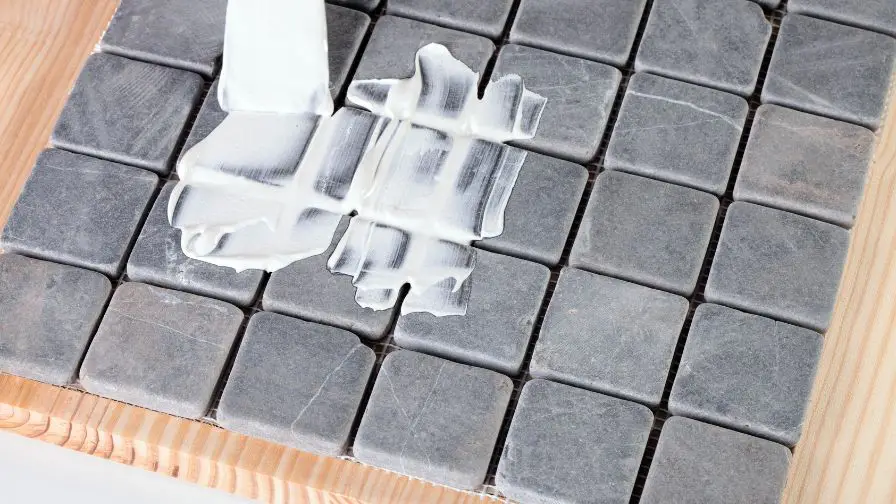
Grout is a cement-based material used to fill the joints between tiles. It can be difficult to remove because it hardens quickly and has an extremely strong bond. If you’ve ever tried to take out grout from around your kitchen or bathroom, you know just how tough it can be! But with the right tools and techniques, you can soften grout for easier removal.
How Do You Soften Old Grout To Remove It?
Removing old grout can be a daunting task, but there are several ways to soften and remove it to make the job simpler. Vinegar is a great natural solution for softening and removing grout. Simply mix equal parts white vinegar and water in a spray bottle and spritz it onto the area where you want to remove the grout. Allow the solution to sit on the grout for 15-20 minutes before scrubbing it with a brush or sponge. If needed, you can also add some sugar to the mixture to help soften and dissolve the grout more effectively.
Another option is to use lemon juice as an acidic cleaner for softening grout. Make a mixture of one part lemon juice and two parts warm water. Then, dip a sponge in the solution and apply it to the grout lines that need to be softened. You may need to use some elbow grease to scrub away the softened grout.
If other solutions don’t work, you can try using sulfamic acid as a last resort. Be sure to read the safety instructions carefully before using this product and wear proper protective equipment. Mix the acid as directed and apply it to the grout with a brush or sponge. Leave it on for 15 minutes and then scrub away at the softened grout with a stiff-bristled brush or scouring pad.
No matter which grout softening solution you choose, it’s important to take the proper safety precautions and wear protective gear when handling any of these solutions. With a little bit of hard work and patience, you can make short work of removing old grout and giving your tiled surfaces a fresh new look!
Are There Tools To Remove Grout?
Subscribe to Billshowto
If you’re looking to remove grout, there are a few tools at your disposal. Manual options include chipping, scraping, or sawing the hardened grout away. Electric tools like an electric grout remover, reciprocating saw, oscillating tool, and rotary tool can make quick work of tough grout removal jobs too. Depending on the size of the job, you can use one or more of these tools to complete the task. Be sure to wear protective eye and face gear when using these tools and always follow safety guidelines. With a little effort, you’ll be able to remove grout from any surface in no time!
What Can I Use To Soften Grout?
If you’re noticing your grout lines are looking a bit rough around the edges, there are several items that can help soften them up.
One of the simplest solutions is to create a vinegar and water solution – just mix equal parts white vinegar with warm water and apply it to the grout using either a brush or cloth.
If that doesn’t work, you can try a lemon juice solution. Just mix equal parts lemon juice and water and apply to the grout with a brush or cloth.
Finally, if those don’t do the trick, sulfamic acid is often used for cleaning tile and grout – however, it’s important to note that this is a stronger solution and should be used with caution.
No matter which of these softening agents you choose, be sure to wear protective gloves, safety glasses, and an appropriate face mask. After applying the solution, scrub the grout lines gently and rinse them thoroughly with clean water.
Now you’re all set – your tile and grout should be looking good as new!
The Tools And Techniques You’ll Need To Soften The Grout
If the grout in your space has become hard, there are several tools and techniques you can use to soften it. These include manual tools that require chipping, scraping, or sawing motion to cut through the hardened grout. Alternatively, for larger jobs, you may want to consider an electric grout remover such as a reciprocating saw, oscillating tool, or rotary tool. You will want to make sure you are wearing the proper safety equipment when using any of these tools.
When choosing which technique to use for softening your grout, consider the size and scope of the job as well as the type of space in which you’re working. Smaller jobs may be better handled with manual tools while larger areas can be covered more quickly with an electric grout remover. Whichever tool you choose, make sure that it is the proper size and speed for the work.
For best results when softening your grout, start by using a chisel or scraper to loosen the grout. Once you have scraped it out, use a vacuum cleaner to remove any loose particles that remain in the space. For larger jobs, an electric grout remover can provide faster results and will help reduce dust while working. Finally, once your grout is softened and free of debris, use the appropriate sealer to protect the grout from future damage.
By following these steps and using the proper tools and techniques, you can easily soften your hard grout to get it back into shape!
How Do You Remove Hardened Grout?
Subscribe to Hugo Correa
Removing hardened grout can be a difficult job. The best way to remove it is to use a chisel or scraper to loosen the material, then use either an oscillating tool, electric grout remover, reciprocating saw, or rotary tool to chip away at the remaining material.
When working with these tools, it is important to wear safety goggles and a face shield in order to avoid any dust particles that may be created during the removal process. Additionally, you should make sure the tool is set to the proper speed for your task and use a vacuum cleaner afterward for clean-up.
When using these tools, take care not to scratch or damage the surface of the tile. Once all of the grout has been removed, you can use a sealer to protect the newly cleaned area and make sure it remains in good condition for years to come.
By following these steps and using the right tools, you can easily remove hardened grout from any surface in no time!
How Deep Should I Go When Removing Old Grout?
When removing grout, it is important to be careful not to damage the surface of the tile. Depending on the type of grout and how long it has been in place, you may need to chip away at multiple layers.
When removing old grout, you should only go as deep as necessary to loosen and remove all of the existing material. In some cases, you may need to chip away at the surface of the tile in order to remove all of the old grout. However, if possible, try to avoid going too deep into the tile as this can cause damage and weaken its structural integrity.
By following these tips, you can ensure that you are properly removing old grout without damaging the surface of your tile.
What Is The Easiest Way To Remove Excess Grout?
If you find that there is excess grout in your space, the easiest way to remove it is by using a grout saw or an oscillating tool.
To use a grout saw, start by measuring the area where you want to remove the excess grout and marking off the edge with a pencil. Then, insert the blade of the grout saw into the joint and gently cut away at the excess grout, making sure to avoid scratching or damaging the surface of the tile.
If you don’t have a grout saw, you can also use an oscillating tool with a carbide-tipped blade. Start by adjusting the speed of your tool to the proper setting and then hold it at a shallow angle while gently cutting away the excess grout.
Once you have removed all of the grout, use a wet cloth to wipe away any dust particles created during the process. With these simple steps, you can easily remove any excess grout from your space!
Can You Remove Grout Without Damaging Tile?
Subscribe to Your New House
The short answer is, yes! Removing grout without damaging the tile can be done, but it’s not a job for the faint of heart. Grout removal requires patience and skill. It can also be messy, so plan to wear protective eyewear and clothing when tackling this project.
Before attempting to remove grout, make sure to select the right tools for the job. A chisel and hammer are great for larger areas, while an oscillating tool with a carbide-tipped blade is ideal for smaller spaces.
When using these tools, take care not to scratch or damage the surface of the tile. Additionally, you don’t want to go too deep into the grout joint as this can weaken the tile’s structural integrity.
By taking your time and using the right tools, you can safely remove grout without damaging the surface of your tile. However, if you are unsure about doing it yourself, it is best to call in a professional to handle the job.
Should I Keep Leftover Grout?
Once you have finished your grout removal project, it is important to consider what you should do with any leftover grout. If the material is still usable and you plan on needing it in the future, store it in an airtight container. This will help keep it from getting clumpy or hardening over time.
On the other hand, if it has been more than 6 months since the grout was opened, it is best to throw it out and buy new. This will ensure that you are using fresh material for your project.
By following these tips, you can easily store or discard leftover grout without any problems. With proper care and maintenance, your tile will stay looking great for years to come!
What Can You Do With Left Over Grout?
If you have leftover grout, there are a variety of projects you can use it for. Small repairs to tile surfaces and grout lines are one option. You can also add a small amount of water to the grout and use it as DIY mortar for small tiling jobs.
Additionally, if you have leftover epoxy grout, you can mix it with sand to create an adhesive paste. This can be used to fix broken pottery or even hold stones in place for a DIY stepping-stone pathway!
Whatever project you choose, leftover grout can certainly come in handy. With a little creativity, you can find many new and exciting ways to use it!
So don’t throw away that excess grout—you never know when it might come in handy! With the right tools and supplies, you can turn your leftover grout into a fun and functional project.
Is It Worth It To Clean Grout?
Subscribe to This Old House
Absolutely! Grout is one of the most difficult surfaces to keep clean, especially in high-traffic areas like bathrooms, kitchens, and hallways. Even with regular mopping and scrubbing, dirt can quickly accumulate in between the tiny grout lines, making your floors look dull and dingy.
Fortunately, there are plenty of ways to make grout cleaning easier and more effective. You can either use everyday household items such as baking soda, vinegar or lemon juice; or purchase a specialized grout cleaner from your local hardware store. For more stubborn stains, you may need to use an acid-based cleaner or a pressure washer.
No matter which method you choose, the results are worth it. Clean grout looks brighter and cleaner, making your floors look new again. Plus, a thorough cleaning will help to prevent future build-up and make regular maintenance much easier.
So don’t let dingy grout bring down the look of your home – take some time to properly clean and maintain your floors, and you’ll be glad you did!
What Do Professionals Use To Remove Grout?
The answer is simple: a mixture of white vinegar and water in equal parts. It’s amazing how often this solution works as an effective grout removal tool. Whether you believe it or not, every professional knows to have a bottle of white vinegar handy when it comes to removing stubborn grout! Just mix the white vinegar with water in a 1:1 ratio, apply it to the grout and let your mixture work its magic. You’ll have the grout removed in no time! So, next time you need to remove some pesky grout, reach for that bottle of white vinegar and get your project off to a great start.
The Benefits Of Removing The Grout
Removing grout from your tile can make a world of difference in the overall look and feel of your space. Grout removal is an easy way to freshen up a bathroom or kitchen, making it look newer and more inviting. Not only that, but removing grout also makes tile easier to clean and maintain, as you won’t have to worry about dirt and debris accumulating in the grout lines. This can help reduce the risk of developing mold or mildew and make it easier to keep your tile looking its best.
Removing grout also offers other advantages that you may not be aware of. For instance, if you’re planning on installing new tile in your home, removing the existing grout can make it easier to install. This is because you won’t have to worry about aligning the tiles with any existing grout lines, making installation faster and easier. Additionally, removing the grout will also provide a smoother surface for the new tiles which can help them look better and last longer.
Finally, removing grout can also save you money in the long run. Without grout lines that need to be filled, you won’t have to purchase additional grout or other materials for installation. Additionally, it may even be possible to reuse the existing tiles if they are in good condition after being cleaned and grout-free.
Removing grout from your tile can offer a number of advantages that make it worth the effort. Not only will the space look more inviting, but you’ll also save time and money while making it easier to keep your tile clean and maintain its beauty. So don’t hesitate – to take advantage of grout removal and start to enjoy the benefits today!
What Type Of Surface Should I Be Careful About When Removing Grout?
When removing grout, you should be careful when using a chisel or razor blade to avoid damaging delicate surfaces such as tile, marble, and granite. You may want to use a rotary tool with a diamond-cutting bit for greater control. If you’re removing grout from a shower stall or other wet environment, you’ll need waterproof protection for your tools and yourself. Be sure to wear protection such as gloves, goggles, and a face mask to reduce the chance of airborne particles entering your mouth or eyes.
Additionally, use caution when removing grout from around tiles in order to prevent damage to the tiles or surrounding surfaces. When in doubt, always consult a professional before attempting any major grout removal project. Finally, always remember to clean up any dust or debris that results from your grout removal process in order to ensure a safe and healthy environment.
Can I Reuse Grout After It Has Been Removed?
Yes, you can absolutely reuse grout after it has been removed. The only caveat is that the surface must be thoroughly cleaned to remove all residue and foreign particles which may have become lodged in the grout during removal. To ensure a successful re-application of grout, proper preparation techniques should always be employed such as scrubbing the area with a stiff brush and using a vacuum cleaner to remove all loose dirt.
If you’re working with cement-based grout, use a liquid cleaner such as an all-purpose home scrubber to help loosen up any stubborn stains or residue. Once the surface is completely clean and dry, you can then apply new grout in whatever color or pattern you desire. If you’re using a pre-mixed grout, simply follow the manufacturer’s instructions for application and remember to clean up any excess as you go.
Reusing grout can save time and money, so it’s definitely worth considering if your project calls for it. As long as the surface is well prepared and all the necessary steps are taken, your grout should last for many years to come!
What Should I Do With The Old Grout After It Has Been Removed?
After the old grout has been removed, it’s important to clean up the area. Depending on how much grout you removed and what kind of surface you were working with, there are several options for cleaning up loose pieces and debris. Vacuuming is a great option for hard surfaces like tile or stone, while sweeping works well on softer surfaces like wood or vinyl. Once the loose material has been cleared away, you can use a damp cloth to wipe down the area and pick up any remaining particles. Make sure that the surface is completely dry before applying new grout.
Lastly, consider using a sealant to help protect the new grout and ensure that it lasts for years to come. A sealant is a great way to keep dirt and stains from infiltrating the grout, so it’s well worth taking the extra step. Just make sure that you choose a sealant specifically designed for the kind of grout you’re using to get the best results.
With a bit of care, your new installation should look great and provide reliable protection for years to come.
Are There Any Other Tips For Removing Grout?
Subscribe to Bunnings Warehouse
Sure! Here are a few more tips for removing grout that you should consider:
- Start with the widest grout removal tool you can find. This will make it easier to remove large amounts of grout quickly and without damaging the surrounding tile.
- When using a manual grout removal tool, use caution when applying pressure. Too much force may cause the tool to break or damage the tile surrounding the grout.
- Make sure you wear safety glasses when using a manual tool. Small pieces of debris can fly up and into your eyes, causing injury.
- If you’re having difficulty removing stubborn grout, try adding some vinegar or baking soda to the area before using a grout removal tool. This will help loosen the grout and make it easier to remove.
- Finally, always remember to vacuum up any dust created by your grout removal efforts. Dust can quickly settle on other surfaces in your home and cause long-term damage if not properly cleaned up.
Good luck with your grout removal project! With the right tools and techniques, it should be a relatively simple task.
Recommended Posts:

