A rabbet joint is a type of woodworking joint that involves two pieces of material joined together with an open-ended slot cut into one edge. It’s used in many applications, from furniture and cabinetry to window frames and door frames. While it is a strong connection when done correctly, there are some disadvantages associated with using this type of joint.
The most common problems stem from improper cutting or installation techniques, which can lead to weak joints or even complete failure. In this article, we will discuss the upcoming drawbacks of using rabbet joints. So you know what to look out for when constructing your next project.
What Is A Rabbet Joint
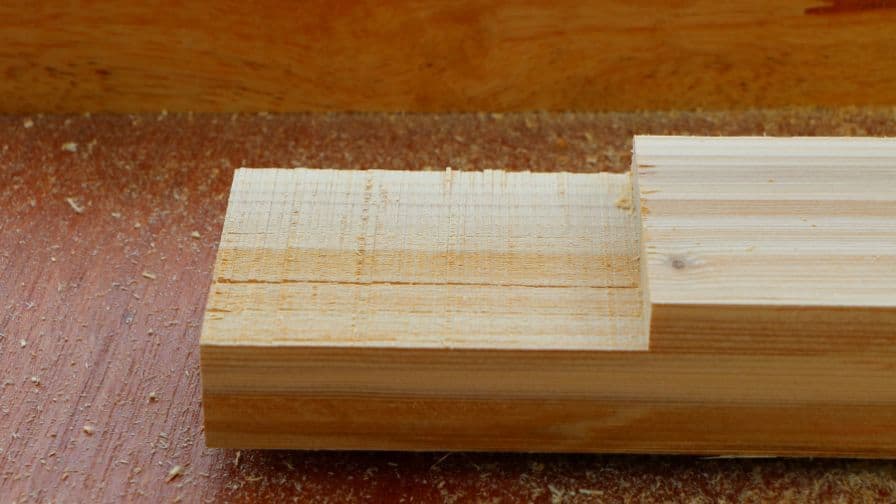
A rabbet joint is a simple yet strong joinery technique that has been used for centuries in woodworking to connect two pieces of material. It’s formed by cutting a shallow groove or notch along the edge of one piece and then fitting the other piece into it.
This joint creates an interlocking connection between the two pieces, giving them a great deal of strength and stability. It’s a great option for projects like shelves and boxes, where a strong joint is needed without making it too bulky or complex. To create a rabbet joint,
-Use some basic power tools such as a circular saw, router, and chisel. With the right tools, do the job in a matter of minutes.
-Layout the pieces and mark the edges for cutting. Cut the rabbet joint along the edge of one piece. So it’s marked accurately before beginning.
-Cut the rabbet using your saw or router. The depth and width of the cut will depend on the size and strength you need.
-Next, chisel out any remaining material from the rabbet joint to ensure it fits snugly against the other piece.
-Apply some wood glue and then fit them together. Use clamps to hold everything in place until the glue has dried.
-Finally, use screws or nails to secure the joint in place.
That’s it! With a little practice and patience, you can master this simple but strong joinery technique. It’s a cool way to build woodworking projects that are sturdy and long-lasting.
Disadvantages Of Using A Rabbet Joint
Using a rabbet joint also has its disadvantages. As with any type of joint, the rabbet joint must properly construct to ensure it will hold up against the forces applied to it. When not executed correctly, it can lead to gaps or weak points that may cause the joint to give out and fail over time.
In addition, they can get difficult to assemble and line up properly, tricky for the do-it-yourselfer. They also require special tools that are not available to everyone. This can leave you with an inferior joint that won’t last as long or provide the same level of support as a correctly executed rabbet joint.
Finally, when you plan on using a rabbet joint to join two pieces of wood, you should also know that it is not a very attractive joint. It does not have the same visual appeal as other types of joints and may detract from the overall look of your project.
For these reasons, take into account all of the pros and cons of using a rabbet joint before embarking on your project. Take the time to consider which type of joint will best suit your needs and you have all of the necessary tools available to do it right.
Advantages Of Using A Rabbet Joint
Subscribe to Stumpy Nubs
A rabbet joint is a versatile type of joinery that can use in a variety of woodworking projects. The advantage of using a rabbet joint is that it’s strong, easy to make, and cost-effective. It also requires fewer tools than many other types of joinery.
The most common use for a rabbet joint is to create a corner joint between two pieces of wood. The rabbet joint provides more surface area for the glue bond, stronger than other types of joints. It also eliminates gaps between the two pieces and helps keep them aligned during construction.
A rabbet joint can also attach trim or molding to the edge of a piece of wood. This is helpful when you need to attach a thin strip, such as a door or window trim, without using nails or screws. The rabbet joint can use with either softwoods or hardwoods, an all-purpose joinery technique.
Finally, a rabbet joint is one of the most cost-effective joinery techniques. Since it doesn’t require as many tools, you can save money on woodworking projects while still getting a strong and reliable connection between two pieces of wood.
No matter what kind of project you’re working on, rabbet joints are an invaluable part of any woodworker’s arsenal. With a little practice, you can produce reliable joinery that is strong and cost-effective.
Plus, they require fewer tools than many other types of joinery! So don’t let their simplicity fool you. Rabbet joints are one of the best ways to get the job done quickly and efficiently.
Common Problems With Installing And Cutting The Rabbet Joints
One of the most common issues people have when installing and cutting rabbet joints is measuring accurately. Use precise measurements, as even a small gap between two pieces of wood can prevent the joint from being secure and long-lasting. To ensure an accurate fit, use a combination square to measure along each side of the rabbet, marking the depth and width with a pencil.
Another issue that can arise is making sure the cuts are straight and even. When your blade isn’t perfectly aligned, or you don’t have enough pressure on it, the cut won’t appear flush and can lead to an uneven joint. Take your time, and use a straight edge as a guide to keeping the blade from drifting, ensuring perfect cuts.
Finally, your rabbet joint is firmly secured with glue and nails or screws before assembling the entire project. Glue can dry out over time, causing the joint to become weak and separate. Nails or screws should space out evenly, and not too close together to avoid splitting the wood fibers. All of the pieces are firmly secured. So you won’t have any problems down the line.
Installing and cutting rabbet joints is a simple process. But it requires precision and patience to do it right. With proper measuring techniques, straight and even cuts, and secure fastenings, you can ensure a tight-fitting rabbet joint that will last for years to come.
Tips For Ensuring Proper Installation And Strength Of Rabbet Joints In Your Projects
When it comes to rabbet joints, getting the installation and strength right is essential. Here are many tips for making sure your projects come together perfectly:
1. Start by cutting a channel into the wood that will hold the joint in place – you want this cut to appear as clean and level as possible. Do this with a router, chisel, or table saw.
2. Measure out the space for the joint carefully – you don’t want either piece of wood as too large or too small as this will affect the strength of the joint.
3. Dry fit first to make sure everything fits properly before gluing and clamping.
4. Use quality wood glue so that you spread it evenly around the joint.
5. Clamp the pieces together firmly and leave for at least 15 minutes before releasing the clamps.
6. When possible, use screws on either side of the rabbet to reinforce the joint, they penetrate the wood and hold the joint in place.
7. In using a loose tenon, you create a rebate for it to fit snugly – this is best done with a router or table saw.
8. To finish off, give the joint extra sand to soften any sharp edges and ensure it looks perfect.
It takes a bit of time and effort, but taking the right steps for rabbet joint installation and strength is essential for a successful project. With many tips in mind and some patience, you can build strong and long-lasting pieces with ease!
How To Avoid Weak Or Failed Connections When Working With Rabbet Joints
Subscribe to Stumpy Nubs
When working with rabbet joints, the key to avoiding weak or failed connections is proper preparation. Any experienced woodworker knows that taking a few extra minutes in the setup can make all the difference when it comes to achieving a strong connection. Here are many tips for making your connections as durable and reliable as possible:
1. Take time to choose the right wood for the job. Look for straight-grained and defect-free boards that are appropriate for the project at hand.
2. Before you begin cutting, double-check your measurements and adjust them as necessary. Even a small mistake can have a big impact on your final results.
3. Cut slowly and accurately. A sharp blade is essential when cutting rabbet joints. Take your time to ensure you get a clean and precise cut.
4. Use clamps and glue liberally when assembling the joint. This will keep everything in place while drying and ensure an extra-strong connection.
5. Once the glue has dried, use wood filler to seal any gaps and smooth out any rough edges.
With a little extra effort, you can avoid weak or failed connections when working with rabbet joints. Use these tips to get the job done right every time!
Final Thoughts On Working With A Rabbet Joint
When it comes to working with rabbet joints, the best advice we can offer is to take your time and practice. It takes some skill to master this technique. But it’s a valuable one that will serve you well in many projects. Once you do get good at it, your work will look beautiful and professional! So don’t get intimidated, take your time and practice.
Recommended Posts:

