A lock rabbet joint is a type of woodworking joint that uses interlocking parts to create a strong and durable connection. It is commonly used in furniture making, cabinetmaking, and other joinery applications. This type of joint has been around for centuries. But it has become increasingly popular with modern woodworkers due to its simple construction and strength.
The name “lock rabbet” comes from the fact that two pieces are locked together using a tongue-and-groove system similar to a door latch or mortise-and-tenon joint. In this article, we will look at how to construct this versatile joint as well as some tips on when you should use it.
Overview Of The Lock Rabbet Joint
The lock rabbet joint is a strong and reliable joinery method that’s been used for centuries. It’s a simple technique to assemble two pieces of wood, with the added benefit of increased strength from the overlapping components. Do this type of joint with either hand or power tools, great for beginners or experienced woodworkers.
-First, the two pieces of wood you’re joining are flush and even.
-Then, cut a rabbet or groove in one piece, where you’ll insert the other piece of wood. The mating part is wider than the rabbet so it fits snugly into place. To secure the pieces, you can use glue and/or nails.
-Finally, cut a few dadoes or notches in the corners of the joint for extra stability.
The lock rabbet joint is a powerful joinery technique that allows you to join two pieces of wood securely and with strength. It’s an easy way to make your projects sturdier and more professional-looking. Give it a try on your next project – you’ll become glad you did!
Benefits Of Using A Lock Rabbet Joint
The lock rabbet joint is a reliable and simple way to join pieces of wood together. It’s a simple technique for beginners to learn, as well as professionals. Here are many benefits that come with using this type of joint:
1. The joint creates strong and durable connections between two pieces of wood. This means you can trust that the joined pieces will stay together for a long time.
2. As it’s easy to create, you don’t need any expensive tools or materials to make one. This is an ideal choice when you’re on a budget.
3. The joint has excellent strength and resistance to the effects of shock, vibration, and changes in humidity and temperature.
4. As it is hidden from view, the lock rabbet joint creates a neat and clean look to your project – perfect for those who want a professional finish.
5. It’s quick and fast to align the two pieces of wood when building this joint, an ideal choice as you’re short on time.
6. As the joint requires no glue or nails, you don’t need to worry about messy adhesives ruining your work.
The benefits of this type of joint are clear – it’s strong, easy to build, and creates a neat finish! So when you’re looking for an affordable and reliable way to join pieces of wood together, consider using the lock rabbet joint. You won’t get disappointed!
Step-By-Step Guide To Constructing A Lock Rabbet Joint
Subscribe to WOOD magazine
Now that you know the basics of constructing a lock rabbet joint, let’s dive into the step-by-step guide:
-First, measure and mark out the desired location for your joint on both pieces of wood.
-Second, make a shallow cut along each marked line with a handsaw or circular saw.
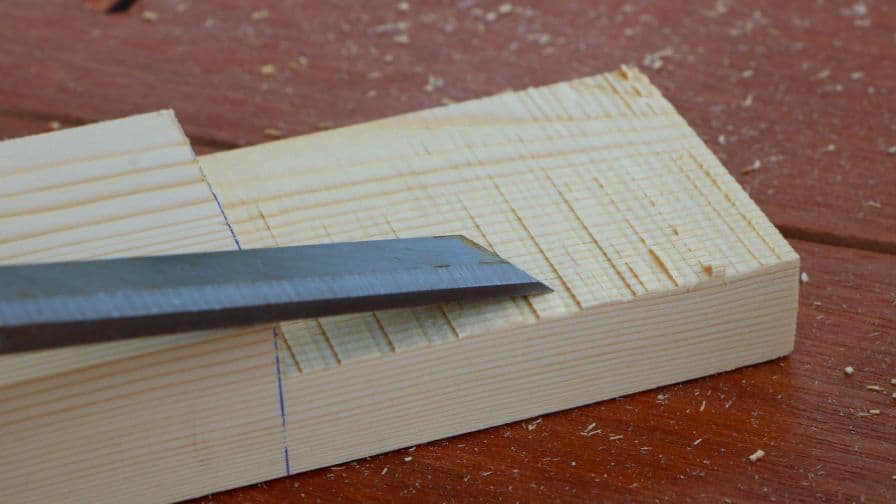
-Third, use a chisel or router to cut a rabbet on the edge of one piece of wood.
-Fourth, dry fit both pieces together and make sure the rabbet fits snugly into the other piece of wood.
-Fifth, use wood glue to attach the joint firmly in place.
-Sixth, clamp the joint together.
-Seventh, use a nail gun or drill to secure the joint with finishing nails.
-Eighth, remove the clamps and sand down any rough edges.
-Finally, apply a finish of your choice for protection against moisture and wear.
There you have it! Now you know how to construct a lock rabbet joint. With the right tools, patience, and attention to detail, you’ll craft beautiful woodworking projects with ease.
How Do You Cut A Lock On A Rabbet Joint Router?
The best way to cut a lock on a rabbet joint router is to use a plunge router.
-Start by positioning the router bit at the end of your rabbet joint. So that it is correctly aligned with the edge of the board. Securely clamp down the workpiece so that it won’t move while you are cutting.
-Next, adjust the depth of cut for your router bit. To make a clean rabbet joint lock, you will need to set the depth of cut as deep as possible without going through the workpiece.
-When you are ready to begin cutting, plunge the router bit into the board at a slow and steady rate. Move the router around and along the edges of the rabbet joint until you have completely cut through.
-Once you’ve cut the lock, use a chisel or a sanding block to clean up any excess material from within the joint. This will ensure that your joint is securely locked and ready for further routing or assembly.
-Now that you have cut the lock on your rabbet joint router, all that’s left to do is enjoy the fruits of your labor!
Tips For When To Use A Lock Rabbet Joint
When it comes to woodworking, the lock rabbet joint is one of the most secure and strong joints you can use. This versatile joinery technique creates a tight bond that will last for years. So when it’s time to create a sturdy joint, consider using a lock rabbet joint.
Here are many tips on when to use a lock rabbet joint:
1. When you’re joining two pieces of wood together, the lock rabbet joint is one of the strongest joinery techniques you can use. It’s ideal for creating frame and panel doors, cabinet frames, and small boxes.
2. As you need an extra secure connection between your pieces, the lock rabbet joint is a great option. It will create a tight bond that won’t loosen over time.
3. When you’re joining two pieces of wood with an uneven surface, the lock rabbet joint can ensure your connection remains stable.
4. If you’re working on a project that requires strength and longevity, the lock rabbet joint is an excellent choice. It will provide a secure connection between your pieces that won’t easily wear down over time.
5. When you need to connect two large pieces of wood, the lock rabbet joint can form a strong bond without making too many compromises on accuracy.
When it comes to woodworking, the lock rabbet joint is a great option for creating secure and strong joints. Use these tips to decide when to use a lock rabbet joint in your next project!
Examples Of Projects That Utilize The Lock Rabbet Joint
Subscribe to Woodsmith
The Lock Rabbet joint is a top choice for projects that involve connecting two pieces of wood at a right angle. It’s used in furniture making and other cabinetry applications.
Here are many examples of projects that make use of the Lock Rabbet joint:
1. Picture Frame – When you have ever put together a picture frame, you used this joint. It is the strongest way to attach the four parts of a picture frame.
2. Cabinets – Lock Rabbet joints are popular for cabinet construction due to their strength and durability. They provide a sturdy connection that will stand up to years of usage.
3. Bookcases – Whether you are building an open bookcase or one with doors, the Lock Rabbet joint provides extra stability to your build and makes it easier to adjust shelves.
4. Tables – When building a table, the Lock Rabbet joint is useful for attaching legs to the top. This connection is mighty and will last for years.
5. Chairs – This joint is often used to attach the seat and back of a chair. It’s also useful for attaching arms, spindles, and other components.
No matter what project you are building with wood, the Lock Rabbet joint can come in handy! With its strength and reliability, it is a great choice for any build.
Common Mistakes Made When Working With The Lock Rabbet Joint
When it comes to working with the lock rabbet joint, there are many common mistakes that you should avoid:
-First, use the correct saw blade when making the joint. A standard crosscut or rip saw won’t cut as cleanly as a dedicated rabbet saw. Using these blades can result in chipping, splintering, and inaccurate cuts.
-Second, you are cutting the rabbet in the right direction on the workpiece. When you cut it in the wrong direction, it won’t lock properly when assembled.
-Third, don’t forget to use a chisel to remove any excess material after making your rabbet cut. This will ensure a smooth and tight joint.
-Fourth, the rabbet is deep so that it can accommodate the other piece of wood when assembled. Too shallow of a cut won’t provide a secure fit and could result in gaps or looseness.
-Finally, check your alignment before you assemble the joint. When the pieces are misaligned, then it will get difficult to get them to fit properly.
By avoiding these common pitfalls when working with a lock rabbet joint, you can ensure that your woodworking projects come out looking great! Have fun and happy building!
Final Thoughts On The Versatility And Strength Of The Lock Rabbet Joint
The lock rabbet joint is a versatile and strong way to join two pieces of wood together. Its simple design makes it easy to use, and its strength means that it can hold up for years with minimal maintenance. It is not the most attractive joint, but its sheer utility and reliability are a popular choice among DIYers.
It is the perfect choice for joining two pieces of wood for furniture, cabinetry, and other projects where strength and stability are key. With a little practice and patience, anyone can create this strong and reliable joint with ease. So go ahead, and give it a try – you won’t get disappointed!
Recommended Posts:

