If you’ve ever used Danish oil, you may have noticed that it can be a bit sticky. This is because of the resin in the oil, which helps to protect the wood and keep it looking beautiful. While this resin can make the oil a bit sticky, it also makes it very durable and long-lasting. In this blog post, we will discuss the benefits of using Danish oil and how to apply it properly!
Why Is My Danish Oil Sticky?
Danish oil is a popular finish for woodworking projects because it’s easy to apply and provides a beautiful, natural look. However, sometimes Danish oil can become sticky or tacky, which can be frustrating.
There are a few reasons why your Danish oil may be sticky. One possibility is that you didn’t allow the first coat to fully dry before applying the second coat. Danish oil needs to be applied in thin coats and allowed to dry completely between each coat. If you apply too much oil or don’t allow enough drying time, the oil can become sticky.
Another reason your Danish oil may be sticky is because of the temperature or humidity in your workshop. Danish oil dries best in warm, dry conditions. If it’s too cold or humid, the oil will take longer to dry and may become sticky.
What Is Danish Oil And What Are Its Benefits
Danish oil penetrates deeply into the wood, protecting it from within. Danish oil also gives the wood a beautiful lustrous finish that highlights the grain patterns.
Some of the benefits of using Danish oil are that it is very easy to apply, it doesn’t require any special equipment, it dries quickly, and it is very durable. Danish oil can be applied to all types of wood, including hardwoods and softwoods.
Danish oil is a great option for finishing wood because it is so easy to use and it provides a beautiful, natural finish. If you are looking for a way to protect your wood furniture, Danish oil is a great choice.
Danish oil is available at most hardware stores and home improvement centers. You can also find it online. When you are ready to apply Danish oil to your wood furniture, make sure to follow the instructions on the can carefully.
How To Apply Danish Oil
Subscribe to Mad Nerd Workshop
Danish oil is a penetrating oil, which means it soaks deep into the wood which helps to protect it from within. This makes it an ideal finish for woodworking projects like countertops, cutting boards, and turnings. It’s also food-safe, making it perfect for surfaces that will come into contact with food.
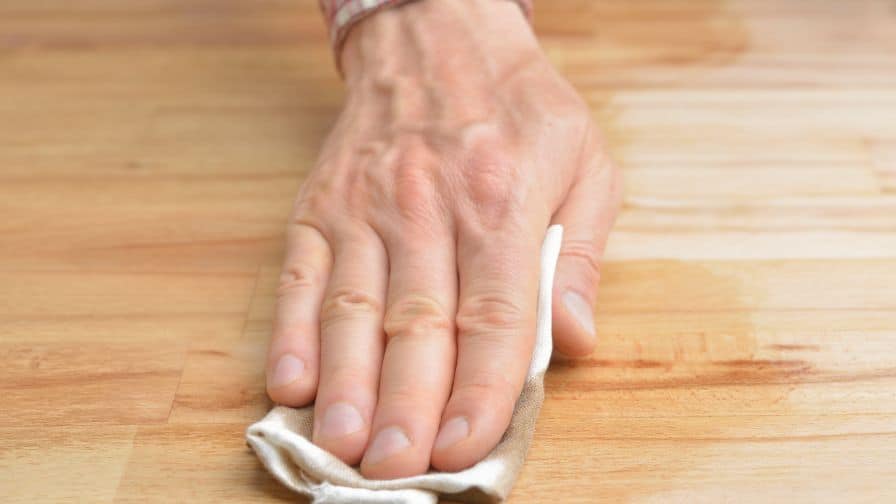
To apply Danish oil, you need to start by sanding your project smoothly. Then, wipe away any dust with a clean cloth. Next, pour some Danish oil into a bowl and apply it to the project with a brush or rag. Work in small sections, applying a thin layer of oil and then wiping away any excess.
Once you’ve applied Danish oil to the entire project, let it dry at least 8 hours. After that, you can apply a second coat if needed. When your project is complete, it will have a beautiful, natural finish that will last for years.
Danish oil is easy to apply and gives the wood a beautiful, natural finish. Follow these steps to get the perfect result on your next woodworking project.
Now that you know how to apply Danish oil, try it on your next woodworking project! You’ll be glad you did.
Tips For Using Danish Oil
Danish oil is a popular finish for woodworking projects. It is easy to apply and provides a beautiful, natural look.
Here are a few tips for using Danish oil:
- To start, sand your project with 220-grit sandpaper. This will create a smooth surface for the Danish oil to adhere to.
- Wipe away any dust from sanding with a clean cloth.
- Danish oil is typically applied with a brush, but you can also use a rag.
- Apply the oil in thin, even coats. Allow each coat to dry completely before applying the next.
- After the final coat has dried, you can buff the surface with a soft cloth to create a shine.
Following these simple tips, you can achieve beautiful results with Danish oil. Experiment and have fun!
How Long Does Danish Oil Take To Dry?
Danish oil is a natural oil finish that is derived from the Danish people. It has been used for centuries on woodworking projects and is known for its deep, rich color and luster. Danish oil is made from a blend of oils, including linseed oil, tung oil, and walnut oil. These oils are all-natural and have been used for centuries in woodworking.
Danish oil is applied with a brush or cloth and then left to dry. The drying time will depend on the temperature and humidity of the room, as well as the type of wood that you are using. Danish oil can take anywhere from 8 hours for first coat to dry to a few days to fully dry.
Do You Sand Between Coats Of Danish Oil?
Subscribe to Mad Nerd Workshop
If you don’t sand between coats of Danish oil, your finish will be sticky. The oil doesn’t harden and fully cure without being exposed to oxygen, and that only happens when you sand the surface. So, if you want a hard, durable finish, make sure to sand between coats of Danish oil.
Does Danish Oil Dry Hard?
Yes, Danish oil dries hard. Danish oil is a blend of natural oils and varnishes that seeps deep into the wood, providing both a durable finish and enhanced color and grain.
Recommended Posts:

