Subscribe to April Wilkerson on Youtube
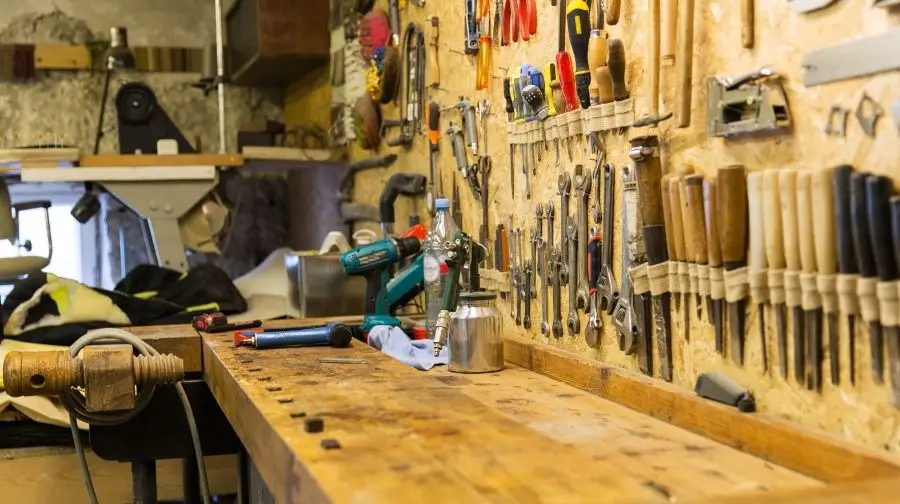
If you’re like most woodworkers, your workbench is one of the most important tools in your shop. It’s where you start every project, and it’s the foundation of your work area. A good workbench doesn’t have to be expensive or elaborate – it just has to be sturdy and well-constructed. In this blog post, we’ll show you 15 easy workbench improvements that you can make in just a few hours!
The “Art Of Woodworking” Guide Plus 40 Project Plans
Click Here to Download Your Free Copy of The “Art Of Woodworking” Guide
Want To Improve Your Woodworking?
Discover 1,000 Hours Of Step-By-Step Woodworking Videos

It’s called Woodwork101. A database of detailed videos and blueprints in crystal clear, mouth-watering HD that will take you by the hand and show you that DIY home projects done the right way are easy, fun, and always of top quality… turning dream into reality in a heart-beat. Getting you that perfect build each and every time.
What’s The Best Kind Of Wood To Make A Workbench?
Workbenches are usually made up of three main parts: the top, legs and base.
The worktop is usually made of strong wood (such as oak or pine), with a variety of veneers available including maple, beech and teak. The work surface should be smooth so that it won’t snag on tools or materials being used on it. It’s best to work from a worktop that’s at least three feet wide and six feet long.
A workbench is a work surface that can be used for woodworking, metalwork or other tasks. It’s also known as a carpenter’s bench. You should choose your workbench carefully to match the type of work you will do on it and design it accordingly.
[Video] 3 Most Common Mistakes
When Setting Up Shop

A woodworking friend of mine shared this video by Ralph Chapman with me that helped him set up his workshop.
The video explains the benefits of Ralph Chapman’s guide about setting up an affordable workshop and avoiding the most common mistakes offers to anyone interested in woodworking.
How Thick Should A Woodworking Bench Top Be?
The thickness of your workbench top depends upon how it will be used. Workbenches with hardwood tops should be at least 3” thick, while workbenches with composite surfaces can be 2½” or more.
Work bench work surfaces come in many different forms. The type of work you do and what tools you will use is the main consideration when selecting a workbench top. There are two basic types, hardwood tops and composite tops (plywood or MDF). Hardwood work surfaces such as maple have good anti-friction properties, but are hard on work pieces and tooling. Composite work surfaces, such as MDF or plywood, have low friction properties which make them easier on workpieces and tooling; however they are more easily damaged by high-speed metal cutting tools.
What Is A Good Height For A Workbench?
A workbench should be at a comfortable height for you to use. This may vary depending on your height and the type of work you will be doing. A general rule of thumb is that the workbench should be around 30-36 inches high. You can adjust this height to fit your needs by using a workbench leg extension or workbench riser. If you are shorter or taller than average, you may want to adjust the height even further.
If you are using your workbench for woodworking, it is important to have the correct height so that you can work comfortably and safely. You don’t want to be hunched over while working or struggling to reach things on high shelves. The workbench should also be stable and sturdy, so that you don’t have to worry about the workbench tipping over when you are using it. You can make your workbench sturdier by adding a workbench riser or leg extension.
What Are The Holes In A Workbench For?
Workbench holes offer woodworkers a variety of workholding options. The workpiece can be clamped to any part of your work surface, including the top, sides and ends. This workholding capability makes workbenches more versatile than worktables.
Types of workbench holes include dog holes, holdfast holes and threaded inserts. Dog Holes are variously called “dog-holes” or “pup-holes” in plans published by workbench makers such as John English and Garrett Hack while “dog holes” is the more common term. They are round, countersunk holes that range in diameter from about ¼ inch to ½ inch. The most popular size for a workbench is ⅜ inch.
You can make dogholes with a Forstner bit or hole saw and jig saw. A holdfast hole is a countersunk, elongated hole that’s about twice as long as it is wide. The most popular size for a workbench is ¼ inch by ½ inch or ⅜ inch by ¾ inch. You can make holdfast holes with a Forstner bit, spade bit or hole saw.
How Much Should A Workbench Overhang?
When it comes to workbench design, there are many choices to make. One of the most important is how much overhang your workbench should have. This decision will depend on the type of work you plan to do and the space you have available.
If you’re working with large pieces of wood, you’ll need plenty of overhang to support the workpiece. If you’re doing a lot of sanding or planing, you’ll want to have enough space on either side of the workbench to move your arms around.
On the other hand, if you don’t have a lot of space available, or if you’re mostly working with smaller pieces, you can get away with a workbench that has less overhang.
Whatever you decide, make sure the workbench is stable and won’t move around while you’re working. You don’t want to have to worry about your workbench tipping over while you’re trying to saw a piece of wood in half.
[Guide] How To Launch Your Woodworking Business For Under $1000


Click Here To View
If you’re considering turning your woodworking hobby into a part-time business check out this helpful guide on how to get started.
Where Do You Put The Bench Vise?
Some workbenches have a dedicated spot for the bench vise, while others allow you to place the bench vise wherever you want. The bench vise is an important workbench tool. It can be used for clamping workpieces, holding tools, and more.
If your workbench doesn’t have a designated spot for the bench vise, you can place it on the front or back edge of the workbench. You should also make sure that the bench vise is clamped down securely to avoid any accidents. Another option is to mount the bench vise to the workbench leg. The workbench leg is the perfect spot for your bench vise because it’s strong and sturdy, it can be easily removed if you need to move your workbench somewhere else, and you don’t have to worry about clamping down the vise in order to use it.
The workbench leg is also a good spot for a workbench vise if you want to add a second bench vise to your workbench. By mounting the bench vise to the workbench leg, you create more space on the workbench top and you don’t have to worry about finding a place to clamp the workpiece.
No matter where you decide to put your workbench vise, you should make sure that the workbench is sturdy and won’t get bumped around while you’re working. If your workbench isn’t strong enough to support a bench vise, it might be better to mount the workpiece directly onto the workbench top using screws.
If your workbench has a designated spot for the bench vise, you can use this spot to clamp down workpieces. The workbench top is usually a flat surface, which makes it the perfect place for clamping workpieces. You should also make sure that the workbench top is strong enough to support the weight of the workpiece.
Recommended Resources:

