Shellac is a shell resin secreted by the female lac bug, and used for making shellac varnish. Shellac is a natural substance that has been around since 1690! It can be found in woodworking as well as being an ingredient in furniture polish, confectionery and even nail polishes. The shell of this insect was ground up to extract the shellac flakes which were then mixed with alcohol to create a thin shellac varnish for wood finishes. It provides protection from water and UV rays without staining or darkening like oil based products would do. With so many uses, you’ll want to learn how to apply shellac properly!
This blog post will discuss how shellac can be applied, what products are needed, and some tips on getting the best results!
How To Apply Shellac
Here are the steps to apply Shellac on your project:
-Wipe the area clean with a lint-free cloth and denatured alcohol.
-Mix one part Shellac flakes to four parts denatured alcohol in a clean container.
-Stir the mixture until the Shellac is dissolved.
-Pour the mixture into a new, clean container.
-Dip a lint-free cloth into the mixture and apply it to the surface.
-Wipe the excess off with a clean, lint-free cloth.
-Allow it to dry for at least two hours.
That’s all there is to it! Applying Shellac is a simple process that anyone can do. Just be sure to follow the steps closely and you’ll have great results.
Complete Video Overview of Shellac
Subscribe to WoodWorkWeb on Youtube
Shellac is one of the oldest woodwork finishing products available. It is easy to use and extremely versatile in how it is applied and how it is used to both seal and finish.
Success with Shellac
Applying shellac is a healthier option than most other wood finishes as it does not contain any toxic ingredients. It is even still used in some medicines and candies! Shellac comes from secretions found on the insects that eat on bark of trees, but lac itself isn’t found in trees.
What Is Shellac?
Shellac is a substance that comes from the indian lac scale insect, Kerria lacca. Shellac has an evaporation finish; which means as it dries on your wood projects it leaves behind a thin film of sealant, protecting the surface of your project for many years to come.
Shellac was introduced over 100 years ago as an alternative to the toxic chemical based varnishes that were in use at the time. Shellac has been used on all sorts of projects since then, and is still a popular wood finish to this day!
*Note: shellac can be used on many different types of surfaces, not just wood. It is also an incredibly durable and chemical resistant substance that dries quickly.
– shellac
– furniture refinishing
– wooden tool handles
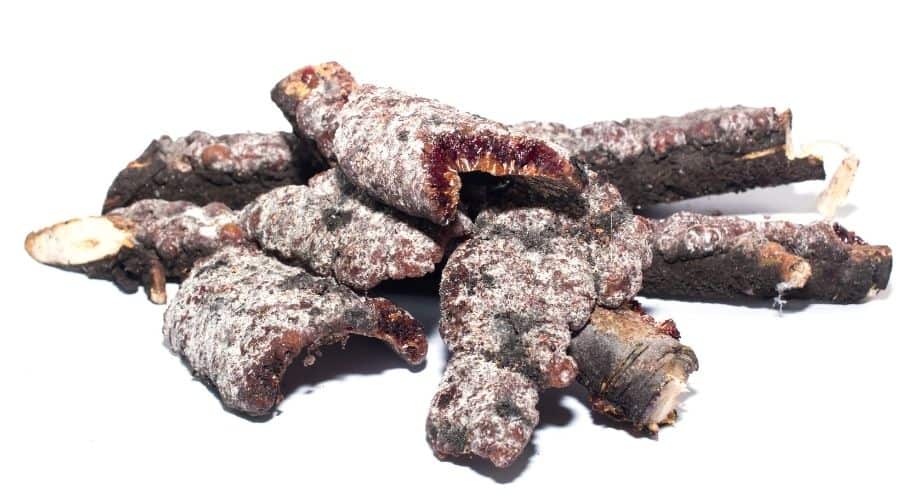
How Shellac Is Made
If you’ve ever wondered how shellac is made, wonder no more! The process begins with the collection of lac bugs. These bugs are gathered from tree branches, where they live and feed on the sap of certain trees. The bugs are then crushed and the resulting substance is mixed with alcohol to create shellac.
Shellac has been used for centuries as a coating for wood and other surfaces. It is still used today in a variety of applications, including furniture finishes, electrical insulation, and even as a food glaze. So the next time you see shellac in use, you’ll know just how it’s made!
What Is The Shelf Life Of Shellac?
The shellac shelf life is approximately five years.
Shellac that is mixed with alcohol has a 6-week shelf life. Cans that are premixed shellac will have the expiration date marked. Shellac cans from store bought products will have a datum stamped on them so we understand when it was made.
The shelf life of shellac depends on the quality, mix ratio, temperature, humidity level and how well shellac flakes are stored.
A good rule of thumb for shellac’s longevity is that if you store your shellacs in a cool.
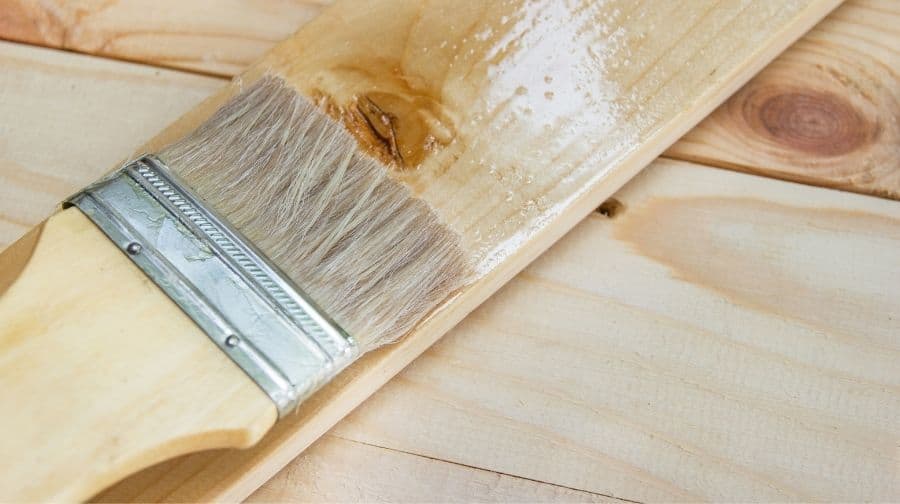
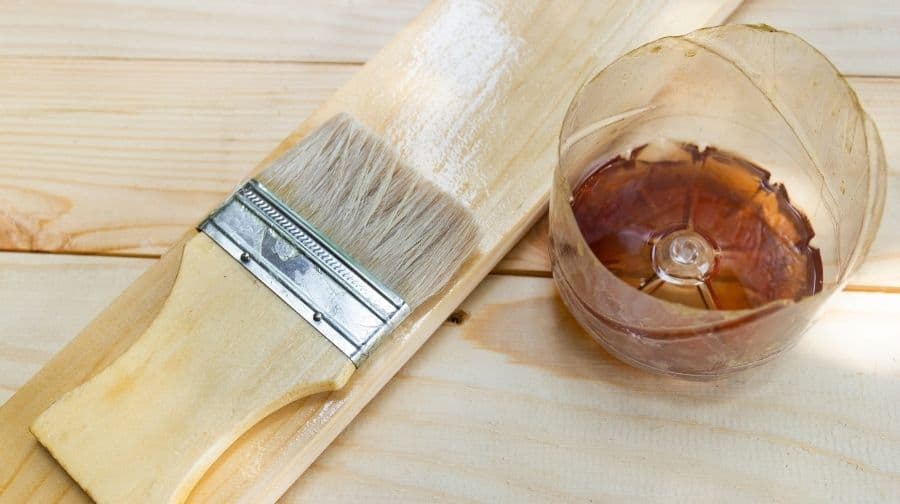
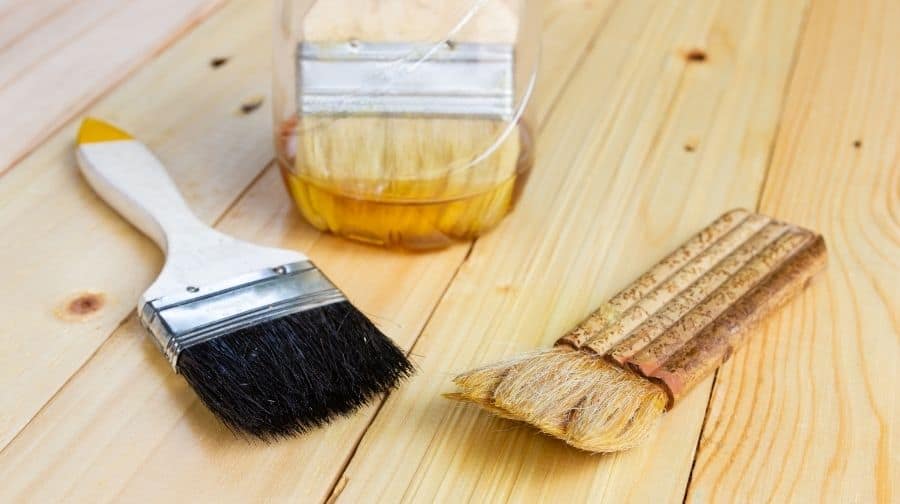
Brushing on Shellac
A good way to apply shellac is with the “pressing” method. You will use a natural-bristle flat brush marks and soak the bristles in water. Apply very liberal smooth strokes of shellac from one side of the surface to another, being careful not to leave drips or blushy areas. Shellac dries very quickly so
Padding on Shellac
For a thorough, hard-wearing finish, apply the finish polish sparingly with a quality pad. Allow your cloth to soak in mineral oil before applying it to the surface of the wood. Avoid overspreading and leaving longer strokes which will lend an uneven appearance to your project. Instead, use smaller circular motions around your object with constant pressure.
Can Shellac Be Used As A Primer?
Shellac can be used as a primer. While shellac won’t adhere to the wood as well, it can be used for filling small cracks before applying your final shellac finish coat of paint or shellac.
Shellac is also a good choice if you are looking for an alternative to polyurethane because shellac will allow any knots in your wood’s natural grain to show through nicely.
Shellac is also a good choice if you are looking for an alternative to polyurethane because shellac will allow any knots in your wood grain to show through nicely. Shellac does not yellow over time, and the dry film that shellac leaves behind can actually be buffed out with steel wool or fine sandpaper between coats.
Shellac does not yellow over time, and the dry film that shellac leaves behind can actually be buffed out with steel wool or fine sandpaper between coats. The downside of shellac is that it doesn’t adhere well to oily wood like pine, so you may need a primer for your project if shellac won’t work by itself.
How Do I Get A Smooth Finish With Shellac?
You get a smooth shellac finish by applying thin coats of shellac and letting the previous coat dry for a few minutes before applying the next one.
First, sand down your surface with coarse grit (120 to 180) wet or dry paper until smooth. Wipe off all dust particles with clean cloths or compressed air. Use water-based shellac if you’re using natural wood, or shellac made from synthetic ingredients if you’re using man-made materials that are not sensitive to water.
Masking tape can be used for touch up work, but is not necessary and should only be applied when the shellac has dried completely (no longer tacky). Protect your hands with nitrile gloves before applying shellac.
Do You Need To Sand Between Coats Of Shellac?
You may have to sand between shellac coats. This will depend on the type of shellac you used (with some shellacs, you can just buff it out).
If so, how do I?
– The best way is with a belt sander: use an 80 grit belt or less and run it in one direction only as shown in the diagram.
– You can also use a drum sander, but it will take more time and make quite a mess of your flooring or work surface.
If you do not need to sand between shellac coats: Congratulations! Your shellac is dry and ready for furniture polish or paste wax (if applied over varnish).
What Color is Shellac?
The color of shellac comes in premixed color tones of white, blonde, amber shellac and dark.
Shellac is also available premixed in bleached shellac tones of the aforementioned colors as well as a creamy white. Shellac is available premixed in amber, which has a light yellow tint that will darken with age and use to produce an antique or aged appearance.
Shellac comes premixed in a variety of colors for the ultimate color customization option!
What are the Pros and Cons of a Shellac Wood Finish?
The pros are that shellac is a natural product and has been around for thousands of years.
Shellacs wet edge will seal the wood, so there’s no need to sand or take care when handling furniture after it dries.
It only takes one coat of shellac before you can get out your satin finish on top! It also creates a beautiful satin finish on top.
The cons are that shellac is a wet edge sealant, which means the wood needs to be completely dry before applying it.
It’s also more expensive than other types of finishes because you need to buy both ingredients and apply them with special care. It’s not as forgiving or quick in application so make sure you have plenty of time to work with.
How Long Do You Have to Wait Between Coats of Shellac?
You should wait 1-2 hours between coats of shellac. If you wait longer than that, the next coat may not adhere properly. For best results, apply a thin layer of shellac and then immediately follow with a thicker layer. This will help to ensure that your finish is smooth and even.
How Many Coats of Shellac Should You Apply?
You should always apply subsequent coats of shellac to seal and protect the existing coat. Apply ONE first coat, followed by three more coats for a total of four coats (each subsequent coat should be applied after the previous one has dried).
After your last coat dries, you can put on a clear topcoat if desired. You may want to do this with any color that is near white or light-colored so it will not yellow over time due to exposure to sunlight. Keep in mind that acrylic paint also yellows as it ages because its binder chemically breaks down — but there are ways around this problem!
A good rule of thumb is: If what’s underneath starts turning brown or blackish while the surface stays white or light-colored, it’s time for a new coat of paint.
If additional coats are applied properly, shellac can last up to 12 months without any further maintenance! When in doubt about the number of coats you should apply, always err on the side of applying too many rather than too few (you’ll never regret having done so, but you may regret not having done so.)
Shellac Drying Time
The drying time for Shellac is about 30 minutes to an hour. You can tell it is dry when it is no longer tacky to the touch. It will feel smooth and have a bit of a sheen to it. Once it is dry, you can apply a second coat or move on to topcoat. If you are going to be doing any painting or staining, you will want to wait 24 hours before doing so. Otherwise, your project will be good to go!
Can You Apply Shellac Over Stain?
Shellac is a great sealant and can be used over any stain with the exception of alcohol-based ones. It’s especially useful for filling up the pores in wood. Shellac is a great stain protector and can be used as an alternative to polyurethane.
Shellac works on virtually any wood surface.
Shellac has a sticky, gooey consistency and doesn’t stain clothes like paint does. The downside to this is that it’s not as durable and can stain the wood.
How to Strip Shellac
Subscribe to Cooper’s Strip Club on Youtube
In this video, you’ll see how to remove old offensive shellac from the previously gorgeous interior woodwork without sanding.
What Is The Best Finish Over Shellac?
The best finish over shellac is one that provides a durable, protective surface while enhancing the beauty of the wood. There are a variety of finishes that can be used over shellac, including varnish, lacquer, and polyurethane. Each type of finish has its own advantages and disadvantages, so it is important to choose the right one for your project.
Shellac is a popular finish for woodworking projects because it is easy to apply and provides a smooth, even surface. However, shellac is not very durable and can be easily damaged by water or cleaners. For this reason, many woodworkers prefer to use a more durable finish over their shellac projects.
Varnish is a popular choice for a finish over shellac. Varnish is highly durable and resists damage from water, cleaners, and sunlight. It also provides a beautiful, glossy surface that enhances the natural beauty of the wood. However, varnish can be difficult to apply and can yellow over time.
Lacquer is another option for a finish over shellac. Lacquer is highly durable and resists damage from water, cleaners, and sunlight. It also dries quickly and provides a smooth, even surface. However, lacquer can be difficult to apply and can yellow over time.
Polyurethane is the most popular choice for a finish over shellac. Polyurethane is highly durable and resists damage from water, cleaners, and sunlight. It also dries quickly and provides a smooth, even surface. However, polyurethane can be difficult to apply and can yellow over time.