Looking to add a touch of blue to your woodworking projects? This guide will teach you everything you need to know about blue wood dye! We’ll discuss the different types of dyes available, how to apply them, and the best way to get the desired results. Whether you’re looking to dye a piece of furniture or give your wooden tools a new look, this guide has you covered!
What Is Blue Wood Dye And What Are The Different Types Available?
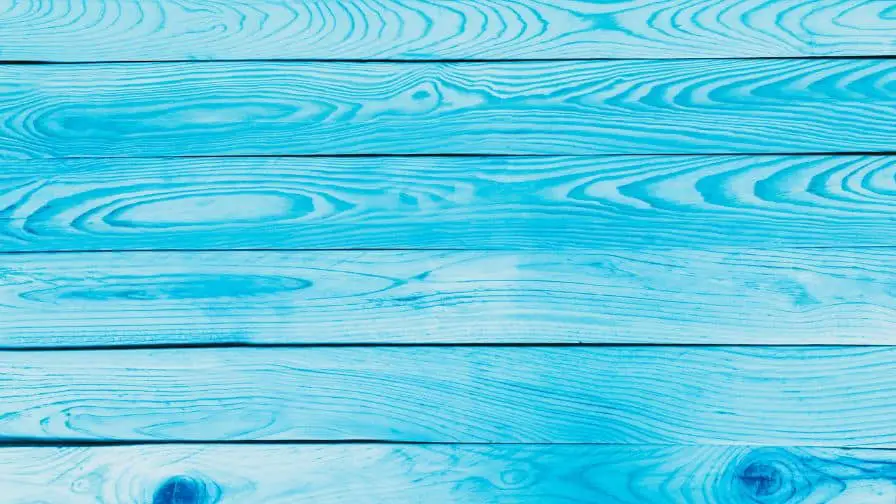
Blue wood dye is an easy and safe way to change the color of your wood. It can apply directly to bare wood, over an existing stain or whitewashed surface without affecting the original finish. Dye is perfect for giving the furniture a unique look or adding depth to cabinets and trim work.
There are several types of blue wood dye available. The two most common types are water-based and oil-based dyes.
Water-based dye penetrates the wood grain quickly and evenly and it is easier to apply than oil-based dyes. It is also easier to clean up after use, a great choice for someone new to staining or dyeing. This type of dye will give a lighter and more transparent finish than oil-based dyes and it dries faster as well.
Oil-based blue wood dye is the preference of experienced staining professionals. It gives a richer, deeper color and better coverage than water-based dyes. Oil-based dyes are also harder to apply and require more skill to use. But the result is a beautiful blue color that will last for many years.
No matter which type of dye you choose, follow all safety instructions when putting it. Wear protective clothing and a respirator while using wood dyes and always work in a well-ventilated area.
How To Apply Blue Wood Dye
When you’re looking to give your wood furniture a makeover, the blue wood dye is the thing! Applying wood dye is an easy process and a great way to add a unique touch of color to your pieces.
Here’s how:
1. Start by preparing the surface of the wood. Sand down the surface with medium grit sandpaper, then clean it off to remove any debris.
2. Once the surface is ready, you can start applying the dye. Wear disposable gloves and work in a well-ventilated area! Put an even layer of the blue wood dye using a brush or rag. Depending on the type of finish you’re looking for, you might have to place multiple coats.
3. Let the dye dry before applying a clear sealant or wax over it. This will protect the color from fading and make sure it stays vibrant for longer!
4. Once it’s all set, your wood furniture is ready to use and show off!
There you have it — everything you need to know about applying blue wood dye! With a few simple steps, your furniture will look as good as new. Have fun with it and get creative!
Subscribe to Keda Wood Dye
The Best Way To Get The Desired Results From Blue Wood Dye
When you’re looking to add a unique and gorgeous hue to your woodworking project, blue wood dye is an excellent choice. Whether you’re sprucing up an old dresser or adding color to a new table, you can achieve beautiful results with it.
Here are some tips for getting the most out of your blue wood dye:
-The surface is clean and free of dust, dirt, and other particles before you apply the dye. Use a damp cloth to wipe down the wood and remove any debris. Then sand the wood lightly with fine-grit sandpaper to ensure an even finish.
-When putting the dye on, use a brush or foam pad and place it in sweeping motions. This will distribute the color throughout the wood.
-For an even bolder hue, you can mix two colors of blue (such as navy and turquoise). This way, you’ll get a beautiful blended result.
-When you’re looking for a more subtle effect, apply the dye in layers. This will give the wood a softer and more natural appearance.
-Finally, take your time when putting the dye to ensure that no area gets missed and everything is evenly coated.
With these tips, you’ll get the best results from your blue wood dye. So try it out and see how well it works for you!
Tips And Tricks For Using Blue Wood Dye
Blue wood dye is a great way to give your woodworking project an interesting and unique look. With the right techniques, you can create amazing effects with different dyes.
Here are some tips and tricks for using blue wood dye:
1. Start With A Sample Board: Before starting your project, test out the dye on a sample board first. This will get an idea of how the dye looks and behaves, so you can make any adjustments as needed.
2. Prep Your Wood: Sand down your wood before applying the wood dye, as this will ensure that the dye holds properly. Clean off any dust afterward.
3. Choose The Right Type Of Dye: There are many types of dyes, so do your research and find the one that works best for your project.
4. Apply Evenly: When putting the dye, coat the entire surface of the wood. This will give you a more consistent look and prevents blotches or streaks.
5. Keep It In Mind While Sanding: The dye color can often change when you are sanding the wood, so keep that in mind while working on your project.
6. Don’t Overmix: When mixing the dye and the sealant, do not overmix it as this can hurt the color.
7. Let It Dry: Let your project dry completely before adding any additional coats of dye or sealant.
8. Protect Your Work: When finished, protect your work by sealing it with a clear finish like varnish. This will keep the color looking its best for years to come.
By following these tips and tricks, you can create beautiful projects with a blue wood dye that will last. Have fun experimenting and creating something unique!
Recommended Posts:

