Looking for a way to add some personality to your wooden furniture? Why not try dyeing it yourself? In this blog post, we will show you how to make a wood dye using natural ingredients. This is a great project for the weekend, and the results are stunning. Let’s get started!
How To Make A Wood Dye
Making your own wood dye is a great way to add some color to your woodworking projects, and it’s easy to do! In this blog post, we’ll show you how to make a wood dye using natural ingredients. This is a great project for the weekend, and the results are stunning. Let’s get started!
First, you’ll need to gather your supplies. You can find everything you need for this project at your local hardware store. Here is a list of what you’ll need:
- A clean, dry work area
- Fine sandpaper
- White vinegar
- Water
- A glass jar or container with a lid
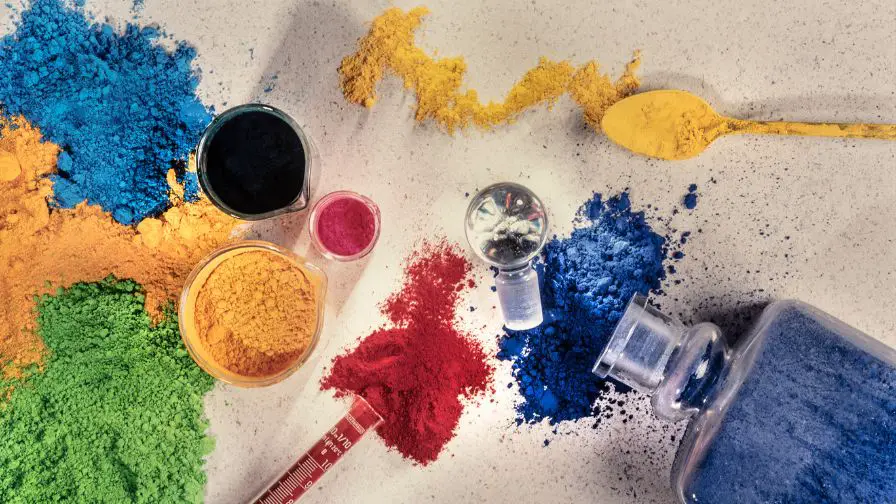
- colorant like dye power, coffee, tea, or berries
- A wooden stir stick
- Rubber gloves (optional)
- Safety goggles (optional)
To make your wood dye, you’ll need to mix equal parts water and vinegar in your glass jar. Then, add your desired amount of colorant to the mixture. We have used coffee grounds for a dark brown dye, but you can use any natural pigment that you like. Be sure to stir well until the colorant is completely dissolved.
Next, sand your wood surface with fine sandpaper to create a smooth finish. This will help the dye evenly absorb into the wood. Once you’ve sanded your piece, apply the dye using a brush or a rag. Work in small sections and be sure to wipe away any excess dye.
Let the dye dry for at least 4-8 hours before sealing it with a clear topcoat. And that’s it! You’ve successfully created your own wood dye. Now you can use it to add some personality to your wooden furniture. Thanks for following along, and happy crafting!
Can I Dye Wood With Food Coloring?
Yes, you can dye wood with food coloring. Although it’s not the best idea. Here’s why:
First, food coloring is water-based, and wood is porous. That means that the color will soak into the wood and be difficult to remove if you don’t like the result.
Second, food coloring is not very concentrated, so you’ll need to use a lot of it to get a good result. That can make the wood look patchy and uneven.
Finally, food coloring can fade over time, so your beautiful new wood dye job might not last as long as you’d like.
So, if you’re still set on using food coloring to dye wood, here’s what you need to do:
Mix the food coloring with water in a ratio of about one drop of food coloring per ounce of water. (You can always add more food coloring if you want a darker color.)
Pour the mixture into a spray bottle and spray it onto the wood.
Let the wood dry completely before applying a clear sealer. This will help protect the color from fading.
Now you have a beautiful, unique piece of dyed wood! Enjoy your new creation!
How To Apply The Wood Dye
Subscribe to WoodworkersJournal
Once you have your wood dye, it’s time to apply it. Here’s how:
First, make sure you’re working in a well-ventilated area. If possible, do this outdoors.
Next, put on gloves and eye protection. You don’t want the dye to get on your skin or in your eyes.
Now, sand the wood. You want to create a smooth surface for the dye to adhere to.
Once the wood is sanded, wipe it down with a tack cloth or damp rag to remove any dust.
Now it’s time to apply the dye. Using a liquid dye, pour it into a bowl or container. Dip a brush into the dye and apply it to the wood, working in long strokes.
Once you’ve applied the dye, let it sit for at least 15 minutes. Then, wipe off any excess with a clean rag.
Let the dyed wood dry completely before you proceed to the next step. Depending on the wood and the dye, this could take anywhere from a few hours to a day. Once it’s dry, you’re ready to move on to finishing your project!
If you want a deeper color, apply a second coat of dye. Otherwise, proceed to the next step.
Now that you’ve applied the dye, it’s time to finish your project. If you’re staining the wood, follow the directions on your stain. If you’re painting the wood, choose a paint that’s compatible with the type of wood you’re using.
Once you’ve finished your project, enjoy your new piece of furniture!
Tips And Tricks
Making a wood dye is not as difficult as you might think. With a few simple ingredients, you can create a beautiful and unique color for your next project. Here are a few tips and tricks to help you get started:
- Start by mixing your chosen colorants in a small bowl. You can use any combination of natural or synthetic dyes, but be sure to use gloves and a respirator mask if you are working with synthetic dyes.
- Once you have your desired color, apply it to the wood using a brush or sponge.
- Be sure to work in a well-ventilated area, as some of the fumes can be harmful.
- Allow the dye to dry completely before applying a top coat of finish, such as varnish or lacquer.
With these simple tips, you can easily create a beautiful and unique color for your next woodworking project. Give it a try and see for yourself!
Recommended Posts:

