Wood putty is a substance that is used to fill in the gaps and cracks in wood. It is a great way to repair furniture or woodwork, and it can also be used to cover up screws or nails that are showing. In this blog post, we will teach you how to apply wood putty like a pro!
How Do You Apply Wood Putty?
Applying wood putty is not difficult, but there are a few things you need to know before you start.
First, wood putty comes in two forms: pre-mixed and dry. Pre-mixed wood putty is ready to use right out of the container. Dry wood putty must be mixed with water before it can be used but double check the instructions on your product label.
Second, when you are ready to apply the wood putty, start by cleaning the area to be repaired with a damp cloth then you will need to choose the right application tool. For small jobs, you can use a putty knife. For larger jobs, you may need to use a wood chisel.
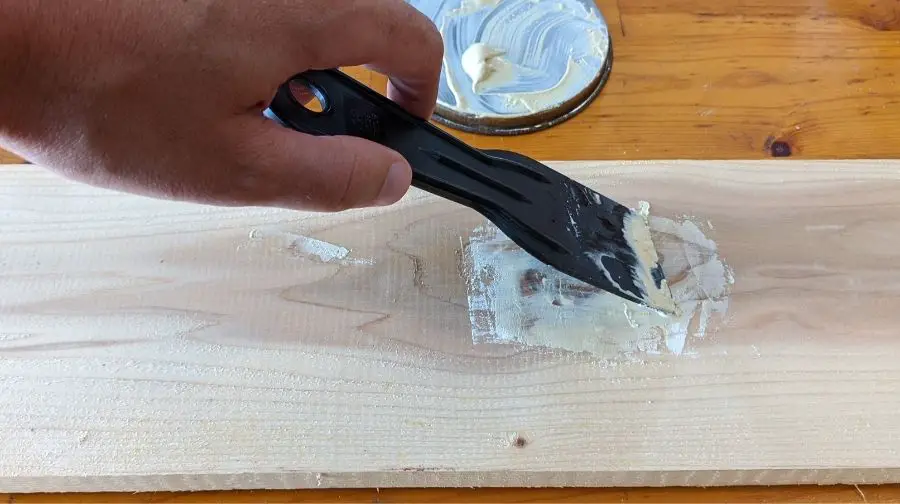
Once you have chosen the right application tool, you are ready to apply the wood putty. Start by taking a small amount of wood putty and spreading it over the hole or crack you are trying to fill.
For small holes, you can simply apply the putty and let it dry. For larger holes or cracks, you may need to apply multiple layers of putty and let each layer dry before applying the next.
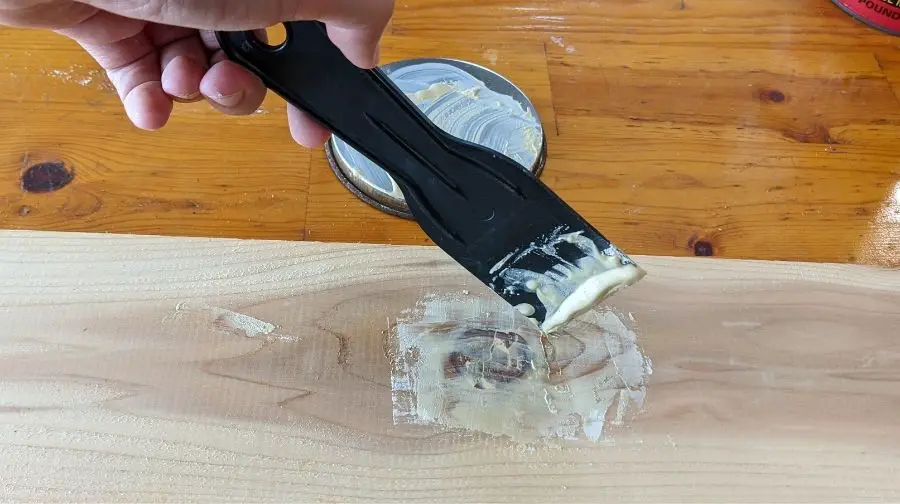
Use a putty knife or wood chisel to smooth out the wood putty and remove any excess putty from your workpiece. Allow the wood putty to dry completely.
Wood putty is better for fixing repairs on finished projects that have already been stained so you will want to match your putty color to your project. If you want to fix them prior to staining then it is best to use a wood filler instead of wood putty.
What Is Wood Putty And What Are Its Uses?
Wood putty is a type of wood filler that is used to fill in small holes, cracks, or gouges in wood surfaces. It is made from wood fibers, binders, and pigments, and can be purchased pre-mixed or as a dry powder that must be mixed with water before use.
Wood putty is commonly used to fill in small holes left by nails or screws, as well as cracks or gouges that may have been caused by woodworking tools. It can also be used to fill in gaps between wood molding and trim. When applying wood putty, it is important to choose a color that closely matches the wood being repaired.
There are two main types of wood putty: oil-based and water-based. Oil-based wood putty takes longer to dry but is more durable and less likely to shrink as it dries. Water-based wood putty dries more quickly but is not as durable.
Subscribe to This Old House on YouTube
Tips For Using Wood Putty
Here are a few tips on how to apply wood putty:
– Use a clean, dry cloth to apply the wood putty.
– Work the putty into the dent or scratch, using as little pressure as possible.
– Wipe away any excess wood putty with the cloth.
– Allow the wood putty to dry completely.
When To Use Wood Putty
You should use wood putty any time you need to make a cosmetic repair to a finished project. This includes filling in small holes, scratches, or dents. It can also be used to fill in gaps between wood pieces.
Wood putty works well on a variety of wood surfaces including painted wood, stained wood, and bare wood.
Wood putty is not meant for structural repairs. If you need to make a large repair or fill a large hole, you should use a wood filler instead. Wood filler is made from wood fibers and is much stronger than putty.
How To Mix Wood Putty
To mix wood putty, you will need:
-wood putty powder
-water
-container
Instructions:
Add the wood putty to the container. Slowly add water to the wood putty and mix it until it has a creamy consistency. Apply the wood putty to the crack, hole, or scratch with a putty knife. Wipe off any excess wood putty with a damp cloth. Allow the wood putty to dry for at least 24 hours.
If your looking to mix wood putty to match the color of your stained project you can mix separate wood putty colors to try to create the same color as your stain.
You could also use dye to mix in with your wood putty to create the color that best matches your project you’re repairing.
Recommended Posts:

