Cutting angles is an important skill when working with wood: you can hardly build anything if you aren’t able to angle at different degrees.
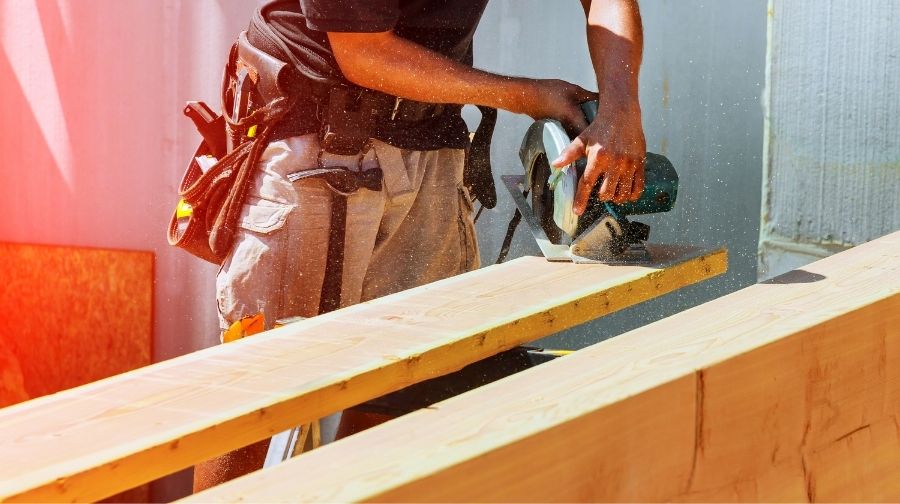
The best, most precise, and quickest way to cut angles on a piece of wood is by using a circular saw. While cutting angles isn’t particularly challenging, using the circular in the most appropriate and safe way is the most daunting part of the process. In this article, we’re going to explore how to cut wood with a circular saw: what tools you’re going to need, what safety precautions, and how to cut the different angles. By the end of this article, you’ll find out that, once you know-how, cutting angles with a circular saw is one of the easiest aspects of wood-crafting.
How To Cut Wood At An Angle With A Circular Saw
Here are the steps to cut wood at an angle with a circular saw:
-First, use a pencil to mark the cut line on the wood.
-Next, set the saw blade to the desired depth and angle.
-Then, align the saw blade with the marked line on the wood.
-Finally, start the saw and slowly guide it along the marked line.
As you can see, cutting wood at an angle with a circular saw is not difficult. Just follow these simple steps and you will be able to cut wood like a pro!
Cutting Wood At Angles With A Circular Saw: What Do You Need?
What tools are required to use a circular saw to cut wood at angles? Other than the saw itself and a piece of wood, you’ll need:
- A workbench or a sawhorse: when you use a circular saw, you need a support surface. You want to make sure it is solid and firm, and it isn’t wobbling. Professional workbenches or sawhorses are ideal; if you are not provided with any of them, make sure you can rely on a thick, solid, and firm table.
- Pen or pencil: you’re going to need them to draw a line that you can follow to cut the wood and place the circular saw in the right position. You can also use other tools to draw the lines that are going to guide the cut, such as rules, triangles, and goniometers.
- Guide items: sometimes, you want to use something as a guide during the cut. This “something” is usually a professional set of squares or – in most cases – it’s simply another piece of wood that serves as a guide block.
- Appropriate safety equipment: we’re going to discuss anything about safety in a dedicated paragraph (see below)
Cutting With A Circular Saw: Safety Measures
A circular saw is a potentially dangerous tool. You can’t harm yourself or anyone else if you use it properly, and to use it properly, you need to know what safety equipment you need and also what sort of attention and precautions you must have around such a tool.
Circular Saw Safety Equipment
When you use a saw, you know you usually know you need to protect your fingers, but many underestimate the importance of protecting your face, especially your eyes.
Splinters or small pieces of wood can break off and jump towards your face as you use the saw. This is why it’s very important to protect your eyes with special glasses: there is no need to spend a lot on this item. The glasses just need to be large and strong enough to be an effective physical barrier against any possible foreign object that comes dangerously close to your face.
To protect not only your eyes but also the rest of your face, masks can also be used with the same function of bouncing any wood splinters and avoiding them harming your face. This is particularly indicated when you need to make a small or extremely precise cut: when your face is fully protected, you can get closer to the area of work without risking any harm to your eyes or face.
The other part of your body that is going to be extremely close to the say is, of course, your fingers. Make sure you use the appropriate type of gloves. General use gloves can’t be considered appropriate here: you need special gloves that can protect your fingers from being harmed or cut in the case they come accidentally in contact with the saw.
This type of gloves can be large and uncomfortable. However, make sure you wear them anytime you use the saw: it would be too dangerous otherwise. You don’t have to wear them during the entire session of work; they’d be just too uncomfortable, and they would limit your manual skill. Once you have everything set up for the cut and you’re about to turn on the saw, that’s when you need to wear the gloves. As soon as you’ve finished your cut and you’ve turned the saw off, now you can pull them off and keep on working in full safety.
Circular Saw Safety Behaviors
Other than wearing your safety equipment, there are also some other precautions that you can take to be 100% safe around your circular saw.
1. Check your saw
Anytime you use your circular saw, you should be 100% certain that it works properly. In particular, check the retraining lower guard and make sure that it retracts and recovers in the right way. It’s the most important safety feature built-in your circular saw, and – if it’s defective – you shouldn’t use the tool at all.
Before doing your checks, unplug the saw so that you can’t turn it on accidentally (if it’s battery-powered, remove the battery). This check requires less than a minute, and it’s extremely important, so make sure you never miss it.
2. Hold your circular saw properly
Sometimes we take useless risks only because we don’t know how to use a tool properly. In the case of a circular saw, the inappropriate use could cost great damage and hurt.
First of all, you should make sure you buy the right circular saw according to your dominant hand: there are left and right circular saws. Buying the right circular saw is important because, when you use it and place your dominant hand on the main handle and the other on the auxiliary one, you must avoid crossing your hands.
3. Set the cut depth properly
When you cut with a circular saw, you need to set a cut depth. Always make sure that the blade is not exposed too much beneath the piece of wood that you’re cutting.
4. Use sharp blades
By dint of using them, blades become less and less sharp until you need to replace them. Always use sharp blades so that you don’t have to push too much on the material to obtain the cut.
Subscribe to WoodWorkWeb on Youtube
How Do You Cut A 90-Degree Angle With A Circular Saw?
Here are the steps to cut a 90-degree angle with a circular saw:
1. Draw your guideline
There are no particular suggestions here: draw a line where you want to make the cut, and make sure it stands out against the color of the wood.
2. Set the cut depth
When you use a circular saw, you need to set the cut depth before you make the cut. Measure the thickness of the piece of wood you’re cutting and set the depth so that it just exceeds it. As we’ve mentioned, don’t make the blade go too deep beyond the piece of the wood: it’d be dangerous and unnecessary.
3. Make your cut
Place the circular saw over the guideline. Since we’re cutting a 90-degree angle, no additional settings are required.
While you make the cut, make sure to hold a firm grip on the saw, push down, but you shouldn’t be pushing too hard. If you need to push hard to make the cut, it means the blade is not sharp enough, and you must replace it: the cut will be neater and the whole process safer.
At the end of the cut, loosen your grip.
How Do You Cut A 45-Degree Angle With A Circular Saw?
Here are the steps to cut a 45-degree angle with a circular saw:
– Set the blade of the saw to 45 degrees.
– Place the board you’re going to cut on a stable surface.
– Measure and mark the spot where you need to make the cut.
– Put your safety goggles on.
– Start the saw and slowly guide it along the marked line.
– Cut through the board until you reach the end.
– Turn off the saw and unplug it from the power source.
– Carefully remove the piece you just cut.
There you have it! Those are the steps to cut a 45-degree angle with a circular saw. Be sure to take all necessary safety precautions and always use proper protective gear when operating any power tools.
How Do You Cut A 50-Degree Angle With A Circular Saw?
Here are the steps to cut a 50-degree angle with a circular saw:
-Set the bevel angle of your circular saw to 50 degrees.
-Place the board you’re going to cut on a stable surface.
-Mark the cut line on the board.
-Line up the blade of the saw with the cut line.
-Start the saw and slowly guide it along the line.
-Apply steady pressure to the saw as you guide it along the line.
-Stop the saw when you reach the end of the line.
-Remove the board from the surface and check your cut.
There you have it! Those are the steps to cut a 50-degree angle with a circular saw. Give it a try and see how it goes. Good luck!
Recommended Posts:

