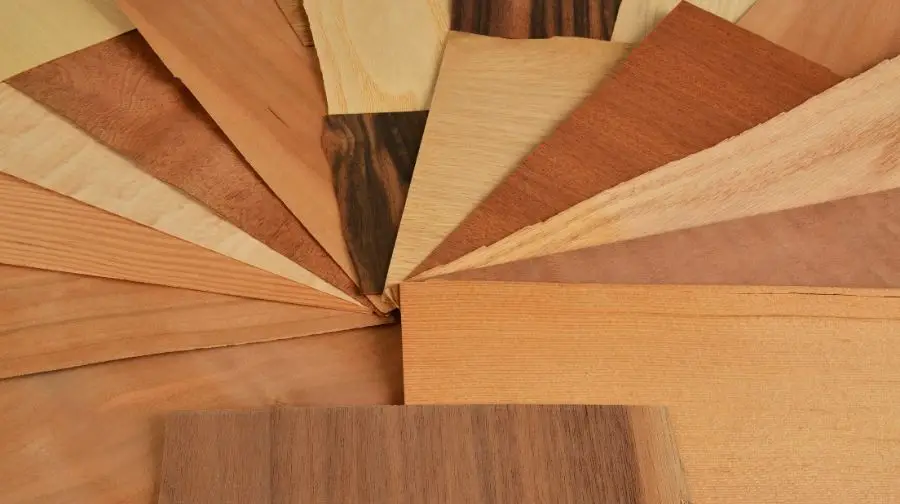
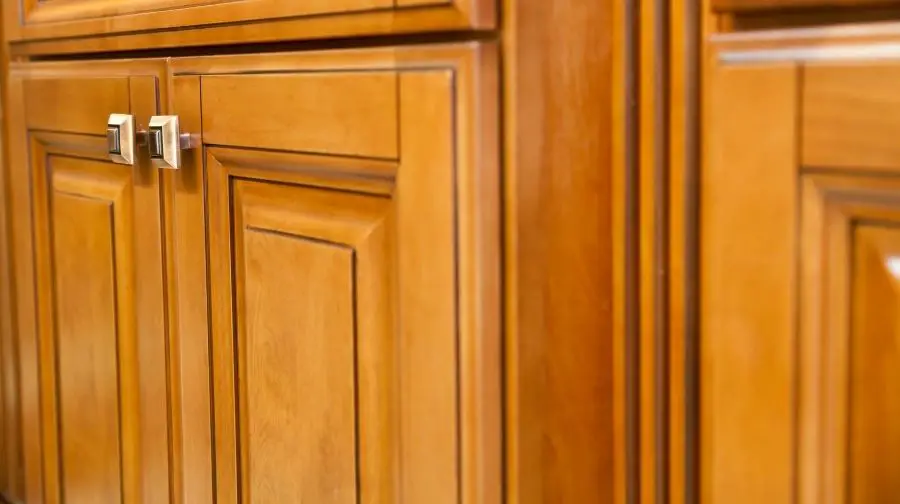
A Cabinet veneer is a cabinet that has been covered with thin sheets of wood. The cabinet veneers are usually matched to the cabinet’s style and color, but some people like to experiment with different combinations.
Cabinet veneer can be made from many different types of wood, such as maple, oak, cherry, or mahogany; it all depends on what you prefer and what your cabinet door is made out of. There are many benefits to using cabinet veneers: they make cabinets more durable and give them a nice finish! We hope this article about cabinet veneer was helpful for you!
What Is A Cabinet Veneer?
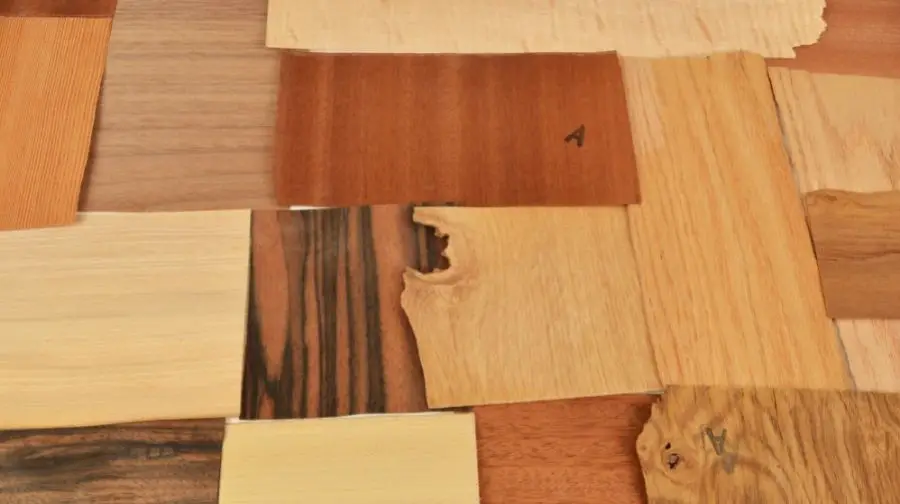
A cabinet veneer is a thin sheet of wood that has been cut and layered to look like cabinet doors. They can be made from one type of wood or multiple types; the only limit is your imagination!
Cabinet Veneer Sheet
As we mentioned before, cabinet veneers usually come in sheets that you attach onto cabinet doors and cabinet faces. A cabinet veneer sheet is made from a single type of wood or multiple types that are glued together to make them stronger.
Wood Veneer For Beginners, How To Work With Wood Veneer
Subscribe to Jon Peters – Longview Woodworking on Youtube
Cabinet Veneer Strips
Sometimes cabinet veneers will come in strips which you can attach onto cabinet door frames. To install these strips properly, it’s important to make sure cabinet door frames are clean and smooth.
Cabinet Veneer Colors
There is a wide range of cabinet veneer colors to choose from; you can find ones that match your cabinets perfectly or stand out in contrast! Some cabinet veneers come with different finishes such as matte, gloss, lacquer, clear coat, and more.
Cabinet Veneer White
White cabinet veneers are a popular choice for cabinets, especially in kitchens. To install white cabinet veneers, you simply need to make sure cabinet doors have been sanded down thoroughly before applying the veneer sheets to them. You also want to be careful not to get any veneer adhesive on cabinet door frames.
Cabinet Veneer Tape
Some cabinet veneers come with pre-applied tape that you can use to attach them to cabinet doors. Without the tape, it may be difficult to keep cabinet veneers attached properly; this is where cabinet veneer tape comes in handy!
How to Apply Wood Veneer
Subscribe to Rockler Woodworking and Hardware on Youtube
Cabinet Veneer Peeling
In the unfortunate event that cabinet veneers start to peel, you can easily re-adhere them with cabinet veneer adhesive. There are a few different types of cabinet veneer adhesives, so make sure to use one specially made for cabinet door frames.
Cabinet Veneer Kit
Most cabinet veneers come with all the necessary supplies to install them onto cabinet doors, but sometimes you might need a few extra things: sandpaper, wood adhesive, and acrylic glaze.
Cabinet Veneer Plywood
Some cabinet veneers are made from plywood; this is one of the most expensive cabinet veneer options. Plywood cabinet veneers are made out of plywood with a thin layer of cabinet-grade wood attached to the top and bottom, which is then sanded down to make it smooth for attaching to cabinet doors.
Cabinet Veneer Repair
If cabinet door frames have any nicks or scratches in them, cabinet veneers can help cover up these blemishes. You just want to make sure cabinet door frames are sanded down properly before putting cabinet veneer adhesive on them.
Cabinet Veneer Panels
Some cabinet veneers come in panels that you attach to the sides of cabinets. Because they’re not used for cabinet doors, cabinet veneer panels are usually made out of plywood.
Cabinet Refacing in Just 3 Minutes | Kitchen Magic
Subscribe to Kitchen Magic on Youtube
Veneer Cabinets Pros Vs. Cons
Ultimately cabinet veneers can be a great addition to your cabinets; they make them more durable and give them an updated look. Cabinet veneers do have some downsides, though: if you don’t maintain cabinet veneer cabinet doors properly, they can get damaged easily.
Pros:
– cabinet veneers can be a quick and easy way to update cabinets
– cabinet veneer cabinet doors are very durable
– cabinet veneers come in a wide range of colors and finishes
– cabinet veneer cabinet doors are easy to install onto cabinets
Cons:
– cabinet veneer cabinet doors can be difficult to repair if they get damaged
– Cabinet veneer cabinet doors are very delicate, so you have to take special care when sanding, cleaning, or maintaining them.
How Do You Attach Veneers To Cabinets?
There are several ways cabinet veneers can be added. The traditional method of applying glue to both surfaces and then clamping them together until they dry takes time, but it does work well if done properly. Another way is using a brad nailer with special nails that have an angled head, so once installed, you cannot see where the cabinet veneer was attached. A third method is to use an air stapler that attaches the cabinet veneers with staples, this also has its merits, but again if not done properly, it can look less than professional.
Are Veneer Cabinets Good?
Veneer cabinets are not as popular today as they were years ago. Simply because cabinet companies have found ways to make real wood or even engineered woods look like cabinet veneers, plus the cost has gone down due to advances in technology and manufacturing processes.
Can You Put Veneer Over Kitchen Cabinets?
No, you cannot put cabinet veneers over kitchen cabinets. The glue will not hold up to heat and moisture like it is needed in a kitchen environment. However, cabinet veneers can be applied on top of lower grade wood or plywood that has already been installed prior to the cabinet installation.
Can You Paint Cabinets That Are Veneer?
Yes, you can paint cabinets with veneers. However, it is not recommended because the moisture in the air will cause expansion and contraction of the wood causing unsightly cracks to appear on your freshly painted cabinet doors or drawer fronts. It is best if you decide to paint cabinet veneers to use a lacquer or polyurethane finish.
Flexible Laminate Veneer
Subscribe to Keystone Wood Specialties on Youtube
How Do You Fix Veneer On Kitchen Cabinets?
One way is to remove the cabinet doors and any drawers, sand off all of the old glue residues so you have clean wood that can be glued back together using either liquid hide glue or cabinet grade glue with clamps.
The other way is to remove the cabinet doors, drawers, and any hardware that may be attached, then use a veneer saw or chisel to cut away the bad area of the cabinet veneer.
Once you have completed this step, take your cabinet wood back outside for about an hour so it can dry off, this will make it easier to sand with a belt sander or orbital palm sander.
After you have blended in the cabinet veneer, your cabinets are ready for re-installation and finishing, if desired.
How Do I Know If My Cabinets Are Veneer?
You can tell by looking at the cabinet doors or drawer fronts. If there are no screws in them, then you have a cabinet veneer. Also, cabinet veneers tend to be thinner than traditional cabinet wood, so they will not require any additional support underneath other than that of your standard cabinets.
How Do I Choose the Best Cabinet Veneer?
Choosing a cabinet veneer can be a complex and sometimes confusing task. There are so many options to choose from that it is hard to know where to start or what you really need. Here we will go through the process step by step and hopefully help take some of the confusion away. Before we get into which cabinet veneer may be right for you, let’s talk about cabinet veneers in general.
1. The cabinet veneer should be durable.
Cabinet veneers are simply pressed fiberboards that have been coated with a thin layer of plastic resin. The most common cabinet veneer is high-density fiberboard (HDF). It has the benefit of being very strong and resistant to moisture, but it also weighs more than other options like MDF.
It is important to ensure the cabinet veneer you have chosen will hold up in your environment and any potential moisture issues that may come about from spills or cooking. If this isn’t enough, MDF cabinet veneers can also be painted, so if a customer changes their mind, it’s not an issue!
2. The cabinet veneer should be low maintenance.
Cabinet veneers are a great option for those of you who don’t want to deal with the process of staining and finishing wood cabinets every few years. Cabinet veneers come in many different colors, finishes, and styles, so it is easy to find one that suits your taste or home decor.
3. The cabinet veneer should be easy to maintain.
Cabinet veneers are a great option for those of you who don’t want to deal with the process of staining and finishing wood cabinets every few years. Cabinet veneers come in many different colors, finishes, and styles, so it is easy to find one that suits your taste or home decor.
4. The cabinet veneer should be easy to install.
Cabinet veneers come as a complete kit that includes the cabinet faces, doors, and drawer fronts all in one package. These packages have been pre-assembled into “kits,” so they are ready for installation right out of the box! This is another reason why cabinet veneers are perfect for cabinet refacing projects.
Cabinet Veneer Types
So now that you know what to look for, let’s go over the different styles of cabinet veneer available and which one may be right for your cabinet project. There are three main types: solid wood (or real wood), patterned cabinet veneers, and cultured stone cabinet veneers.
Solid Wood Cabinet Veneer: these cabinet veneers are created from real wood and have a beautiful finish that is sanded smooth. Solid cabinet veneers come in many different species, including maple, cherry, oak, hickory, and more! These cabinet veneers can be sanded down to provide an even smoother finish and allow cabinet refacing companies to work with many different cabinet styles.
Patterned Cabinet Veneer: these cabinet veneers are created from real wood but have a unique pattern on the surface (some may even resemble paint). These cabinet veneers come in some of your favorite designer patterns like shaker, casual or rustic. These cabinet veneers are perfect for those of you who don’t want to deal with caring for real wood but also love the look.
Cultured Stone Cabinet Veneer: these cabinet veneers are created from either natural or engineered stones that have been specially treated so they can be used as cabinet panels. These cabinet veneers are very durable and fire-resistant cabinet veneers. These cabinet veneers are perfect for those of you who love the look of stone but don’t want to deal with any upkeep or risks that come along with the natural stone.
How to Reface Cabinets With Veneer?
You may be familiar with cabinet veneer, but how much do you really know about this material? Perhaps your kitchen cabinets are old and outdated, or your remodeling plans include changing the cabinet styles. Whatever the case, cabinet refacing is a great option for those who want to update their kitchens without replacing all of their cabinetry. Plus, a cabinet veneer is an affordable way to create a stunning new look.
It can be challenging to install cabinet refacing on your own, but our step-by-step guide will walk you through the process and make it easy for you! If cabinet doors are already installed in place, simply remove them before starting this DIY project.
Step One:
First, you should remove the cabinet veneer from the cabinet frame. Then, add a bead of cabinet refacing adhesive to all sides and ends of your cabinet. Be sure not to get any on the surface where you’ll be adding new veneer! Next, roll out a length of cabinet foil onto a flat workspace with an edge that will help you tightly wrap the cabinet veneer around the cabinet frame.
Step Two:
Lay your cabinet on top of cabinet foil, with its backside facing up, and center it as best as possible to do a neat job later on. Apply an even layer of adhesive to the exposed sides and ends using a roller or paintbrush before carefully rolling the cabinet veneer onto the cabinet frame and removing any air bubbles using a squeegee. Run your fingers over its surface to ensure it is tightly adhered to before moving on to Step Three.
Step Three:
Before you start covering up all of that adhesive, make sure that cabinet foil doesn’t have any air bubbles or wrinkles in it. For cabinet foil with adhesive on one side, simply remove the release paper to reveal the sticky surface. Then, carefully align it over the cabinet veneer and smooth out any bubbles or wrinkles using your fingers before trimming away excess cabinet foil around cabinet edges using a utility knife.
Step Four:
After you’ve applied both cabinet refacing surfaces, allow cabinet refacing adhesive to dry according to the manufacturer’s instructions. This can be anywhere from a few hours up to overnight, depending on temperature and humidity levels as well as the cabinet veneer product that you’re using. Once cabinet refacing has dried completely, apply another coat of cabinet refacing adhesive around all sides and ends where it was applied previously.
Step Five:
Attach cabinet doors and drawers the same way that they were before cabinet refacing to finish your project! It’s that easy to add a cabinet veneer to any existing kitchen cabinets, giving them an entirely new look in no time at all without breaking the bank or requiring major renovations. Whether you prefer a modern cabinet veneer or a cabinet refacing antique finish, you’re sure to find cabinet doors and drawer fronts that suit your style.
Recommended Posts:

