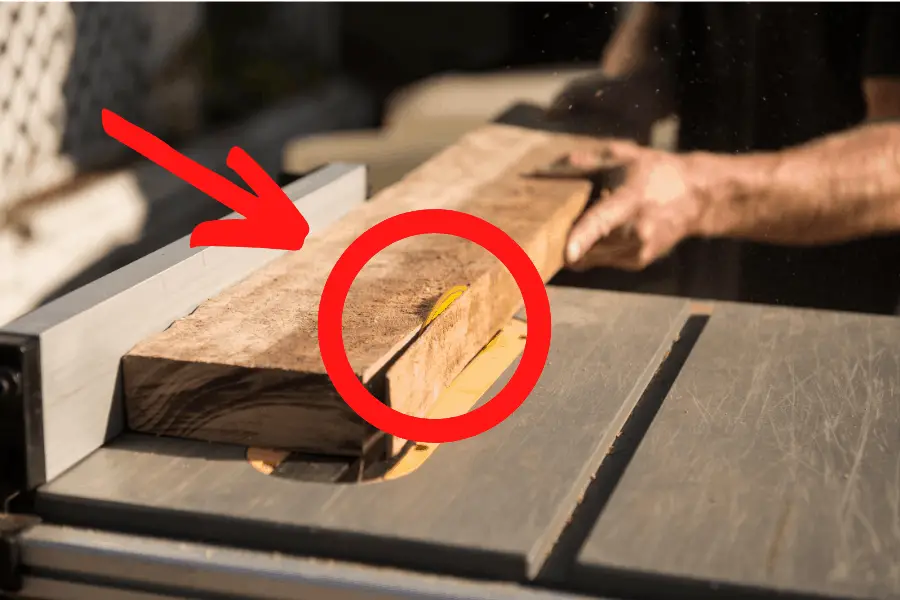
It can be extremely frustrating and annoying when your trying to finish a project but you notice your cuts aren’t straight. I decided to do some research to find all the reasons this happens and how to solve them so you can get back to your project.
Why Does My Table Saw Not Cut Straight?
- Improper Technique
- Blade Misaligned
- Damaged/Warped blade
- Loose/Wobbly Blade
- Misaligned Fence
- Bowed/Bent Fence
If you want to learn more about the details of each cause and how to resolve them to help you get back on the straight and narrow read below.
Why Does My Table Saw Not Cut Straight?
Improper Technique:
Improper technique when cutting pieces of wood can easily lead to non straight cuts. It’s always best to learn the basics then test and practice them before making cuts on your project. If you are an experienced woodworker than you can skip over this section because you’ve probably had plenty of practice with your technique.
- Use your blade guard. If you have set it aside or never installed it then grab the blade guard and set it up because it could help prevent a major injury. The guard keeps your fingers away from the blade and prevents chips from flying up. It should also keep the cut from pinching causing the board to kickback at you. I cover table saw safety in more detail in this article “What Is The Safest Saw? (You Won’t Believe How Safe This Is)”
- Lower the blade to the height of the wood. Lower the blade so that the top of your piece of wood height is right at the start of the blade tooth where it meets the base of the blade. This is called the bottom of the gullet.
- Use a Push Stick. This tool allows you to keep your fingers and hands at a safe distance from the blade.
- Keep the wood tight to the fence. Press the wood firmly against the fence as you slowly run the wood all the way through the saw blade. Switch off the blade after each cut.
- Use an outfeed table for long cuts. With long pieces of wood set up an outfeed table for the wood to rest on. Otherwise it can be tempting to reach over the blade to catch the wood.
- Use commonsense Table Saw safety rules. Stand to the side of the blade when you’re cutting and not directly behind it to avoid being hit if the wood kicks back. Prevent anyone else in the area from being in this danger zone. Unplug the table saw when performing maintenance like blade changes or adjustments. Wear protective safety gear like glasses, ear plugs, and dust mask. Unplug the table saw if resetting a tripped breaker or replacing a fuse.
Blade Misaligned:
Having your blade misaligned can lead to burn marks, make it more difficult to push your wood piece through and cause dangerous kickbacks of the wood. Even a small misalignment that may not affect your woodworking could still be problematic when trying to use any sleds on your table saw.
Rockler.com put together some great information and a video on this issue see below.
How To Check The Alignment Of Your Table Saw Blade.
- Always start by unplugging your table saw.
- Remove the table insert (lid covering your blade) to get a clear view of all the parts.
- The blade and motor are mounted to a couple of brackets called the trunnion; it is either mounted to the saw’s base or underside of the table. This can slide out of alignment during manufacturing or shipping.
- It is difficult to see the misalignment with the naked eye so you will need to measure to see if it is out of alignment.
- Raise the blade to it’s full height and use a T-square to check that the blade is at a 90 degree angle to the table surface.
- You want to measure the distance between the front of the blade and miter slot as well as the back of the blade and the miter slot. You can use an accurate combination square, scrap piece of wood with screw on the end, or dial indicator.
How To Adjust Your Table Saw Blade When It’s Misaligned.
- All table saws vary so first check your table saw’s owner manual.
- Always unplug your table saw.
- Generally, with contractor, job site, and hybrid table saws the trunnions are mounted to the underside of the saw table so you make the adjustment to the base. Cabinet saws trunnions are mounted to the base.
- With a Cabinet saw you just need to adjust the angle of the table to get the blade in equal alignment until the front and back of the blade line up with the miter slot. Just remove the bolts under the table and tap the table on the corner to get it aligned.
- With a contractor, job site, and hybrid table saw you loosen the bolts to the stationary table surface and adjust the base assembly of the motor and blade until aligned.
Subscribe to Rockler Woodworking and Hardware on Youtube
Damaged/Warped blade:
We put our table saw blades through a lot over time. We cut various types of wood, over heat the blade at times when cutting and get in a rush which can lead to using improper technique.
Wear and tear on the blade can lead to it “warping” meaning it can get bent and teeth get dull or break off. This can lead to the blade having what is called “runout” which is wobbling from side to side when in use.
It is easy to check to see if this wobble is caused by a warped blade. Just change it out with a replacement blade. If it no longer wobbles, then it is safe to say the blade was at fault.
The easiest option is to just replace the blade and move on with your project rather than try and fix the bend in the blade which could lead to weakening the blade causing damage to you or your table saw.
Loose/Wobbly Blade:
A loose or wobbly blade will lead to your cuts not coming out straight. Like I mentioned above this is known as “Runout” which is when the blade wobbles from side to side.
The first thing to check is to make sure all of your blade pieces are clean. Take off your flange, blade, and bolt to check them to make sure there is no debris in the mix. When dissembling these pieces take note of if the bolt holding the blade in place was loose or not. This could be the reason for the wobble; over time with the high amount of rotations the blade makes the bolt can loosen.
Make sure your flange is flush and not rocking back and forth when you press it firm. If it is clean and there is no debris it could be what is called a Burr in the metal of one of your pieces causing the wobble. A burr is just a little bump in the metal keeping it from being flush.
To remove a burr you can use a file to smooth it our or a burr knife. See the video below for more details.
Subscribe to Highland Park Lapidary on Youtube
Other common causes for this are a warped blade which I covered above or a bent Arbor. The table saw arbor is the shaft that holds the blade in place.
See the arrow pointing to the arbor below.
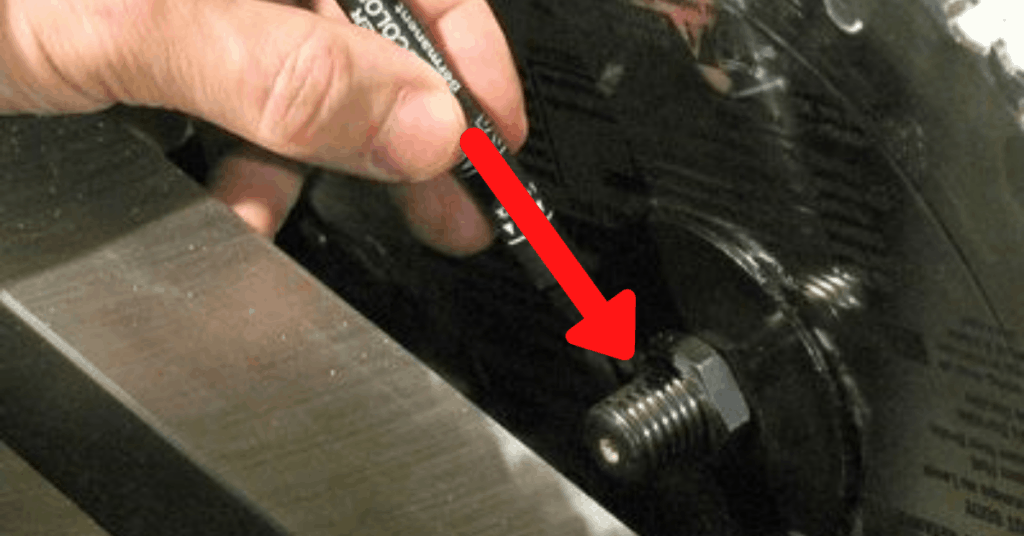
Image Source: https://woodgears.ca/saw_arbor/
How To Check If Your Table Saw Arbor Is Bent.
- Unplug the table saw.
- Remove your blade.
- Attach your dial indicator to your saw table.
- Set the plunger perpendicular to the smooth part of the arbor near the threads firmly.
- If the dial shows a variance as you rotate the arbor more than a couple thousandths of an inch the arbor is bent.
- Unless you have experience in machining metal parts it is best just to replace it.
- If you want to give an attempt at filing it down to correct the issue check out this article. https://woodgears.ca/saw_arbor/ or watch the video below.
Subscribe to Matthias Wandel on Youtube
Misaligned Fence
A misaligned fence on your table saw will lead to cuts not coming out straight, burnt cuts and excessive saw dust. The worst part is it could cause a dangerous kickback of the wood because the fence can pressure the wood against the blade and cause it to fly out. Some even prefer to keep the rear side of the fence open a little bit typically between .015” to .030” to make sure the wood and fence don’t pinch causing the wood to kickback. For dado cuts reset your fence without being open in the rear.
Checking your fence alignment is something to be considered as routine maintenance and should be done prior to each cutting project. The fence can get knocked out of alignment just from daily use of the saw.
How To Align Your Table Saw Fence.
- First unplug the table saw then make sure the blade and the miter slot are aligned. See above for details.
- Option 1: A quick way to see obvious misalignment is to slide your fence up to the miter slot and use your finger to feel and measure if there is a gap on the front or rear side.
- Option 2: A simple way is to cut 2 blocks of wood to fit in your miter slot at the front and rear of the table. Loosen the bolts or screws to adjust parallelism and line up the fence with the blocks.
- Option 3: Dial Indicator or Combination Square: Place the indicator in the miter slot and measure the front and rear ends of the fence. As long as the difference is less than 15-20 thousandths of an inch it will be fine.
Subscribe to Rockler Woodworking and Hardware on Youtube
Bowed Fence
A bowed/bent table saw fence can cause your cuts to come out less than perfect. It can also cause your wood to slide around on you as your ripping through.
Other than replacing the entire fence creating an “Auxiliary Fence” to fit over your original fence is a nice alternative solution to fix this problem and has additional beneficial uses with certain cutting projects.
How To Build An Auxiliary Fence.
There are tons of different auxiliary fence styles and each style can provide additional benefits to your specific project. A simple auxiliary fence is all that is needed to resolve a fence with a bow or bend in the middle.
- Cut a strip of plywood to fit the length and height of your table saw fence.
- Make sure to cut a straight flat edge on both long ends of the plywood.
- Once the plywood is cut to fit you can use 2 clamps to attach it to the fence. This method gives you more flexibility in being able to easily remove it when needed but you can always attach it more permanently if necessary.
- You will need 2 Fence Clamps to attach the plywood to the fence.
- Measure and drill a hole on the front and rear side of the plywood while making sure the clamps won’t interfere with any setting adjustments on your fence then you can attach the plywood.
Subscribe to Ron Paulk on Youtube
Woodworking Joke:
When Don’s wife visited the woodworker’s shop, she was shocked at the state of the men’s bathroom. She went right down to the hardware store and bought bleach and a toilet brush.
A month later she stopped by again to check on the progress, but nothing had changed.
“You’re not using the bleach and toilet brush!”
“Oh, Honey,” he replied, “I tried them, but the paper is so much softer.”
Source: Woodworking Jokes: Compiled by the editors of WoodEzine.