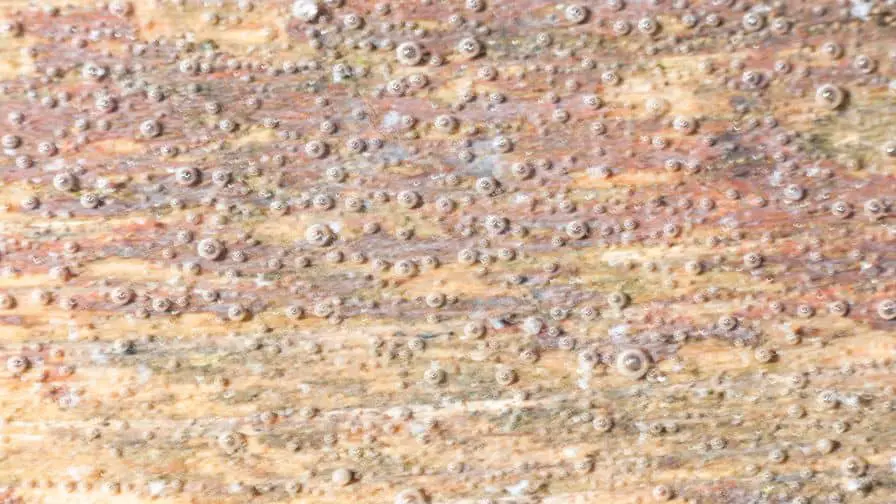
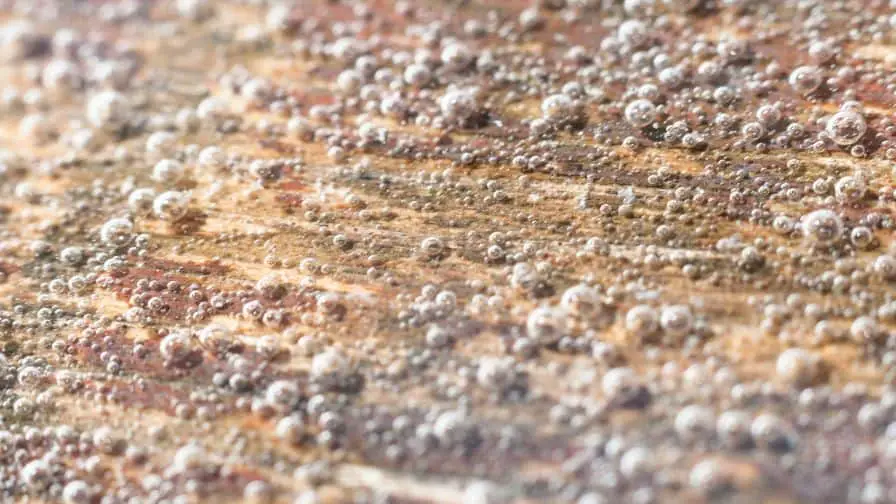
If you have recently applied a coat of polycrylic to your wooden project and noticed that it is bubbling, you are not alone. This can be a common issue, but there are ways to fix it. In this blog post, we will discuss the causes of bubbling polycrylic and how to prevent it from happening in the future. We will also provide tips for fixing the bubbling paint if it has already occurred.
Why Am I Getting Bubbles In My Polycrylic?
It’s likely that the bubbles are being caused by shaking the can too much, or by not properly preparing your brush before applying the polycrylic. To avoid bubbles, make sure you lightly brush the surface of the polycrylic before applying it to your project. With a little extra care, you can avoid those pesky bubbles and enjoy a smooth, professional finish.
What Is Bubbling Polycrylic And What Causes It
Polycrylic is a type of polyurethane finish that is often used on wood surfaces. It is durable and provides a high-gloss finish. However, polycrylic can sometimes bubble when applied to a surface. This can be caused by several factors, including incorrect application, humidity, or temperature.
Make sure you are using the correct type of brush. Polycrylic should be applied with a natural bristle brush. Synthetic brushes can sometimes cause bubbling.
- Apply the polycrylic in thin layers. Thick layers are more likely to bubble.
- Avoid applying polycrylic in humid conditions. If possible, wait for a day with low humidity before applying the finish.
- Make sure the surface is clean and dry before applying polycrylic. Any dirt or dust will cause the finish to bubble.
- Apply polycrylic in a well-ventilated area. The fumes from the finish can cause bubbling if they are not able to disperse properly.
If you follow these tips, you should be able to avoid bubbling polycrylic. If you have already applied the finish and it is bubbling, you can try to fix it by sanding the surface and reapplying a thin layer of polycrylic.
How To Prevent Bubbling Polycrylic From Happening In The Future
Subscribe to ML Campbell
It’s easy to get caught up in the moment and forget to do something as simple as stirring your product. But, trust us, it’s worth taking that extra minute (or two) to give your can of polycrylic a good stir before you start painting.
Not only will this help to evenly distribute the paint pigments, but it will also help to prevent any air bubbles from forming and ruining your project. If you’re using a brush, be sure to use long, even strokes to avoid creating any new bubbles.
If you’re painting over an existing paint job, be sure to thoroughly clean the surface before you start. Any dirt or debris that’s left behind can cause bubbles to form as well.
Once you’re finished painting, take a step back and check your work for any areas that may have been missed. If you see any bubbles, pop them with a needle and then smooth out the area with your brush.
With just a little bit of care and attention, you can avoid bubbling polycrylic and have a beautiful, smooth finish that will last for years to come.
Will Bubbles In Polyurethane Go Away?
It depends on what kind of bubbles you’re talking about. If you’re referring to the small air pockets that can sometimes form when polyurethane is first applied, then yes, they will eventually go away on their own. However, if you’re talking about larger bubbles or blisters that have formed after the polyurethane has already dried, then you’ll likely need to sand them down and reapply the finish.
How Do You Get Bubbles Out Of Polyacrylic?
If you’re working with polyacrylic and you notice some bubbles forming, don’t panic. There are a few ways to get rid of them and continue working on your project.
One way to remove bubbles is to use a pin or needle to pop them. This will release the air inside and allow the polyacrylic to flatten out again.
Another way to get rid of bubbles is to use a heat gun or hair dryer on low setting. Hold the heat gun away from the polyacrylic and move it around until the bubbles start to disappear.
Try sanding down the area that is bubbling. This will help to remove any excess finish that may be causing the problem.
If you’re working with a large area of polyacrylic, you may want to use a vacuum press. This will remove all the air from the polyacrylic and give you a smooth, bubble-free surface.
So there you have it – a few ways to get rid of bubbles in polyacrylic. Just remember to take your time and be careful not to damage the polyacrylic while you’re working on it.
What Will Happen If I Don’t Sand Between Coats Of Polycrylic?
If you don’t sand between coats of polycrylic, the finish will be rough and uneven. The paint will also have a difficult time adhering to the surface, which can lead to peeling and flaking. In addition, the polycrylic won’t be as durable and it will be more susceptible to scratches and other damage.
How Do I Get A Smooth Finish With Polycrylic?
There are a few things you can do to get a smooth finish with polyacrylic.
First, make sure that you sand the surface before you apply the polycrylic. This will help to create a smooth surface for the polycrylic to adhere to.
Second, when you apply the polycrylic, use a brush with soft bristles. This will help to avoid any brush strokes in the finish. Lastly, make sure that you apply thin coats of polycrylic. This will help to avoid any drips or runs in the finish.
Another tip is to wait until the polycrylic is dry to the touch before you sand it. This will help to create an even smoother finish.
following these tips should help you to get a smooth finish with polycrylic.
Is It Better To Brush Or Roll Polycrylic?
If you’re looking for a smooth, even finish, then brushing is the way to go. A synthetic bristle brush will help to evenly distribute the Polycrylic over the surface. Rolling can also work, but you have to be careful not to create any bubbles. So, if you’re looking for a smooth finish, go with brushing.
Recommended Posts:

