When it comes to wood finishing, many people are unsure of the best methods to use. One question that often comes up is whether or not you can use a rag to apply polyurethane. Yes, but there are a few things you need to know to do it correctly.
In this blog post, we will discuss the proper way to use a rag to apply polyurethane, as well as some tips and tricks for getting the best results!
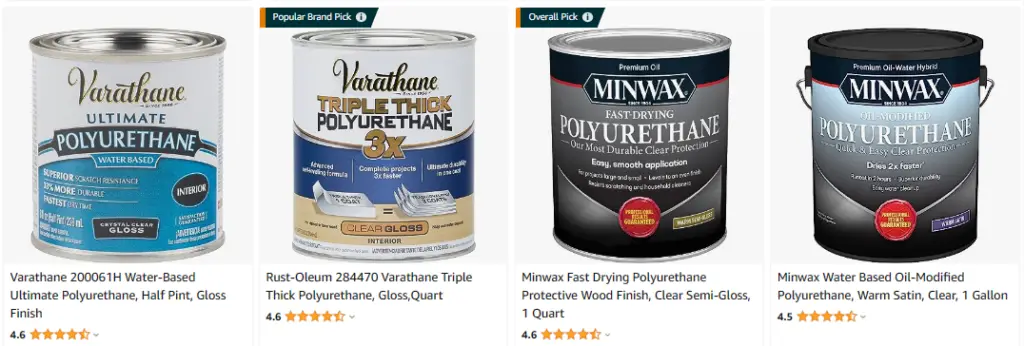
Click Here To Check The Pricing On Amazon
Table of Contents
Can I Use A Rag To Apply Polyurethane?
Yes, you can use a rag to apply polyurethane. However, there are a few things you should keep in mind.
First, make sure the rag is clean and free of any lint or debris.
Second, saturate the rag with the polyurethane and then wring it out so that it’s not dripping.
Third, apply the polyurethane in a thin and even layer.
Fourth, allow the first coat to dry completely before applying a second as desired.
Keep these tips in mind and you’ll use a rag to apply polyurethane like a pro!
Subscribe to mmschweizer on YouTube
Should I Apply Polyurethane With A Brush Or Rag?
Some people say that applying polyurethane with a brush will give you the best finish. Others say that using a rag is the way to go. So, which is the right way to apply polyurethane?
There are benefits to both methods.
Applying polyurethane with a brush gives you more control over the amount of finish that you’re applying. You can also get into tighter spaces with a brush.
On the other hand, using a rag to apply polyurethane is easier and gives you a more even finish. It’s also less likely that you’ll end up with brush strokes in your finish.
Can You Apply Polyurethane With Microfiber Cloth?
Yes, you can apply polyurethane with a microfiber cloth. You will need to make sure that the microfiber cloth is clean and dry before you start. You will also need to not over-apply the polyurethane, as this can cause streaking. Once you applied the polyurethane, you will want to use a clean microfiber cloth to buff it out.
It is important to note that you should never use a regular cotton cloth when applying polyurethane. This is because the cotton can leave behind lint that is visible once the polyurethane dries. Microfiber cloths are much less likely to cause this problem.
When you are going to use a microfiber cloth to apply polyurethane, make sure that you take the time to do it right. It may take a little bit longer than using a regular cloth. But it is worth it in the end. Your floors will look great and you can enjoy them for years to come!
Can You Apply Polyurethane With A Sponge?
Yes, you can apply polyurethane with a sponge, but there are a few things you need to know before you start.
Polyurethane is a durable finish that can be applied to wood floors, furniture, and other surfaces. It is important to choose the right type of polyurethane for your project and to follow the manufacturer’s instructions carefully. Applying polyurethane with a sponge is a quick and easy way to get a smooth, even finish.
Here are a few tips for applying polyurethane with a sponge:
– Use a clean sponge and make sure it is dry before you start.
– Pour the polyurethane into a container that is large enough to dip the sponge into.
– Apply the polyurethane to the surface in a smooth, even motion.
– Allow the first coat of polyurethane to dry completely before applying a second coat.
Can You Apply Polyurethane With A Roller?
Yes, rolling on a finish is often quicker and easier than brushing it on. It leaves a much smoother surface with fewer brush marks. Polyurethane dries slowly, so you have plenty of time to even out the finish before it starts to set up. Work in a well-ventilated area, and wear a respirator mask and gloves to avoid breathing in fumes or getting the finish on your skin.
To apply polyurethane with a roller:
-Start by pouring some of the finish into a paint tray.
-Dip the roller into the finish, and roll it back and forth to load it with paint.
-Roll the finish onto the surface in long and even strokes.
-Work in small sections to avoid creating puddles or streaks.
-Let the first coat of polyurethane dry completely before applying a second coat.
Subscribe to Debt-Free DIY on YouTube
How Do I Choose The Right Type Of Polyurethane For My Project?
There are three main types of polyurethane: oil-based, water-based, and solid. Each type has its own unique set of benefits and drawbacks.
Oil-based polyurethanes have a reputation for durability and resistance to wear and tear. They’re also easy to apply and are less expensive than other types of polyurethane. However, they can yellow over time and are not as easy to clean as water-based polyurethanes.
Water-based polyurethanes have low odor and quick drying time. They’re also more resistant to yellowing than oil-based polyurethanes. However, they’re more expensive and can get difficult to apply evenly.
Solid polyurethanes are the most durable type of polyurethane. They’re also the most expensive and have the longest drying time. But when you’re looking for a long-lasting finish, it is the way to go.
No matter which type of polyurethane you choose, make sure you follow the manufacturer’s instructions for application and cure time. Always test the finish in an inconspicuous area before applying it to your project.
With a little time and effort, you can get a great-looking finish that will protect your surfaces for years to come.
What Are The Steps For Applying Polyurethane With A Rag?
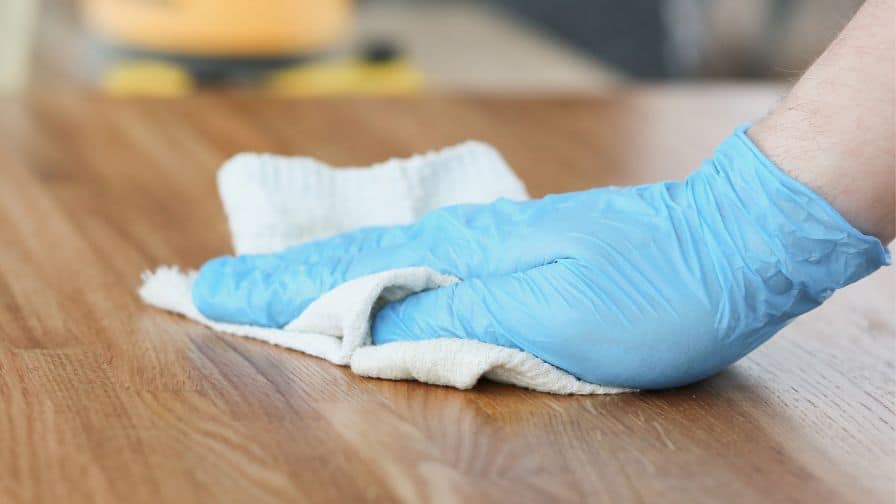
Polyurethane is a clear finish that applies to wood to protect it from scratches, stains, and water damage. Applying it with a rag is a quick and easy way to get a smooth and even finish.
Here are the steps for applying polyurethane with a rag:
-Wipe down the surface with a rag to remove any dust or debris.
-Pour a small amount of polyurethane onto the rag.
-Wipe the rag over the surface in a thin and even layer.
-Let the polyurethane dry for at least 24 hours before using the surface.
Repeat these steps until you have the desired number of coats. You can get away with two or three coats. But more is necessary for high-traffic areas. Sanding between each coat will help to create an even and smooth finish. Let the final coat dry for at least 48 hours before using the surface.
What Are Some Tips For Getting The Best Results When Using A Rag To Apply Polyurethane?
Below are some tips for you to take note of:
When using a rag to apply polyurethane, it’s important to use a lint-free rag. So that you don’t end up with any unwanted fibers on your surface.
You’ll also want to wipe in the direction of the grain to avoid any streaks.
It’s also important to apply thin and even coats, as too much polyurethane can result in a sticky or tacky surface.
Let each coat dry completely before applying the next.
By following these tips, you’ll get the best results when using a rag to apply polyurethane!
Can I Use A Rag To Apply Other Types Of Wood Finishes, Such As Varnish Or Lacquer?
You can use a rag to apply varnish or lacquer, but it’s not the best method. A brush will give you a more even coat and help avoid drips and streaks. Plus, it’s easier to clean with a brush than a rag. When you do use a rag, make sure it’s lint-free. Otherwise, you’ll end up with a finish that’s full of lint. No one wants that.
As you’re determined to use a rag, dip it in the finish, and then wring it out so it’s not dripping wet. Wipe it on the surface in long and even strokes. You may need to go over it a few times to get full coverage.
When you’re done, dispose of the rag properly. Don’t toss it in the trash can. Rags soaked in flammable liquids are a fire hazard. Soak them in water and then put them in a sealed container before throwing them away.
Now that you know how to use a rag to apply wood finishes, you can get started on your project. Remember to stay safe and take your time. A rushed job will never look as good as a well-done one. So, take your time and enjoy the process! Before long, you’ll have a beautiful finish that you can become proud of! Who knows, maybe you’ll even come to prefer using a rag over a brush.
Recommended Posts:


