If you’re working on a DIY project that requires Bondo, you may be wondering how long it takes to dry without a hardener. This is an important question because you don’t want your Bondo to dry too quickly and ruin your project. In this blog post, we will answer that question and give you some tips for using Bondo correctly!
What Is Bondo, And What Are Its Uses?
Bondo is a brand name of an adhesive putty that is commonly used in automotive bodywork. It is also sometimes referred to as plastic filler, mud, or by its generic name, polyester resin. Bondo can be used to fill in small dents and scratches, as well as larger holes. It can also be used to repair rust spots.
Bondo is made of a polyester resin that is mixed with a hardener. When these two ingredients are mixed together, they create a putty-like substance that can be applied to a variety of surfaces. Once Bondo dries, it becomes very strong and can be sanded down to create a smooth finish.
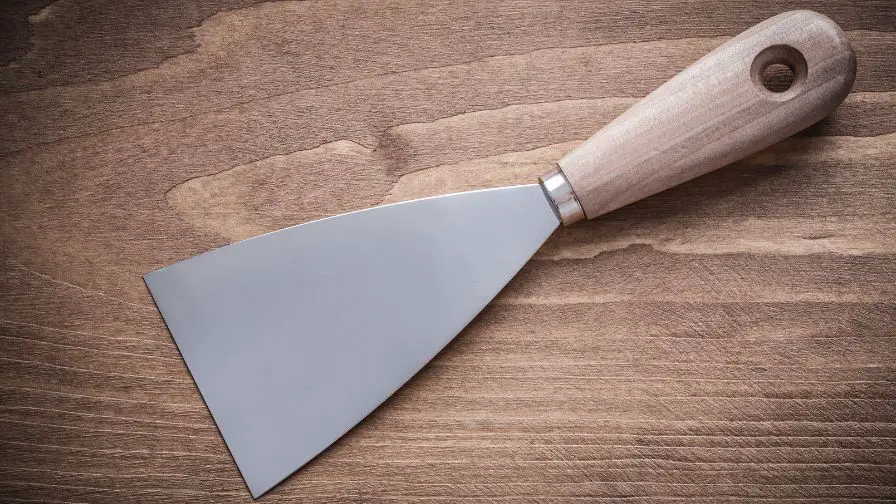
Bondo is typically used in two different ways: for small repairs, Bondo can be applied by hand; for larger repairs, Bondo can be applied with a putty knife.
When using Bondo to repair small dents and scratches, it is important to make sure that the area is clean and free of any dirt or debris. Once the area is clean, Bondo can be applied directly to the surface. For larger repairs, Bondo can be applied in layers. Each layer should be allowed to dry completely before sanding it down and applying the next layer.
Once the Bondo has dried, it can then be sanded down to create a smooth, finished surface. Bondo can also be painted over once it has been sanded down.
Bondo is a versatile product that can be used for a variety of repairs. It is relatively easy to use and dries quickly, making it a great option for those who are looking to make quick repairs.
How Long Does Bondo Take To Dry Without Hardener, And Why Is That Important?
Bondo is a two-part putty that is commonly used to repair dents and other damage on cars. It is made of resin and a hardener, which react with each other to create a strong, durable bond.
However, if you use Bondo without the hardener, it will not harden and the repair will not be as strong. In addition, the paint may peel off the vehicle. That’s why it’s important to use Bondo with the hardener so that it dries properly and creates a strong, lasting repair.
Discover 1,000 Hours Of Step-By-Step Woodworking Videos

It’s called Woodwork101. A database of detailed videos and blueprints in crystal clear, mouth-watering HD that will take you by the hand and show you that DIY home projects done the right way are easy, fun, and always of top quality… turning a dream into reality in a heartbeat. Getting you that perfect build each and every time.
Do You Have To Use Hardener In Bondo?
Subscribe to Ron Budman
Without hardener, bondo will not harden. This means that if you’re trying to use it as a filler for dents and scratches, the repair won’t last. The paint may also peel off the vehicle. So, it’s important to use the hardener when using bondo.
How Do You Know When Bondo Is Dry?
It’s pretty simple really. Once the surface of the Bondo is no longer tacky to the touch, it’s ready for a new coat or primer. If you wait too long and the Bondo begins to set up, simply sand it off and start again.
Subscribe to Wheelers Hoarder
Does Heat Help Bondo Dry?
Yes, heat does help bondo dry. By applying heat to the bondo, you are essentially helping the solvents evaporate faster. This will speed up the drying process and help to prevent any sagging or running of the material. So, if you are in a hurry to get your project done, applying some heat can be a big help. Just be careful not to overdo it, as too much heat can actually damage the bondo and cause it to become brittle.
How Long Should You Wait To Sand Bondo?
15 minutes is usually sufficient time for the Bondo to set and be ready for sanding. However, in colder climates, you may need to wait up to 30 minutes before sanding. Whichever timeframe you use, make sure that the Bondo is completely dry before attempting to sand it. Otherwise, you’ll just end up making a mess.
How Long Does Bondo Last For?
While Bondo is durable and long-lasting, it’s not permanent. Eventually, the putty will dry out, crack, and shrink, causing the repair to fail. For this reason, it’s important to only use Bondo as a temporary fix. With proper care, however, Bondo can last for five years or more.
To extend the life of your Bondo repair, avoid exposing it to extreme temperatures or direct sunlight. If the area is subject to a lot of wear and tear, you may need to replace the Bondo more frequently. With proper care, however, Bondo can be a great way to extend the life of your car or other objects.
Subscribe to RYAN MAYER
What Happens If Bondo Is Too Thick?
It’s important not to make Bondo too thick, as it will not last as long and will eventually shrink and crack. If you make it too thick, it can also pop off. So, make sure to follow the directions and not make it too thick.
[Video] 3 Most Common Mistakes
When Setting Up Shop

A woodworking friend of mine shared this video by Ralph Chapman with me that helped him set up his workshop.
The video explains the benefits of Ralph Chapman’s guide about setting up an affordable workshop and avoiding the most common mistakes offers to anyone interested in woodworking.
When Should I Use Bondo?
Here are some tips on when you should use Bondo:
- Bondo can be used to fill in small holes or cracks in surfaces.
- Bondo can also be used to even out surfaces that are not perfectly flat.
If you’re not sure if Bondo is right for your repair project, it’s always a good idea to consult with a professional.
What Will Bondo Not Stick To?
Bondo will not stick to smooth, dirty or oily surfaces. If you’re trying to repair a hole or crack in a wall, it’s best to clean the area first with soap and water. For larger repairs, you may need to use a primer before applying Bondo.
Subscribe to 3M Auto
Is Body Filler The Same As Bondo?
Body filler is a putty that is used to fill in small imperfections in a vehicle’s body. It is applied with a putty knife and then smoothed out until it is flush with the surrounding area. Body filler is easy to use and dries quickly, making it ideal for small repairs. However, body filler is not as strong as Bondo and can crack if it is not applied correctly.
Bondo is a product that is used to fill in larger holes and cracks in a vehicle’s body. It is applied with a putty knife or a trowel and then smoothed out until it is flush with the surrounding area. Bondo is stronger than body filler and can be used to repair larger areas of damage. However, Bondo is more difficult to use and takes longer to dry.
When choosing a product to use for bodywork, it is important to consider the size of the repair and the strength of the product. For small repairs, body filler is a good choice. For larger repairs, Bondo is a better choice.
Is Bondo Better Than Wood Filler?
Whether you’re a do-it-yourselfer or a professional contractor, you know that there are a lot of different products on the market designed to help you with your home improvement projects. One such product is wood filler. Wood filler comes in handy for filling in holes or cracks in wood, but it’s not always the best option.
Another product that can be used for similar purposes is Bondo. So, what’s the difference between these two products? And which one is better?
Let’s start with wood filler. Wood filler is typically made from sawdust or wood shavings mixed with a binder.
Once it’s dry, the wood filler can be sanded, painted, or stained to match the surrounding wood. However, it’s not as strong as Bondo and it’s not always the best choice for outdoor projects because it can be susceptible to moisture damage.
Bondo, on the other hand, is a two-part epoxy that dries hard and strong. It can be used to fill holes, cracks, or dents in wood, metal, or fiberglass. And because it’s so strong, Bondo is often the better choice for outdoor projects.
Bondo does have a shorter drying time than wood filler, so you don’t need to be patient while it dries. And once it’s dry, Bondo is sandable, paintable, and stainable just like wood filler.
So, which is better? That depends on your needs. If you’re looking for a product that dries quickly and is strong enough for outdoor projects, Bondo is the better choice. However, if you don’t mind waiting a little longer for your filler to dry and you’re not concerned about strength, the wood filler may be the way to go.
Tips For Using Bondo Correctly
If you’re going to be using Bondo, there are a few things you need to keep in mind in order to get the best results. First of all, make sure that you’re using the right type of Bondo for your project. There are different formulas for different materials, so be sure to read the labels carefully.
Once you’ve got the right Bondo, it’s time to prep the surface. This is important because Bondo won’t adhere properly to a dirty surface. Use a clean cloth to wipe away any dirt, dust, or grease.
Once the surface is clean, you’re ready to apply the Bondo. Use a putty knife to scoop out a small amount of Bondo, and then press it into the crack or hole. Smooth it out as best you can, and then let it dry. Once it’s dry, you can sand it down until it’s flush with the rest of the surface.
With these tips in mind, you should be able to use Bondo like a pro!
[Guide] How To Launch Your Woodworking Business For Under $1000


Click Here To View
If you’re considering turning your woodworking hobby into a part-time business check out this helpful guide on how to get started.
Troubleshooting Tips If Something Goes Wrong With Your Project
If you’re having trouble with your project, here are a few troubleshooting tips to help you get back on track.
- First, check to make sure all of your materials are gathered and organized. It can be easy to forget something when you’re in the middle of a project, so take a moment to double-check that you have everything you need.
- Next, make sure you’re following all of the instructions carefully. Sometimes it can be easy to misread a step or skip over something, so it’s important to go back and check that you’re doing everything correctly.
- If you’re still having trouble, try asking a friend or family member for help. Sometimes it can be helpful to have another set of eyes on a project.
- Still, struggling? There’s no shame in admitting that you need help. Reach out to a professional for assistance.
With these troubleshooting tips in mind, you should be able to get your project back on track in no time!
Recommended Posts:

