When you’re looking for a high-quality finish on your wood projects, Varathane is a great option! There are different types of Varathane, including oil-based and water-based formulas. Each type has its unique benefits.
In this blog post, we’ll discuss how long oil-based Varathane takes to dry and some tips for speeding up the drying process.
Click Here To Check The Pricing On Amazon
How Long Does It Take Oil-Based Varathane To Dry?
It’s important to know how long it will take your project to dry completely, so you can plan accordingly. According to the manufacturer, Oil-based Varathane “Dries to the touch in 1-2 hours and can be recoated in 4 hours. It is fully cured in 72 hours.” This is with moderate temperatures around 70 degrees and 50% humidity. In colder temperatures, they recommend waiting longer.
In feeling uncertain, it’s always better to stay on the side of caution and give it more time to dry. After all, you don’t want to ruin all your hard work with a rushed job. Plan and your project will come out looking fabulous!
What Is Oil-Based Varathane And What Are Its Benefits?
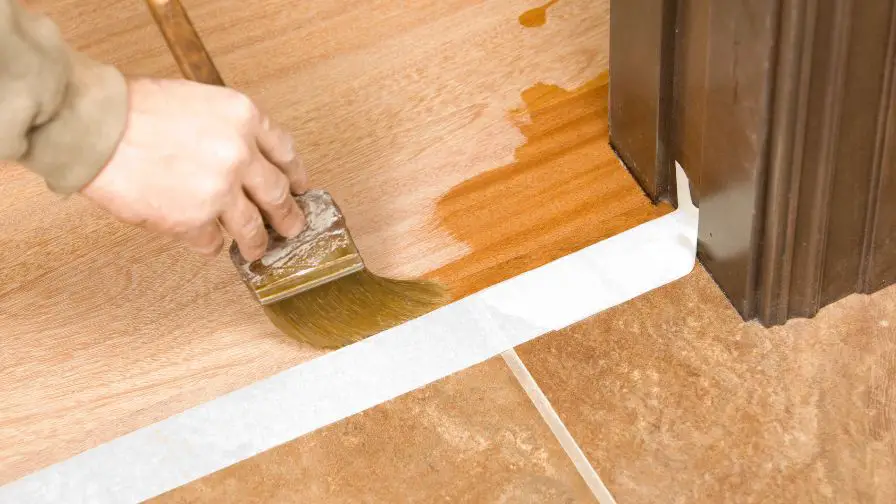
Oil-based Varathane is a type of polyurethane used as a topcoat for wood floors. It is durable and provides a high-gloss finish. Varathane is available in different sheens, from semi-gloss to high-gloss. Apply with a brush, roller, or sprayer. You can also use a sponge or cloth to put it. Let it dry for at least two hours before walking on it.
This type of Varathane is more durable than water-based polyurethane. It is also moisture resistant and can clean with a damp cloth. There is no yellowing over time like some other finishes. You can choose from a variety of sheens, depending on your preference.
Application is easy and it dries quickly! However, you should take care when using oil-based Varathane near open flames or heat sources. Wear a respirator when applying it.
Subscribe to Chris Cute on YouTube
How Can You Speed Up The Process of Drying Oil-Based Varathane?
As you’re working with oil-based Varathane and you need it to dry quickly, there are a few things you can do to speed up the process.
First, make sure the area you’re working in is well-ventilated.
Second, apply a thin layer of Varathane – too much will only slow down the drying process.
Finally, use a hairdryer on the low setting to help speed up the drying time.
By following these steps, you can get your oil-based Varathane to dry in no time!
Tips For Using Oil-Based Varathane
Whether you’re refinishing an old piece of furniture or giving new life to some thrift store finds, oil-based Varathane is a promising way to achieve a high-quality finish.
Here are several tips for using this product:
– Start by sanding the piece down to bare wood. You’ll want to use medium-grit paper for this. Follow with a fine grit to get the surface nice and smooth.
– After sanding the piece, wipe it down with a tack cloth to remove any dust.
– Next, you’ll need to apply a coat of primer. This will help the Varathane adhere to the surface and create a smooth finish.
– Once the primer is dry, you can begin applying the Varathane. Start with a thin coat and build up to thicker coats as needed.
– Let each coat of Varathane dry completely before applying the next one.
– When you’re finished, sand the piece lightly with fine-grit paper to remove any brush strokes.
– Finally, apply a coat of wax to protect the finish. Buff it out with a soft cloth to give the piece a nice shine.
With these tips in mind, you can achieve beautiful results with oil-based Varathane!
How Long Does It Take For Varathane Polyurethane To Cure?
When it comes to Varathane polyurethane, the curing process can take 72 hours according to the manufacturer.
However, it’s important to note that this is only an approximation. The actual time it takes for your Varathane polyurethane to cure will depend on several factors. These include the temperature and humidity of your work area, the type of Varathane polyurethane you’re using, and the thickness of your coat.
Why Is My Polyurethane Still Tacky After 24 Hours?
Here are a few things that could cause your polyurethane to remain tacky.
Temperature and Humidity: These are too low in your home.
Too Much Polyurethane: You apply too much polyurethane to your project.
Not Enough Ventilation: The room you are working in does not have enough ventilation.
There are a few things you can do to fix this problem.
First, make sure the temperature and humidity in your home are at an ideal level.
Second, apply a thinner coat of polyurethane.
Lastly, ventilate the room you are working in by opening a window or using a fan.
By following these steps, your polyurethane should dry properly and will no longer get tacky.
Subscribe to Jen Woodhouse on YouTube
Will A Fan Help Polyurethane Dry Faster?
No. Keep in mind that warmer temperatures will speed up the drying process. But can also lead to wrinkling or bubbling, practice caution not to overdo it.
When you’re patient and follow these tips, your polyurethane will dry beautifully and last for years to come!
Do You Need To Sand Between Coats Of Varathane?
When you’re refinishing a piece of furniture, it’s important to get a smooth and professional-looking one. A way to do this is by sanding between coats of Varathane.
As you’re using water-based polyurethane, you don’t need to sand between coats. Make sure the previous coat is dry before applying the next one. When it’s not sanding between coats, you may end up with a sticky surface.
When you’re using oil-based polyurethane, then you’ll need to sand between coats. This will help to create a smooth surface. Use fine-grit sandpaper and lightly sand the surface. Make sure to remove all the dust before applying the next coat.
By following these tips, you can create a smooth and professional-looking finish on your furniture piece.
Recommended Posts:

