When it comes to wood glue, Titebond 3 is one of the most popular options on the market. Know this type of glue for its strength and durability. It is a great choice for DIY projects and furniture assembly. If you’re new to using Titebond 3, you may wonder how long to clamp it.
In this blog post, we will discuss some tips and tricks that will help you get the best results with this type of glue!
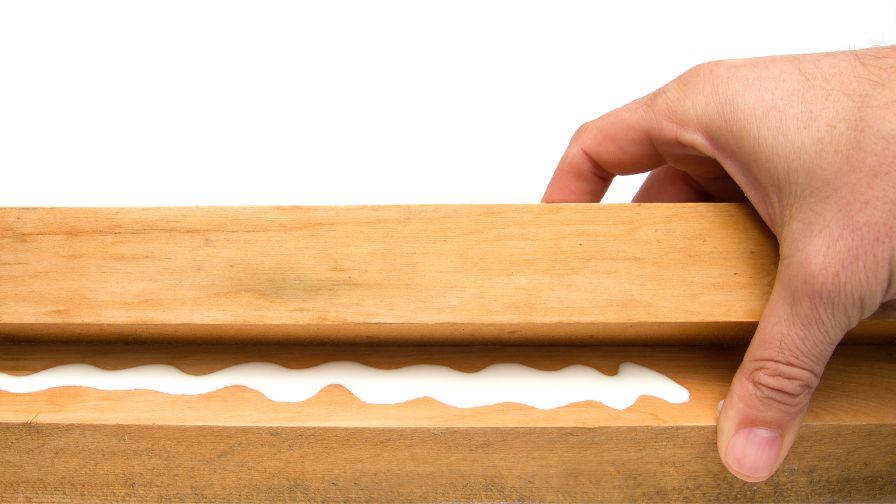
How Long To Clamp Titebond 3 For The Best Results
When using Titebond 3 you can technically unclamp your project after 30 minutes, we recommend waiting at least an hour for the glue to become fully set. If you can, leave your clamps on overnight for the strongest bond possible.
Titebond III is waterproof, so if you’re working on an outdoor project or something that will be exposed to a lot of moisture, this is the glue you want to use. Just like with any other glue, there are some things you should avoid doing when using Titebond III.
You don’t want to get any of the glue on your skin, as it can cause irritation. If you do get some on your skin, wash it off immediately with soap and water. You also want to avoid inhaling the fumes from the glue, so work in a well-ventilated area if possible.
What Is Titebond 3 And Why Is It So Popular?
If you’re a woodworker, chances are good that you heard of Titebond 3. This adhesive is one of the most popular on the market, and for good reason.
Here’s a look at what makes Titebond 3 so special.
Titebond 3 is an improved version of the original Titebond wood glue. It features a longer open time, a stronger bond, and is water-resistant. That makes it ideal for both indoor and outdoor projects.
One of the biggest advantages of Titebond 3 is that it’s easy to use. The extended open time gives you plenty of time to position your pieces before the glue sets. If you do make a mistake, it’s easy to clean up with water.
Subscribe to Titebond on YouTube

Click Here To Check The Price On Amazon
Tips And Tricks For Using Titebond 3
When it comes to wood glue, Titebond 3 is the gold standard. It’s waterproof, durable, and easy to use, making it ideal for a variety of woodworking projects. Here are some tips and tricks for getting the most out of this versatile adhesive.
One of the great things about Titebond 3 is for both indoor and outdoor projects. If you’re working on a thing that will have exposure to the elements, this is the glue to use.
Another thing to keep in mind is that Titebond dries quickly, so you’ll need to work fast after applying it! Line up all of your pieces and ready to go before you start gluing!
Finally, a little goes a long way with this glue. A small bead is all you need for most applications. Overdoing it will make a mess and waste glue.
When To Use Titebond 3 Instead Of Other Types Of Wood Glue
If you’re looking for strong and durable wood glue, then Titebond 3 is a wonderful option! This type of glue is waterproof, making it ideal for outdoor projects or for bonding dissimilar materials. It’s also heat resistant and can withstand temperatures up to 150 degrees Fahrenheit.
Titebond 3 is a suitable choice for projects that require a strong and permanent bond. It’s also advisable for difficult-to-bond surfaces like metals and plastics. If you’re looking for an all-purpose glue that can handle anything, Titebond is the way to go!
How To Clean Up Titebond 3 After Your Project Is Complete
Once your project is complete, you’ll want to take some time to clean up your workspace.
Here’s how to clean up Titebond 3 after doing your project:
First, remove any excess glue from surfaces using a putty knife or similar tool. If the glue dried up, you may need to use a solvent such as acetone to remove it.
Next, clean up any dried glue residue by sanding it off with fine-grit sandpaper. If the residue is stubborn, you can try using a hobby knife or razor blade to scrape it off.
Finally, wipe down all surfaces with a damp cloth to remove any dust or debris.
After cleaning up, your workspace should stay clean and ready for your next project.
How Long Does Titebond 3 Need To Dry?
Titebond 3 is an excellent adhesive and has a very strong initial tack. It will bond most woods and composites in about 30 minutes. However, it is important to allow the adhesive to cure for at least 24 hours before subjecting it to any stress. This will ensure a stronger bond.
It is also worth mentioning that Titebond 3 is waterproof. So, if you’re working on a project that has exposure to moisture, this is the adhesive for you.
Does Titebond 3 Expand?
Titebond 3 does expand, but not as much as some other adhesives. This is due to its low water content. Expect less warping and cupping in your woodworking projects. Many regard it as the best choice for interior projects where there is a need for a strong bond. It’s also waterproof, making it ideal for use in kitchens and bathrooms.
How Strong Is Titebond 3 Glue?
Titebond 3 Ultimate Wood Glue is the strongest wood glue available. Use this glue on everything from small craft projects to large pieces of furniture. It has always held up well. If you are looking for strong and reliable wood glue, Titebond 3 is the way to go!
Woodworker’s Guide to Titebond Glue
Subscribe to The Wood Whisperer on YouTube
Is Gorilla Glue Better Than Titebond?
Gorilla Glue and Titebond are both great adhesives. But some differences between them might make one better for your project than the other.
Gorilla Glue is a polyurethane adhesive, while Titebond is an aliphatic resin glue. That means that Gorilla Glue will form a stronger bond and is more moisture-resistant than Titebond.
Titebond does have one advantage over Gorilla Glue, though. It is suitable for a wider range of materials, including wood, metal, ceramic, and glass. So if you’re not sure what your project will have, Titebond is the better choice.
Both adhesives come in different formulations. Read the labels carefully to find the right one for your needs. Always test the adhesive on a small piece of the material you’re using before committing to it. That way, you’re certain you’re getting the best possible bond for your project.
Recommended Posts:

