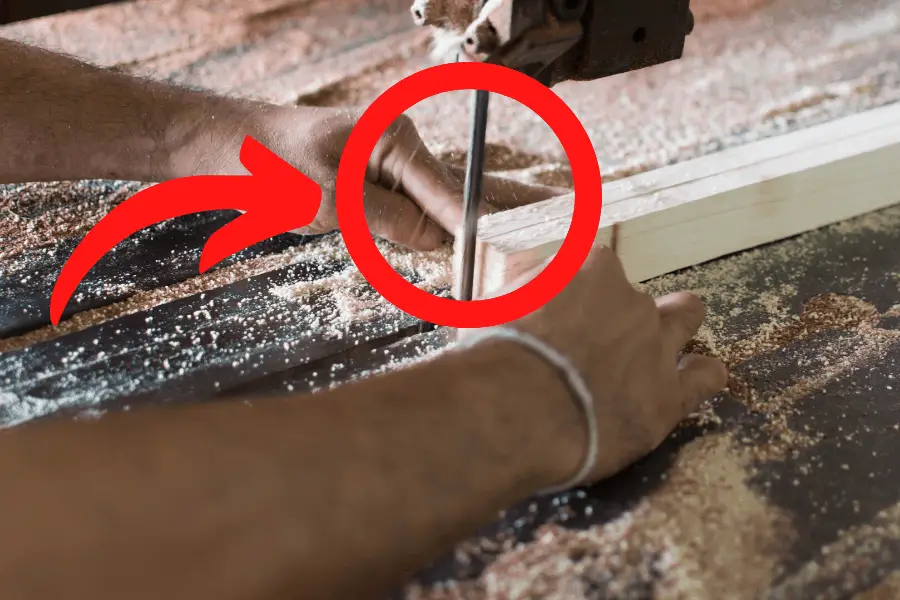
Needing to straighten your bandsaw blade is a common occurrence when working this machine. I researched this question on a lot of different woodworking forums and websites to find the absolute consensus from top woodworkers on how to handle the problem.
How to straighten a bandsaw blade? It is risky but if it’s absolutely necessary, a temporary fix to straighten a bandsaw blade can be done by placing it on an anvil and gently tapping it flat with a nylon head hammer/mallet or using a pair of gas pliers to straighten out the blade. The safest and least risky answer is to replace the blade to avoid it breaking which can cause damage to your project, bandsaw machine and most importantly cause injury to you.
If you want to know more about the risks of repairing a bandsaw blade, if it’s worth it, the most cost effective bandsaw blades and some bandsaw blade hacks then read on.
How To Straighten A Bandsaw Blade?
Most experienced woodworkers will recommend replacing a bent or kinked bandsaw blade. They have seen and heard too many horror stories about shop accidents to risk a blade snapping on them. More on the risks below in the article.
If you do decide to go a head and try a temporary repair on your bandsaw blade a very common option is to place it on an anvil or hard metal surface then gently and slowly tap the blade to flatten it out with a nylon head hammer or mallet. You could also try and use a pair of gas pliers to straighten out the blade.
This could allow you to finish what you were working on until you can replace the blade if you don’t already have any replacement blades in the shop. The blade will thump and wobble after the repair plus your cut may wander depending on the damage.
What Are The Risks Of Using A Bent Bandsaw Blade?
When you use a repaired or bent bandsaw blade you run the risk of it breaking either during or before you make your cut.
The machine is designed to protect the user in the event of a broken blade but depending on when and how it breaks it can cause serious damage but is easily avoidable.
The blade could snap out of the bandsaw causing damage to your machine which would be costly to fix or replace and it could damage the piece of wood your working with causing your project to stall or be delayed.
Most importantly it can cause injury to the user. The blade could make a deep cut into your hand or fingers. It’s possible it could come out of the machine and cut a part of your body.
One forum user said “you’re wife will thank you for not having to help you wipe while your fingers heal.”
When working with dangerous objects it is always best to err on the side of caution and safety.
Is It Worth It To Repair Or Replace My Bandsaw Blade?
It depends on your situation. If you have just a few cuts left to finish up your project then using a temporary fix on your blade may be an ok option.
Pretty much all of the woodworkers responses I researched said to “stop being cheap and get a new blade.”
No amount of cost is worth putting yourself in danger and possibly injuring yourself to save a relatively low amount of money to get a new blade. The typical bandsaw blade can range from $20-$60 for most projects. The widest cost range depending on the type of blade you need is $5.50-$416.
See below for the most cost effective bandsaw blades by buying in bulk and making custom size blades.
How To Get The Most Cost Effective Bandsaw Blades?
Brazing your own custom length bandsaw blade is the most cost effective method. You are able to get the bulk material at a cheaper price but have to put in a little elbow grease to create the size you want to get it on your bandsaw. The best part about this method is it doesn’t require a welding machine which could cost $600 or more.
This method may not be for everyone, but if you have the time and want to take on the challenge it can be satisfying.
It’s also called silver soldering or silver brazing.
Items Needed:
- Fixture to line the blades up: Not much to this it can be as simple as a piece of steel with a rabbit cut along the edge to set the blade in and line up the two halves of blade with a notch cut out in the center to use the torch to heat and solder. It has 2 toggle clamps to hold the 2 pieces down. With a key in the bottom to place in the belt sander to cut a 20-degree angle scarf joint on the end of the blade.
- Hard Silver Solder: At least 50% silver
- Propane Torch:
- Superior #601 Paste Flux: make sure it has fluoride in it.
- Acid brush:
- Scotch Brite Pad:
- Grinder to grind it down after solder.
Steps: Follow along with the video
- Cut the blade to length.
- Try to line the teeth of the blade up so when they overlap the teeth are the same spacing through the joint.
- Square up the ends on the belt sander.
- Set up fixture to grind the 20-degree scarf joint on the belt sander.
- Place your fixture in a vise using the key on the bottom.
- Use the piece of Scotch Brite to scrub off the end of the blades.
- Center one scarf joint in the slot them lower the clamp to hold it in position.
- Add the flux to each side of the blades with the acid brush.
- Add the other end of the blade into the fixture and clamp secure.
- Use the torch to heat up some solder.
- Use the torch to heat up the flux on the blades.
- Place the silver solder on the blade edges to join them.
- Now that the blade is joined go back and clean up any extra solder on it.
- Use the grinder with a sanding disk on it to smooth out the joint and solder so that it runs smoothly through your bandsaw.
- Grind it flush but try not to thin the blade out.
Bandsaw Blade Hacks.
The Bandsaw is one of woodworking’s most valuable machines because of it’s versatility and ease of use, for cutting veneers, wood joints, round or square cuts and all with the help of a diversity of bandsaw blades, bandsaw jigs and bandsaw.
SAFETY TIP: Always unplug your bandsaw machine before doing any maintenance to it.
Loosen The Tension On Your Bandsaw Blades.
If your not using your bandsaw everyday it is recommended to loosen the tension on your Bandsaw blades. When you leave the tension on, it very often creates a flat spot on the top of the tire which creates a big vibration creating a loud noise causing you to think you have broken your bandsaw. If you keep running it then it will eventually go out.
How To Remove Sawdust Off Your Tire And Blade.
Sometimes you get sawdust between the blade and the tire. When the blade is hot it can fuse the sawdust to the tire. A hack to remove this is to take a chisel to scrape the sawdust off the blade. Which gives you a smoother running bandsaw.
How To Tell If My Bandsaw Blade Is Dull.
Bandsaw blades can dull pretty quickly because they are steel and don’t have any carbide in most blades. So when they heat up they get so hot sometimes the tips of the teeth will tend to melt a little bit which looses their temper and go dull.
The way to tell if the bandsaw blade is dull is when you grab the blade with your finger it should hook just like a fishhook would do. If it doesn’t do that then it’s probably dull.
How To Compensate For Bandsaw Blade Drift.
If you find as you push the wood through; you have to move the wood at an angle in order to follow a line then that’s called “Bandsaw Blade Drift.” Ideally we would never have blade drift but it does happen from time to time.
Reasons that cause blade drift:
- Dull blade
- Dull Blade on one side
- Tire’s top or bottom are defective
To compensate for bandsaw drift you can start your cut then stop after making a little bit of the cut. Look at your grooved lines on the machine and you can see that the piece of wood is at an angle. Clamp another straight edge piece of wood to set up a fence. Now the wood can be pushed through along the fence and it will compensate for the drift. You can also use a speed square.
How To Compensate For Bandsaw Blade Drift When Cutting Veneer.
Take your piece over to the table saw to cut an initial track for your bandsaw cut using a thin blade to make it easier to cut. Cut the track on all sides of the piece of wood.
Woodworking Joke:
Two Florida woodworkers ran a shop together and one day they nailed all the spare plywood to the window frames because a hurricane was coming.
All that day and into the night, the storm howled. Finally, somewhere in the wee small hours, the racket stopped and the two guys felt it was safe to move. There was an eerie calm in the air.
“I can see stars,” one said. “That means we’re either in the eye, or the storm has passed.”
“Nope,” the other one says. “it means the hurricane took off the roof…”