It might look difficult to cut a Formica or laminate countertop either already installed or yet to be installed, but we have divided the process into five small steps to make it easy for you. This is one of the most asked questions in the DIY world, and that’s why we felt it worth answering through an easy step-by-step guide.
So, if you’ve been thinking that it’s challenging or not possible at all till now, you will be glad you went through these simple steps. Let’s find out how it is done.
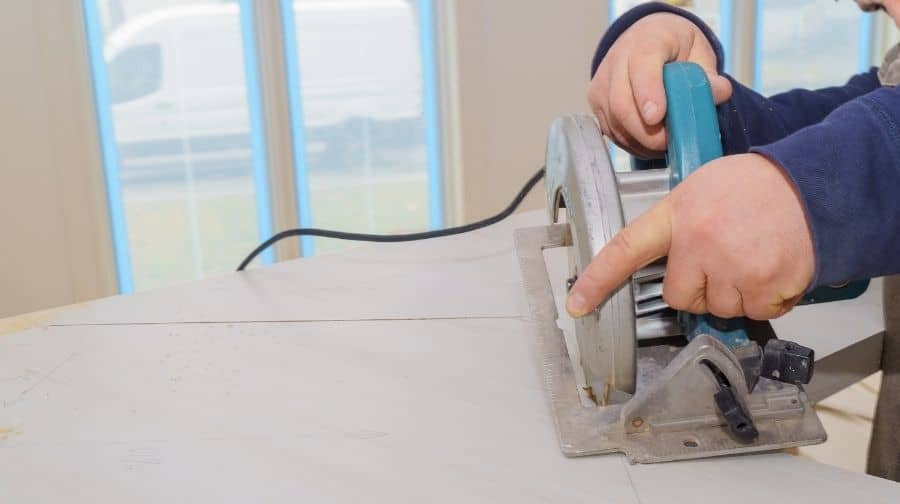
How To Cut A Formica Countertop With A Circular Saw?
Before going through these easy steps, make sure you have all the tools required for the process, including a circular saw, sharp blades, and a metal file. Also, get a belt sander if you want to smooth the edges after cutting the Formica countertop. Make sure to go through these steps in order, or you may ruin the entire process!
Here are the steps to cut a formica countertop with a circular saw:
Step #1: Mark the Cutting Line
It’s important to mark the measurements before proceeding to the cutting process for precise and accurate results. So, prepare the area and mark the cutting line where you need to make the cut. Marking also helps prevent accidental chipping that ruin the entire Formica.
Furthermore, when drawing a straight line, don’t forget to use a rip fence that helps keep the laminate material in a firm, perfect place. A smaller scale would not entirely cover the whole Formica, and you would need to measure by placing it multiple times. In that case, use a large scale for comfortable and accurate measuring.
Step #2: Clamp a Rip Fence
We must take all the precautions to achieve accurate results, and clamping a rip fence is one of them. It will help move the circular saw along with the Formica countertop to cut through the straight line. In this situation, we recommend using a C-clamp to keep the rip fence firmly attached to the countertop.
Step #3: Adjust the Depth of Circular Saw
It’s time to get your tools ready, and by that, we mean to adjust the circular saw blade’s depth. You should prioritize the cutting part and make sure to cut through the thickest portion first. You don’t have to cut through the entire thickness of Formica material. It would be a lot easier to go for the thickest part first.
While cutting the laminate material, adjust the thickness at 1/8th of an inch and keep increasing the depth of ½ inch when cutting through more than an inch of material’s thickness. The purpose is to achieve accurate results through clamping the rip fence first and then adjusting the saw accordingly.
Step #4: Cut to the Length of Formica Countertop
You need patience when going through this step because hasty cutting always leads to chipping at the edges. Instead of cutting through the width, cut to the length of your Formica countertop.
Do not panic when going along the line because you can always smooth the edges later, but if you left chipping at the edges, there’s no going back. Use a circular saw to achieve extra precision and accuracy and keep leaving the cut portion aside.
Step #5: Smooth Out Edges
Now you’ve passed the scary part, and there’s no extra care needed at this step. Still, you need a few tools to smooth out the edges — a belt sander. Use this tool to smooth out the edges and make the uneven boundaries smooth.
If you’ve accidentally had any chipping in the previous step, you can use this tool to get the crisp edges. Don’t try to achieve extra precision and accuracy in this step because this is a professional’s job, and you might ruin the laminate. Still, a belt sander is enough to deal with the uneven surfaces and to smooth the edges.
Bonus Tip: Use the Metal File to Further Smooth Out Edges
If you want to smooth the edges further nearer to the wall after going through the sanding part, we recommend using a metal file. Get the metal file made using high-carbon steel with its teeth pressed for more accurate results. Never use the metal file in sawing motion but instead push forward.
How To Cut a Formica/Laminate Countertop | Including Lessons Learned
Subscribe to Everyday Home Repairs on Youtube
What are the Best Tools to Cut Formica?
People might recommend a wide range of tools to cut Formica, but experts only suggest a circular saw and a laminate shear. These are the widely used tools to cut Formica of any thickness as these are explicit tools for many DIYers and carpenters.
When choosing the best circular saw, we suggest BLACK+DECKER 20V MAX Cordless Circular Saw that comes with several qualities to make your work a lot easier and achieve accurate results. It features a high torque motor, compact design and comes with all the necessary tools to start using right away.
If you want to go for a laminate shear, Norske Tools NMAP001 13 inch Laminate Cutter is the best choice because of its improved design, perfect for cutting Formica. Besides cutting laminate, it allows you to cut fiber cement board, engineered wood, and vinyl sliding up to 13 and 19/32 inches thick. Its extended handle, along with sturdy construction using high-quality steel and aluminum, makes it the perfect choice for many DIYers and carpenters.
Cutting Laminate Countertop 5 Tips and Hacks
Subscribe to Ted Did It on Youtube
Is Formica Easy to Cut?
If you have a circular saw with sharp blades or laminate shear, it’s not challenging to cut the Formica, no matter if it’s thin or thick. To achieve extra precision and accuracy, go through our above-compiled guide to cut the Formica. Also, gather other small tools to later make the rough edges smooth.
Formica is an excellent material for kitchen countertops, but when it comes to cutting it, there are a few complications that require skills and the best tools. When you have both, there’s no problem in cutting the Formica countertop. We have made the process so convenient that you can easily cut the Formica countertop even if you are a beginner but have the right tools.

Quickest and easiest way to cut a FORMICA Countertop to size.
Subscribe to Marco the Handyman on Youtube
Recommended Posts:

