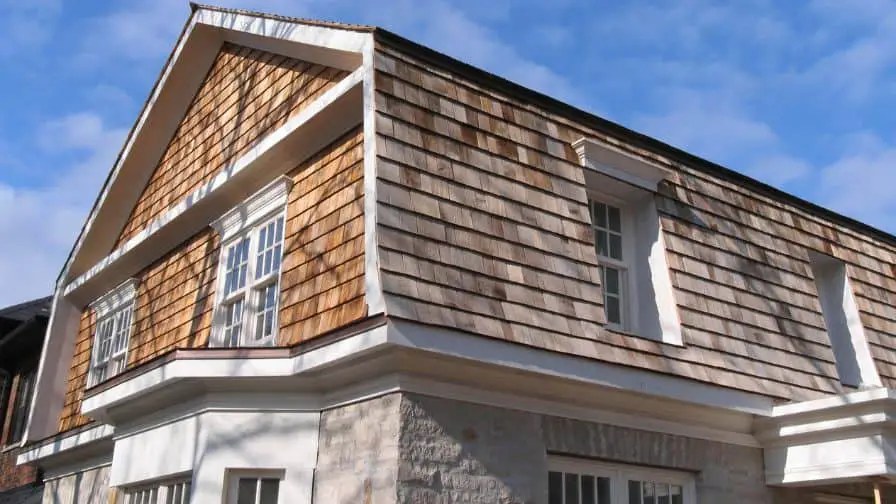
Cedar siding is a popular choice for homeowners because of its natural beauty and durability. Installing cedar siding can be a daunting task, but if you follow our guide, you’ll be able to do it like a pro! In this blog post, we will discuss everything you need to know about cedar siding nails. We’ll go over the different types of nails available, as well as the best way to install them. So drop that hammer and read on!
What Are Cedar Siding Nails And What Do They Do
Cedar siding nails are used to fasten cedar siding to your home. There are three types of cedar siding nails: stainless steel, hot-dipped galvanized, and aluminum. Each type has its own benefits and drawbacks.
Stainless Steel siding nails are the most expensive but will last the longest. They’re also rust-resistant, so you won’t have to worry about them staining your cedar siding.
Hot-dipped Galvanized siding nails are less expensive than stainless steel but still provide good rust resistance. The downside is that they may leave dark streaks on your cedar siding.
Aluminum siding nails are the least expensive but don’t provide as much rust resistance. However, they will not leave streaks on your cedar siding.
Now that you know the different types of cedar siding nails available, let’s discuss the best way to install them.
How To Install Cedar Siding
Installing cedar siding is a relatively easy process, but there are a few things you’ll need to keep in mind.
1. Start by measuring the area you’re going to be working on. This will help you determine how much siding you’ll need and what size nails to use.
2. Choose the type of nail you want to use. As we mentioned before, there are three main types: stainless steel, hot-dipped galvanized, and aluminum.
3. Once you’ve selected the type of nail you want to use, it’s time to start nailing them into the siding. Be sure to drive the nails in at a slight angle so that they grip the siding tightly.
4. Continue nailing the siding into place until the area is covered.
5. That’s it! You’ve now successfully installed cedar siding on your home.
Installing cedar siding is a relatively easy process, but it’s important to choose the right type of nail for your project. Be sure to consider the benefits and drawbacks of each type before making your final decision.
Tips For Installing Cedar Siding Nails
Subscribe to Dave Rohde
Cedar siding nails are an important part of any cedar siding installation. Here are a few tips to help you choose and install the right nails for your project:
1. Choose the right size nail. Cedar siding is available in a variety of thicknesses, so it’s important to choose a nail that is long enough to penetrate the thickness of the siding plus 1/2 inch. For example, if you are using 3/4-inch thick cedar siding, you will need a 2-inch long nail.
2. Choose the right type of nail. There are three types of nails commonly used for cedar siding: galvanized, aluminum and stainless steel.
3. Predrill holes for the nails. This will help prevent the cedar siding from splitting when you drive in the nails.
4. Use a pneumatic nail gun. This will make it easier to drive in the nails and will help prevent damage to the cedar siding.
5. Use a hammer to drive in the nails. This will help prevent the nails from bending.
6. Use a nail set to countersink the nails. This will give the cedar siding a more finished look.
7. Caulk the joints between the cedar siding and the trim. This will help prevent water from getting behind the siding and causing rot.
8. Prime and paint the cedar siding. This will help protect it from the elements and will give it a finished look.
Benefits Of Using Cedar Siding Nails
If you’re looking for an environmentally friendly, durable, and beautiful siding option for your home, cedar siding is a great choice. Cedar siding is made from the wood of cedar trees, which is a renewable resource. Cedar is also extremely durable, resisting rot, insects, and weather damage. And, because it’s a natural material, cedar siding is also very attractive.
To install cedar siding, you’ll need to use nails that are specifically designed for the job. Here are some tips for choosing and using cedar siding nails:
#1. Choose the right size nail. Cedar siding is available in a variety of thicknesses, so you’ll need to choose nails that are long enough to penetrate the thickness of the siding plus the sheathing underneath. For example, if you’re using 1/2″ thick cedar siding, you’ll need nails that are at least 2-1/2″ long.
#2. Use galvanized or stainless
Why Do Nails Pop Out Of Cedar Siding?
Your nails could be popping out because of the type of nails you’re using, the length of the nails, or the way you’re driving them into the siding.
If you’re using galvanized nails, they may be rusting and causing the siding to swell. This can cause the nails to pop out. Try using stainless steel nails instead.
If you’re using the correct length of nails, but they’re still popping out, try driving them in at a slight angle. This will help them grip the siding better and prevent them from popping out.
If you’re still having problems, try using a pneumatic nail gun. This will make it easier to drive in the nails and will help prevent damage to the cedar siding.
How Do You Hide Nails In Wood Siding?
Subscribe to gregvancom
In order to hide nails in your wood siding, you’ll need to use a nail set. A nail set is a small, hand-held tool that is used to countersink nails below the surface of the wood.
To use a nail set, first drive the nail into the siding using a hammer. Then, place the point of the nail set on top of the head of the nail. Strike the nail set with a hammer to drive the nail below the surface of the wood.
Once all of the nails are countersunk, you can cover them with wood putty or caulk. This will help to prevent water from getting behind the siding and causing rot.
Cedar Siding Maintenance Tips
Once your cedar siding is installed, you’ll need to take some steps to keep it looking its best.
Here are a few tips:
1. Inspect your siding regularly. Look for cracks, holes, or other damage. Also, check the caulking around windows and doors to make sure it’s in good condition.
2. Clean your siding regularly. Use a mild soap and water solution to remove dirt and grime. You can also use a pressure washer, but be careful not to damage the siding.
3. Paint or stain your siding every few years. This will help protect it from the elements and keep it looking its best.
4. Repair any damage as soon as possible. Don’t wait until the damage is extensive before making repairs.
By following these tips, you can keep your cedar siding in good condition for many years.
Cedar Siding Nails For Nail Gun
If you’re using a nail gun to install your cedar siding, you’ll need to use nails that are specifically designed for the job.
Here are some tips for choosing and using cedar siding nails:
1. Choose the right size nail. Cedar siding is available in a variety of thicknesses, so you’ll need to choose nails that are long enough to penetrate the thickness of the siding plus the sheathing underneath. For example, if you’re using 1/2″ thick cedar siding, you’ll need nails that are at least 2-1/2″ long.
2. Use galvanized or stainless steel nails. These types of nails won’t rust, and they’ll provide a strong hold.
3. Be sure to use the correct size nail for your nail gun. If you use a nail that’s too big or too small, it could damage the gun.
4. Drive the nails in at a slight angle. This will help them grip the siding better and prevent them from popping out.
By following these tips, you can ensure that your cedar siding is installed properly and will last for many years.
Recommended Posts:

