When it comes to carpentry, one of the most important aspects is knowing the depth of a rabbet cut. It is a type of groove that’s made in the edge or end of a board and for joining two pieces together. Know that it’s an essential skill for any carpenter or woodworker to master. So know what kind of depth you need when making your cuts.
In this article, we’ll discuss how deep a rabbet cut is and provide some tips on getting the perfect depth every time.
Introduce The Importance Of Knowing The Depth Of A Rabbet Cut
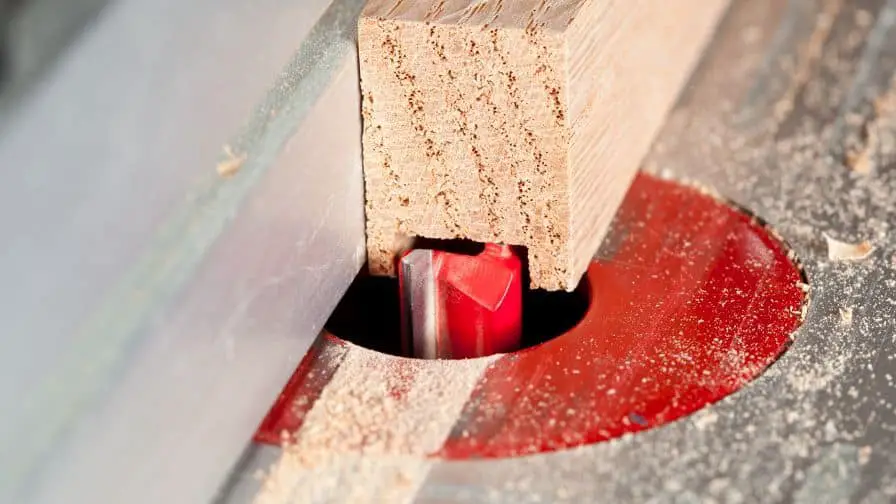
The rabbet cut is one of the most important cuts a carpenter or do-it-yourself handyman should know. It is an L-shaped cut made along the edge of a board and can use for many purposes. Some are creating joints between two pieces of wood, fitting trim around openings, or creating custom window casings. A rabbet cut is also the starting point for many other shapes and joints. So know how to make a proper rabbet cut.
The depth of your rabbet cut is one of the most key aspects of making this type of joint. Uneven cuts can ruin the fit between two pieces of wood. With the right tools and a bit of knowledge, you can easily get a rabbet cut with consistent depth in no time.
To make sure your rabbet cut is properly sized, use a combination square to measure the width of your saw blade or router bit and then set that as a depth stop on your cutting tool. This will ensure that the depth of your rabbet is consistent every time. Don’t cut too deep, as this can leave a sloppy finish and weaken the joint strength.
Knowing how to make a proper rabbet cut is a vital skill for any carpenter or do-it-yourselfer. With the right tools, a bit of knowledge and practice, you’ll get consistent rabbet cuts every time. Who knows, it can even become your favorite cut!
Explain What A Rabbet Cut Is And Its Purpose
A rabbet cut is a type of joint used in woodworking where two pieces of material are joined by cutting a channel along the edge or end of one or both pieces. This allows for the two pieces to interlock and creates a strong and secure connection.
Rabbet cuts can join corners, show flush surfaces between materials of uneven thickness, and can attach drawer or door fronts. Rabbets are useful when making a cabinet or adding trim around doors and windows. They can also invent flush surfaces in projects such as picture frames and tables.
For best results, do rabbet cuts with a router. But they may also cut with other tools like a circular saw. Whatever tool you use, ensure that the cut is straight and precise. Double-check the measurements so that your project fits together correctly.
Rabbet joints are some of the most reliable and strong connections in woodworking. They are handy when there are multiple pieces that need to fit together. With the right tools and a steady hand, you can produce mighty rabbet joints in any project.
Provide Tips On How To Measure And Achieve The Perfect Depth For Your Cuts
Subscribe to WoodWorkers Guild Of America
Measuring and achieving the perfect depth for your cuts is an important part of any renovation project. Here are some tips to get it right:
1. Use a ruler or measuring tape to measure the depth of the cut. Start with a shallow cut and then make deeper cuts until you reach the desired depth.
2. Practice with scrap wood before cutting into the actual material you are working with. This will help you become familiar with the tool and how to use it properly.
3. Mark the depth of your cut on the wood using a pencil or marker so that you don’t accidentally cut too deep.
4. Start out at a low speed and increase the speed as you become comfortable with the tool.
5. Try using a clamp or other device to hold the material in place while you make the cut. This will ensure that you don’t slip and accidentally cut too deep.
6. When making multiple cuts, always measure each one separately to ensure accuracy.
7. Finally, as you need to make a shallow cut, consider using a router instead of a saw. Routers are designed for precision work and can adjust to achieve the exact depth that you need.
Following these tips will ensure that you get the perfect depth for your cuts every time! Good luck with your project.
Describe Different Types Of Rabbets And Their Uses
Rabbets are an essential joint in woodworking and can use for a variety of projects. There are four types of rabbets, each with its own special purpose.
-Blind Rabbet: A blind rabbet is a shallow groove cut into the inside edge or face of a surface, along the entire length of the joint. It’s used to join two pieces of wood with an open corner, or where the rabbet won’t appear on the finished piece.
-Shoulder Rabbet: This type of rabbet is created by cutting a groove along an edge that runs from one face to another. Its purpose is to provide stability and strength in a joint, ideal for use on door frames and cabinets.
-Half Blind Rabbet: This type of rabbet consists of a shallow groove cut along the edge of one surface that extends part way through the other. It’s used in situations where only one side will show, such as when joining two boards at an angle.
-Through Rabbet: A through rabbet is cut all the way through a joint, creating a pocket or “rabbet” that can join two pieces of wood together. The result is a very strong and durable joint, perfect for use in furniture construction.
No matter what type of project you’re working on, there’s a rabbet to suit your needs. Knowing the type of rabbet and how it’s used is essential for creating strong and lasting joints. With their versatility, rabbets are sure to make any woodworking project easier and more successful!
Demonstrate How To Make A Rabbet Cut With Step-By-Step Instructions
Making a rabbet cut is an essential carpentry technique that provides a joint for two pieces of material to fit together. With the right tools and supplies, you can easily form a rabbet cut with step-by-step instructions.
-First, determine the size of your rabbet cut. Measure the width and mark it on both pieces of material.
-Next, use a saw to do the rabbet cut. The blade is set at an angle so that you can create a deep cut along your measurement lines.
-When making the cuts, hold the saw in one hand and guide it with your other hand. The saw is held securely at all times and move slowly to ensure a precise cut.
-Once you made the cuts, use a chisel to clean up any rough edges and finish an even rabbet cut.
-Last, use sandpaper or a power sander to smooth out the final product.
By following these steps, you will perfect a rabbet cut and complete a strong joint for two pieces of material. Use the right tools for the job and take your time when cutting and sanding. With practice, you’ll master this technique and have great results every time!
Discuss Common Mistakes When Making A Rabbet Cut, Such As Not Measuring Properly Or Cutting Too Deep
Subscribe to Mellowpine Woodworking
When it comes to making any kind of cut in wood, one of the most important things you should keep in mind is proper measurement. This is true when it comes to a rabbet cut. It is a type of joint made by cutting away part of the edge or side of a piece of wood so that another piece can fit into it. You must make sure that the dimensions of your rabbet cut are exact to ensure a tight and secure joint.
Another common mistake when completing a rabbet cut is cutting too deep. This can weaken the wood and reduce the strength of the joint. When you’re going to use screws or nails to join two pieces of wood, keep the rabbet cut as shallow as possible. This will ensure that the screws or nails have something solid to grip onto without going too deep and compromising the structural integrity of the joint.
Lastly, avoid using a dull blade when cutting your rabbet. A sharp blade will get a clean cut and ensure that your pieces fit together properly. Having a dull blade can cause splintering, rough edges, and inaccurate measurements – all of which can compromise the integrity of your rabbet joint.
Shaping a rabbet cut is not an overly complicated task. But take the time to do it right. With proper measurement and the correct tools, you’ll do a clean cut and secure joint. That’s the only way to ensure that your rabbet joints will last for years to come.
Summarize Key Points From Knowing The Depth Of A Rabbet Cut And Provide Resources For Further Learning
Rabbet cuts are a type of woodworking cut that can add detail to the corner or edge of any project. Knowing the depth of a rabbet cut is essential for achieving an even look and ensuring the finished product will hold together and last. To ensure you get an accurate measurement, understand how these cuts work and use a tape measure or other measuring device to determine the depth.
Additionally, there are many resources available online and in woodworking shops that can help you learn more about this important cut. From understanding basic concepts to exploring advanced techniques, these resources will provide the knowledge needed to master rabbet cuts and create beautiful projects. With the right know-how, every woodworking project you take on is successful and looks professional.
Finally, practice safety when working with tools and become mindful of the depth of each rabbet cut before making your final project. Taking the time to learn the basics now will save you time and frustration in the future.
To learn more about rabbet cuts, visit a local woodworking shop or search online for helpful articles and tutorials. You can also check out books such as “The Complete Guide to Router Techniques” by Pat Warner for detailed information about this essential woodworking cut. With the right knowledge and practice, you’ll accomplish beautiful projects with successful rabbet cuts.
Recommended Posts:

