Every table saw should have a good solid outfeed table, that’s what we’re going to do today. And it’s not just any table, it’s a very simple table that can be built with a basic compliment of tools. It’s what I like to call a can-do project.
Welcome to The Wood Whisperer, I’m your host, Marc Spagnuolo. On today’s show, we’re going to build a new outfeed table for the table saw. Now I know you’re probably thinking, “Hey, you already had one. Why do you need a new one?” Well, I actually had a chance to upgrade the fence system and since the outfeed table was made specifically for the fence system that I had, it’s not going to work on this new one. Just to show you really quick, it is the new Incra TS, I believe it’s a TS3 table saw fence system and this thing is just a dream to use. I’ve wanted one for a long time, and finally had the chance to get one, so I took advantage of it. Here it is, but unfortunately, no outfeed table, as you can see.
I have a few things to consider with this one. First of all, dust collection; I’ve got to make sure my dust collection gets where it needs to go. I also want to make this one a little bit wider, so I have more working space. I almost want to duplicate the surface area of the table saw once more behind the saw. And we’ve got a few specific things that we need to look at in terms of measurements, that, if you’re building your outfeed table, what you might want to consider when you, when you actually put those numbers to paper. Let’s go ahead and take a look at those details.
YouTube Video Tip: Hit the gear button to speed up the playback to watch the video faster.
How To Build A Table Saw Outfeed Table
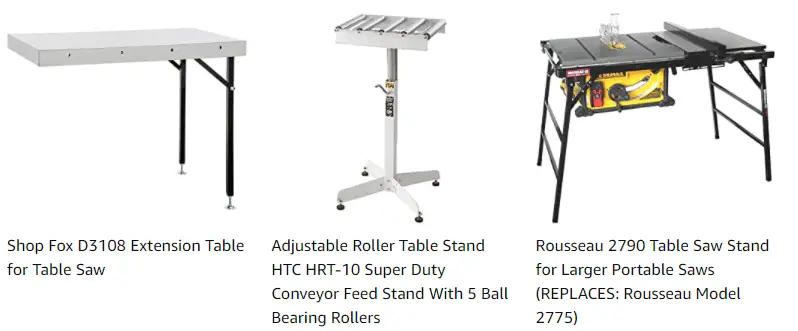
Did you know? – Outfeed tables don’t have to be this formal. A serviceable outfeed table can be as simple as a roller stand or even an old ironing board]
The first thing we’re going to consider is the height. Obviously, if the height is off, this whole thing is shot. We need the pieces to flow smoothly off of our table and then onto the outfeed table. What I like to do is take a measurement from the floor to the top of the table and that is exactly 34 inches. Now, if your table is not real level, you may want to check all sides, make sure everything’s okay but your reading should be 34. And if your table isn’t level, it could cause some problems, so try to get your table level before you do this process. Okay, so we’ve got 34 inches here, that means that our outfeed table with our top length of our legs, everything, when it’s all said and done can be no higher than 34 inches.
And in fact, I’m going to aim for it to be at least an eighth of an inch under 34, because I plan on using some adjustable feet and I want to lose a little bit of extra wiggle room there so that I can bring it up to the perfect height that’ll make sense for this table. Also keep in mind, depending on what type of leveling feet you use, there may be a certain amount of a distance that these automatically add. This one looks like it’s only going to add about a 16th, you know, maybe 330 seconds of an inch to the height. So, I’m going to make sure that I allow for the leveling feet when I calculate the length of my pieces.
So now we need to look at the dimensions of the top, width is really up to you. Some people like a really narrow table. If you’ve got enough room, to me, bigger is better because it’s more work surface. But the thing I’m really concerned about is how far from the back of the saw out we should go. We have to have enough rooms to support the pieces that we’re going to put on this thing, so let’s think about it logically. Usually, the longest piece that we’re going to run across here would be, let’s say a 4 by 8 sheet of plywood. And the key is that once you go through the cut, you want to make sure that that piece doesn’t have a tendency to tip forward. If you’re under four feet, that’s exactly what’s going to happen because the majority of the sheets are going to be hanging off your outfeed table.
So for me, the key is just at the point where my splitter starts, where you’re past the blade, I want to make sure that I’ve got at least four feet from that point, right there. And if I do that, basically the easiest way for me to do this is to measure from here to the end of the rail, which is about 10 inches. And I know I need at least four feet, so I’m going to say 48 inches minus these 10 inches. I know that I need my table to be at least right about here, 38 inches from front to back.
Now, there are a few other things to consider when you design your table. The biggest thing is obstacles. What do you have to maneuver around? What has to get around to it? Especially if it’s going to be a permanent fixture like mine is, if you’re going to put it on wheels, you know that’s another thing you have to be concerned about and how it’s going to get around. For me, I have this big tube here for my dust collection system, and I need to make sure that that’s not a problem for the setup.
Secondly, I really want to have a shelf on this thing. I hate the fact that there’s empty space under these outfeed tables, and it’s just wasted, you know you could really do something with that space. I want to have a shelf that sits about, maybe 12 to 16 inches off the ground. Obviously, if you look at this design of the dust collection system, my shelf needs to come above this pipe here, the flex tubing. That shouldn’t be a problem, but at least now you know why I made some of the decisions I did and what you might need to change about your design to make it fit your table saw and your dusk collection system.
Now, I don’t know about you guys, but more often than not, I seem to be rushing my projects. There’s always some scheduling issue or I don’t know, maybe it’s just psychological, but either way, I wasn’t anticipating this outfeed table project. So, in an effort to make things go fast yet, not sacrifice quality, I’m trying to find a design that’s very simple, but very sturdy and has all of the design elements that I need, so that six months from now, I’m not thinking about building a new one. That’s usually the goal and if it lasts a couple of years in my shop, then that’s pretty good.
The design it’s an it’s imperative that it’d be very easy to build, but sturdy. And I actually was watching an episode of New Yankee Workshop recently, and Norm was building his assembly table, the current version of his assembly table. And his design was all out of a three-quarter inch plywood; the legs, the stretchers, everything was three quarter inch plywood and it was all assembled with glue and screws. And I’m thinking, you know, this is a perfect can-do project for The Wood Whisper. This is a project that anybody can do, if you have a drill and a circular saw and a couple sheets of plywood, this is definitely a good project.
The other thing is this table doesn’t have to be an outfeed table. I mean, put some wheels on it and this is a roll around assembly table, that’ll, it’s going to be great. And I mean, if you consider the amount of work that went into my other assembly table, the torsion box top, geez, this thing is, this can be done in a weekend. The other one is a week-long project, obviously, and it takes a little bit more in the way of tooling. So, again can-do project and I want to hear some stories from you guys about this and see what modifications you make and where you can use this table in your shop.
Now you’re going to think I’m crazy, but I’m actually going to use some walnut veneered plywood for this project. I happen to have a decent amount of the stuff left over, lots of weird off from a previous project. And honestly, it’s more of a hassle for me to keep it around and wait for that perfect project than it is just to use it for something like this and clear the shopping, get ready for the new stuff. It’s really a matter of efficiency. Shop projects are just a great time to use up all the scraps that really, you just don’t have a use for anywhere else. Most of my material is going to be this walnut and I believe I’ve also got some birch that might wind up in the project.
Now, each one of our legs is composed of two pieces of three quarters inch plywood, and they will be butted up against each other with glue and screws in a sort of an L shape, like this. If you cut these two pieces the same width, you’re actually going to have one side longer than the other, because as you can see, one side adds in this extra piece of plywood, three quarters of an inch or close to it. What we’re going to do is cut four leg pieces at four inches, and the other four leg pieces are going to be three and a quarter inches. Each leg will be composed of those two different size pieces, so that when it’s all said and done, it’s going to look like four inches by four inches.
Now I’m going to cut all of my plywood on the table saw today. If you have a table saw, it’s a great way to go. If you don’t have a table saw, there are a number of other options that you can use. You could use a standard circular saw; I’ve got the festivals circular saw here. You could even go as far as using a jigsaw, if you have a nice blade, that’s a really sharp and has a lot of teeth per inch, so you don’t get to tear out on the plywood. The real key is not so much the cutting tool in this case, it’s having a good, reliable, straight edge to run that cutting tool along with so that you have a good reference. You can go as low tech as one of these aluminum straight edges. These are really cheap from a home Depot and Lowe’s, even lower tech than that is a two by four that’s been jointed on one side.
You could even have a, if you have a nice four-foot level, you could use that as something to ride your tools up against. You have got these fancier ones; this clamp and tool guide has a built-in clamping system. You just drop it across your work piece, tighten it down and have a nice, reliable, straight edge. And then of course, one of my favorite ones is festal straight edge, which is you know, obviously best used with the festal system. But this also will give you a nice, accurate straight-line cuts but again, today I’m using a table saw.
All right, now this is a very easy project to assemble. In fact, the most complicated part of it is the assembly of the legs. And I’m going to show you how I, how I plan to do that. There’s a number of ways that you could do a standard plywood butt joint like this. And again, we’re keeping it simple, you could have put a rabbit or a dato along here and joined the legs in that way, but that’s just too much work for what I’m trying to accomplish here. So the butt joint, okay. You can use something like biscuits, you could use dominoes, if you have the domino on hand. You can go as simple as bread nails and glue and call it a day. You know for me personally; I want a little bit more help than that. I like the fact that I can use a biscuit or a domino and these boards will be nice and aligned so that when I drive some screws through, I don’t have the chance of them sort of being knocked out of registration, so that’s how I’m going to do it. I’m going to throw a about three biscuits along the length and then three screws, counter sunk along the length.
With the narrow link piece claim to the table, I cut three biscuit slots into the side of the board. For the adjoining wider leg pieces. I stand the boards on end with a second board behind them for extra support. Now this ensures a safer and more accurate cut. Next, I pre-drill for the screws. As with any project, I apply glue to the mating surfaces, the biscuit slots, and the biscuits. Assembling these pieces gets a whole lot easier if you use a piece of scrap to support the overhanging end. These square drive screws will not only add strength to the joint, but they also act as clamps while the glue dries.
And that my friends is what I call a quick and dirty leg. Okay, so now that all four of our legs are constructed, we can start to create sub-assemblies. It’s much easier to assemble something of this size in portions, as opposed to trying to get the whole thing done in one shot. I’ve got two of my legs laying on the assembly table and I’ve got side stretcher pieces cut, they’re cut at about 38 inches. And I got one for the top and one for the bottom. Now the bottom one is the support for our shelf and of course that has to clear the dust collection, so that’s how I got the height for that.
And then the top one is actually pretty straightforward. I cut a little piece of the top material, three quarter inch ply that I’m going to use for the top. And we want this stretcher to be exactly that distance – the thickness of this material – we want it to be exactly that distance from the top of the leg. This little block here serves as a guide to let me know when I’m perfectly lined up. I’m going to actually use that instead of doing measurements, you know, just use the actual material. So glue couple of brads, their holding in place, and then some screws to really lock it down.
The lower stretcher is attached the same way as the top. Make sure your shelf height is high enough for anything that might need to go under it. Same deal as before; glue, brads and screws.
So now we have to attach our long stretchers top and bottom. I like to actually lay my sub assembly down on the assembly table and with glue, brads and screws, just like every other piece that we’re going to do on this outfeed table, we’re going to attach this to the leg like so. It’s a good idea though, to have a square on hand, put that on the inside of the leg and make sure everything is lined up properly. Now I’ve moved the entire unit on the floor, resting on its side so that it can access the other side easily. Now, of course, I would want to apply all my glues to all four sides before I do this for the final step, but this is sort of just the dry fit. Now you’re going to notice things are pretty wobbly at this point and that’s to be expected, given the structure. As soon as this thing is put together and we put the top piece and the bottom shelf on it, that’ll stiffen everything right up and this will be very, very sturdy.
All right, the basic structure is looking pretty good. My only concern at this point is over this span, we might get a little bit of a sag in the middle here, over time. It’s probably not a bad idea for us to add some dividers in here and just basically suspend those in the middle. The easiest way to measure is not to take a measurement here at the center or mark our boards from what we see here because as you can tell, there’s quite a bit of flex in there. The easiest thing and the most accurate way to do this is take our measurement here at the end, because we know that that’s not going to move, that’s a restricted measurement. Once we get this thing to fit perfectly on the ends, we could put it in the center and if the sides need to be pushed in a little bit or bowed out a little bit, that’s fine because we know what actually is happening is they’re being straightened out. We’ll take that measurement from the sides and install a center support on the top and also one on the bottom.
Now attaching these center dividers may seem like a minor detail at first, but then if you’re working by yourself, you start to realize that this isn’t a perfect fit. We do need to apply pressure on both sides. How are we going to get this board locked into place? For me, the easiest thing to do is get a clamp, run it pretty close to center, pretty close to where we’re going to apply our board and just start to apply just a little bit of pressure, enough so that in order to get this board to slide in, we’re going to need to kind of push it apart, just a hair and in fact, that was too much, so that I can apply some glue to the board. Here we go and pop it into place that way and that’ll kind of hold it. So, once I have it in line with my hands, then I’ll tighten the clamp down and come back with some, brad nails, some screws, again, whatever your joinery choices for this project. I got the top cut and now it’s the moment of truth. See if I got it cut right the first time, because that would be nice. I think I got lucky. All right, so that’s the top.
Now the bottom, obviously, given the structure, the bottom is going to be pretty much impossible to get a full sheet on, which is no big deal. It’s just really for storage, so I’m going to do the bottom and two separate sheets. Now I’m going to secure the top, just using a little bit of glue in a few different places. I want it to be, you know, secure, so it doesn’t move but at the same time, I want to be able to take it apart, if I ever need to replace this top without doing a significant amount of damage. And I really don’t want any screw heads on the top of this either that could eventually catch on pieces of material that are moving across the saw. A little bit of strategically placed glue and we should be good to go.
Now I have two different types of leveling feet here. One sort of goes in the corner, it’s a corner bracket style and the other hooks underneath one of the four legs. So, I’ve got two of each, I’m just going to use them up because that’s what I have in stock right now. But basically, they just hook onto the bottom, I’m going to screw into place and that’s really it.
Setting the final height is pretty easy. I place a long, straight edge across both the saw and the outfeed table. I then site down the straight edge and check to see how much adjustment is needed. Next, I make the necessary adjustments to all four legs so that the outfeed table is about a 16th of an inch below the surface of the table saw.
Now, here us a detail I completely forgot about the first time I built an outfeed table. Had everything done, it looked beautiful and went to use it for the first time, with my miter gauge and I was in for a surprise toward the end of my cut. Obviously, as things run through the miter slot, they need to actually have a place to go, even after they’re hanging off of the table saw. So typically, what people do is they make a slightly wider space for this bar to go into and it’s very easy to make. You want to do one on both sides. The easiest thing to do, I find is to just get a straight edge, a router and a straight bit and do it in two or three passes, whatever it takes, depending on the size router bit, you have. There’s no reason for it to be perfect because this table could, you know, move one way or the other. So, you want to make it slightly oversized to give you that extra bit of room.
Now, from what I can see here, my table was a little bit further out than it might be for most people. So, I’m looking at the clearance that I have here, and I think I might be okay with that for now. If I don’t have to put, you know, strips in my top, I’d rather not, so if I can get away with not doing it, I’m going to try that. So I’m not going to do it, but definitely something to think about, depending on how yours is set up, you may need to do that. Now I know it’s just shop furniture, but there are a few things that you can do to make this piece look a little bit nicer. And sometimes it’s just cool to have really cool looking shop furniture. What I’d like to do first of all, is all of my holes that I created, where I have screw holes, I like to plug those with a dowel. I usually take some dowel material, I cut it into small little plugs on the bandsaw and with a little bit of glue, tap them into place. And then once dry, I usually flush, trim them smooth with a flush trim saw and then sand flush.
And we can also improve the look of the table by actually adding one more strip of ply across all of these recess portions here. By attaching that there, it gives the top a nice border all the way around, fills in this gap and gives the front a much more finished look. Again, it’s not necessary, but if you want to pretty it up a little bit, that’s a good way to do it.
Now though I designed this table to be an outfeed table, as you can see, you can apply this to about a hundred different things in the shop, whether it’s a roll around workstation or possibly even an assembly table, whatever you want to do with it. The basic idea that I wanted to show you is that with a very simple and basic compliment of tools, you can make a really rugged and sturdy table like this, just using a couple sheets of plywood.
All right, so how do we finish our outfit table? Now for me personally, I’ve got a policy with shop furniture and that’s a pretty much anything goes. So if you have a new finish that you want to experiment with, you don’t really want to do it on a fine piece of furniture. This is a great place to do it. Just slap it on there, get the feel of the properties of the finish, learn a little bit more about it, and you’ll be that much more prepared for your next project.
And here’s a look at our finished outfeed table. It’s sturdy and beautiful. The catalyzed lacquer finish will allow the boards to slide across the surface with ease. It’s almost like it’s saying “somebody feed me.”

Recommended Posts:

