
Have you ever attempted successfully to cut thin boards with a circular saw? It appears that regardless of your attempts, the blade continues to stray off the designated line and binds up whenever you attempt to reroute your saw.
One thing to remember about circular saws in certain situations is that they cannot move in a straight line. However, improving the accuracy of your circular saw lines is not as tough as you may believe. We’re going to cover how to rip narrow boards with a circular saw in this post.
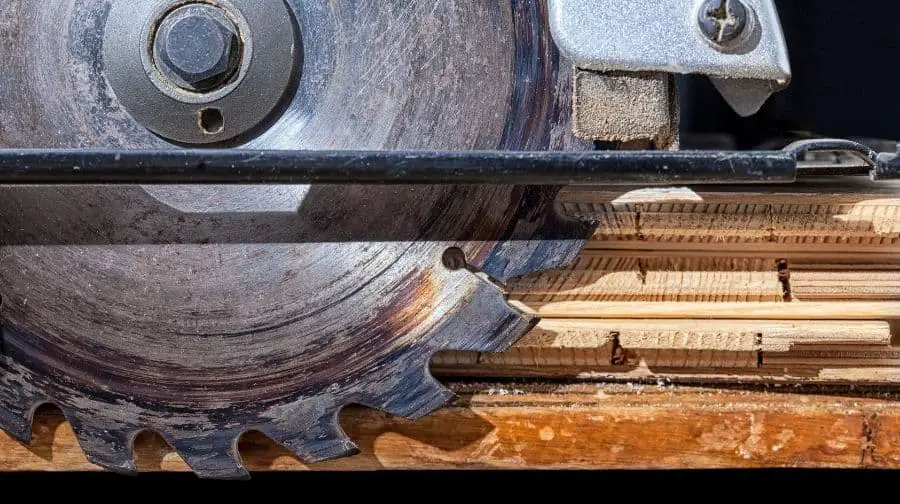
For circular saw operation, rip cuts are the most straightforward option for experts and do-it-yourselfers alike. After all, a well-performed rip cuts with an appropriately sized circular saw blade must successfully break a wood board and plank apart along one of its fiber seams.
Generally, such cuts are not challenging to accomplish with a circular saw’s power and efficiency.
However, there is one exception — rip cuts onto narrow boards.
These jobs may be highly challenging, even if you’ve spent years honing your skills with a circular saw. It is critical to acquire and practice a suitable method for slicing up such tiny boards.
We’ll take you through each step here, and you’ll be able to rip narrow boards using a circular saw easily.
Step-by-Step Instructions for Ripping Narrow Boards with a Circular Saw
The procedure is relatively straightforward. To begin, you must complete a few setup steps.
Step 1: Select the appropriate platform.
As a platform, use a long, straight piece of wood/slab. Depending on the height, you may require numerous slabs. A more extended slab will be more effective. Additionally, the slab ought to be thicker than the board being ripped. Because the circular saw will be mounted on this slab, it must be raised above the workpiece.
Step 2: Secure the circular saw blade to the slab/platform using a clamp.
At two locations, clamp the circular saw sole to the platform. If it does not securely hold it, place some scraps of wood just on the saw sole to check that the clamp securely holds the sole.
Step 3: Make a guideline cut to determine the width of the circular saw.
Locate the circular saw’s front. By and large, the front is the side into which the saw is pushed.
Put a sacrificial piece of wood into the circular saw blade slowly and carefully to create a reference cut. Calculate the thickness of the cut you just made. If the desired thickness is not achieved, adjust the front of the saw accordingly.
Step 4: Carefully align the blade parallel to the platform’s face.
The circular saw blade should be precisely parallel to the platform’s face. If the blade is not adjusted correctly, it will warp during the cutting operation. Additionally, the tension will affect the circular saw motor. It will obliterate your workpiece, and it may even fracture the saw blade.
Take another piece of sacrificial wood. From the front of the saw, carefully insert it into the blade. Flip over the sacrificial piece of wood. At this stage, the front reference cut will be visible on the bottom.
From the unit’s “back,” feed the identical piece of wood into the blade. To make a second reference cut, you’ll have to move the blade guard out from the way. These two reference cuts should meet and align precisely. If these two cuts do not intersect at the exact location, you must readjust the blade. To do so, release the clamp on the rear of the device and make the necessary adjustments. The blade is parallel if the two different cuts intersect at the exact location.
Step 5: Adjust the blade’s height.
Because the workpiece or board being cut is now on the top of the table, you must change the blade height. Reduce the blade of the saw to the table surface. You may change the blade’s height by sliding a piece of paper beneath it. Assure that the paper goes just beneath the blade.
Step 6: Parallels are readjusted
If the saw’s body is at an angle to the sole, adjust it back to parallel. Ascertain that the blade is parallel to the table. You may wedge the sole against the motor housing.
Step 7: Begin ripping your slender board.
Don’t forget to protect your ears, wear a dust mask, and wear safety glasses.
To begin, push and then lock the trigger. Begin carefully passing the board through the blade.
With this approach, you can easily shred 34-inch boards.
How to Rip narrow boards with a circular saw
Subscribe to Mellowpine Woodworking on Youtube
Can You Rip A Board With A Circular Saw?
Yes, you can rip a board with a circular saw but if you already own a table saw, ripping large boards is more simple. However, you can do it more precisely with a decent circular saw. Indeed, cutting large pieces of plywood using a circular saw with a straightedge is frequently more straightforward than wrestling cumbersome sheets via a table saw.
What Is Used To Rip A Narrow Piece Of Board?
While a table saw is unquestionably the most excellent and safest equipment for the majority of rip-cutting tasks, you should observe the following safety procedures: Push the workpiece the final foot or so through the saw blade using a push stick—a disposable stick of wood about such a foot long and a 1 x 1-inch square. Making a thin cut with a table saw is safe and straightforward. Ripping a thin board with a circular saw may be risky and highly inconvenient. However, do not fret if you lack a table saw and must cut thin boards using a circular saw.
How To Rip A Board Quickly With Just Your Circular Saw
Subscribe to KeepMakinDust on Youtube
Can You Rip A 2×4 With A Circular Saw?
A circular saw is not the best saw for ripping a 2×4 and should only be used if you don’t have a table saw. A table saw is perfect for tearing a 2×4.
How Do You Narrow A Board Without A Table Saw?
Assuming you have a working knowledge of the tools you’ll be utilizing; several methods can accomplish this. To begin, this could be accomplished using a handsaw.
You may also use a jigsaw, but you’d have to work around the edges. If you have access to the circular saw, some jigs will work with it. Cutting the thin sizes may prove challenging. Alternatively, you might attach the circular saw to the underside of some substrate, such as melamine, using a straight piece of plywood as a clampdown fence.
As a result, you’ve constructed a primitive version of a table saw. Not as simple to use as a genuine one, but it will suffice. Consider hiring a table saw outfitted with a table saw a day or two. Alternatively, call local cabinet shops and see if they’ll cut your parts.
How Do I Make A Ripping Jig For A Circular Saw?
Rip a piece of 1/4-inch-thick plywood or hardboard approximately 10 inches to a foot broad and at least 4 feet long.
To act as the jig’s fence, rip a straight piece of 3/4-in wood or plywood. Make the fence a few inches wider than the space between your circular saw motor’s base and the fence.
Clamp a straightedge jig to an edge of a workbench and position the circular saw blade to cut through the base. Trim the saw’s base to the proper width by guiding it along the jig fence.
Once the straightedge jig is custom fit to your saw, it’s a snap to use. To begin cutting a sheet, lift it off the floor with scrap blocks to make room for the blade.
It’s not simple to tear a thin board with a circular saw, but with our step-by-step instructions, it’s a start. After reading this, it would help if you now had a solid understanding of how to tear thin boards with such a circular saw.
All that remains is a fair deal of practice. Following that, you may express your creativity via your craft. Always wear the safety gear and have fun tearing!

Recommended Posts:

