Danish oil is a finishing product that can be used on a variety of wood species, including Sapele. It gives the wood a beautiful, natural finish and protects it from moisture and other environmental factors. In this blog post, we will discuss how to apply Danish oil to Sapele, as well as some tips for getting the best results.
What Is Danish Oil And What Are Its Benefits
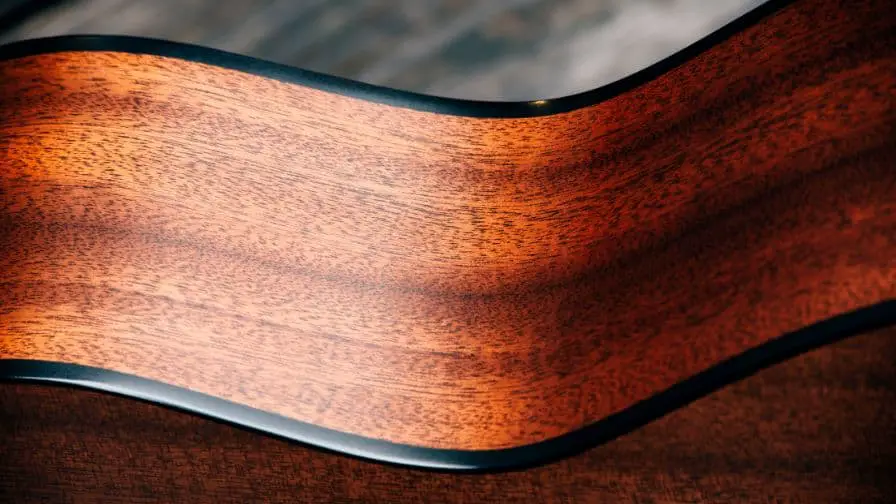
Danish oil is a type of wood finish that can be used on a variety of different woods. It is made from a blend of natural oils and resins, and it penetrates deep into the pores of the wood to protect it from within. Danish oil is also very easy to apply and gives the wood a beautiful, natural luster.
Danish oil is a food-safe, non-toxic oil that dries faster than other oils. It is also waterproof, making it ideal for use in the kitchen. Danish oil can be used on cutting boards, countertops, and utensils. It is also great for woodworking projects.
Tips For Using Danish Oil On Sapele
Using Danish oil on sapele is a great way to protect and enhance the wood. Danish oil is a natural oil that penetrates deep into the wood, providing a durable finish that will not chip or flake off. It also has a very low odor, making it ideal for use in homes with small children or pets.
Here are some tips for using Danish oil on sapele:
1. Always test the oil on a small, hidden area of the wood before applying it to the entire surface. This will help you to see how the oil will react with the wood and ensure that you are happy with the results.
2. When applying Danish oil to sapele, use a clean, lint-free cloth. Apply the oil in a thin, even layer, working it into the wood with circular motions.
3. Allow the oil to penetrate for 30 minutes before wiping off any excess with a clean cloth.
4. Danish oil will continue to cure and harden for up to 48 hours after application. During this time, the oil will become more durable and resistant to scratches and scuffs.
5. After the oil has cured, you can apply a second coat if desired. This will give the wood an even deeper, richer color.
6. Danish oil can be applied as often as desired to maintain the finish. Simply clean the surface with mild soap and water before reapplying the oil.
By following these tips, you can easily apply Danish oil to sapele and achieve beautiful, long-lasting results. Danish oil is the perfect way to protect and enhance your woodworking projects.
Do You Need To Treat Sapele?
Subscribe to Florida School of Woodwork
Sapele is a very durable wood, but it’s not immune to damage from the elements. If you plan to use sapele outdoors, or in an area where it will be exposed to moisture or high humidity, it’s important to treat it with a sealer or primer. This will help protect the wood from water damage, rot, and insect infestation. If you’re not planning to treat the sapele, be sure to sand it smooth before beginning your project.
How To Apply Danish Oil To Sapele
If you’re working with sapele, one of the best ways to protect it is by using Danish oil. This natural oil helps to keep the wood looking great while also providing some protection against wear and tear.
Applying Danish oil is relatively simple, but there are a few things you’ll need to keep in mind in order to get the best results. Here are a few tips on how to apply Danish oil to sapele.
1. Start by sanding your sapele down with some fine-grit sandpaper. This will help the oil to better penetrate the wood.
2. Once you’ve sanded, remove any dust by wiping down the wood using a damp cloth.
3. Next, apply a thin layer of Danish oil to the sapele using a clean rag. Make sure to work it into the grain of wood.
4. Allow the oil to soak in for about 30 minutes, then wipe off any excess with a clean rag.
5. Repeat steps 3 and 4 until you’re happy with the results.
6. Allow the Danish oil to cure for at least 24 hours before using or handling the sapele.
By following these simple tips, you’ll be able to apply Danish oil to sapele like a pro!
How Do I Get A Smooth Finish With Danish Oil?
It’s actually quite easy to get a smooth finish with Danish oil. The secret is in the application. Remember to work the oil into the wood in the direction of the grain and be sure to wipe off any excess oil. Also, make sure you let the oil dry completely before applying another coat. This will ensure that your finish is smooth and uniform.
Tips For Getting The Best Results With Danish Oil
Subscribe to Jason Van Duyn
Danish oil is a great way to finish wood. It’s easy to apply, and it gives the wood a beautiful, natural look.
Here are a few tips for getting the best results with Danish oil:
1. Make sure the wood is clean before you start. Danish oil will highlight any dirt or dust on the surface, so it’s important to start with a clean surface.
2. Apply the oil evenly. Use a brush or cloth to apply the oil evenly over the surface of the wood.
3. Allow the oil to soak in. Danish oil is designed to be absorbed into the wood, so don’t worry if it seems like it’s being absorbed quickly. Just let it soak in for a few minutes before wiping off any excess.
4. Wipe off any excess oil. After the oil has had a chance to soak in, wipe off any excess with a clean cloth.
5. Allow the oil to dry. Danish oil dries quickly, so you shouldn’t have to wait more than a few hours before you can use the wood.
With these tips, you’ll be able to get the best results from your Danish oil finish.
Should I Sand Between Coats Of Danish Oil?
Yes, you should sand between coats of Danish oil. This will help to create a smooth, even finish. Sanding also helps to remove any dust or debris that may be on the surface of the wood.
When sanding between coats of Danish oil, be sure to use fine-grit sandpaper. Coarser grit sandpaper can leave behind scratches or other imperfections.
If you are not sure how many coats of Danish oil to apply, a general rule of thumb is to apply two to three coats. Each coat should be allowed to dry for at least 30 minutes for Sapele wood before the next coat is applied.
How Long Should You Leave Between Coats Of Danish Oil?
You should always leave a minimum of 30 minutes between coats of Danish oil, to allow the previous coat to properly dry.
However, if you need to speed up the process, you can use a hair dryer on a low setting to help the oil dry more quickly. Just be sure not to heat the oil too much, or it could damage the wood.
What Are The Disadvantages Of Danish Oil?
Subscribe to Mad Nerd Workshop
It can be time-consuming to apply Danish oil to your woodworking projects, and the finish isn’t as durable as some other options.
You’ll also need to regularly maintain the finish, which can be a hassle. Danish oil is best suited for bare woods, so it’s not always the best choice for finished projects.
Does Sapele Go GREY?
Sapele is susceptible to fading and discoloration over time when exposed to sunlight and weather elements. While some people may prefer the weathered look of greyed wood, others may want to maintain the original color of their Sapele furniture.
There are a few things you can do to help keep your Sapele wood looking its best:
- Apply a clear sealer or topcoat. This will help protect the wood from UV rays and weather damage.
- Avoid placing furniture in direct sunlight. If possible, move it to a shaded area or cover it with a tarp when not in use.
- Clean the furniture regularly with a mild soap and water solution.
- If you do notice your Sapele wood starting to grey, you can try using a wood brightener or stain to restore its original color. Just be sure to test the product on a small area first to see how it will react with the wood.
Pros And Cons Of Using Danish Oil
Just like any other finish, Danish oil has its pros and cons. Here’s a quick rundown of each:
Pros:
- Food-Safe. It is safe to use on surfaces that will come into contact with food, such as countertops and cutting boards.
- Non-toxic. Danish oil is made from natural ingredients and does not contain toxins or VOCs.
- Dries fast. Danish oil dries quickly, so you won’t have to wait long before using the finished piece.
- Water-resistant. Danish oil is water resistant, making it a good choice for protecting surfaces from moisture.
Cons:
- Regular maintenance. Danish oil needs to be reapplied regularly to maintain its protective properties.
- Time-consuming. Applying Danish oil can be time-consuming, as it requires multiple coats.
- Less durable. Danish oil is not as durable as some other finishes, so it may need to be reapplied more often.
- Apply only on bare wood. Danish oil should only be applied to bare wood, as it will not adhere to paint or varnish.
There you have it! The pros and cons of using Danish oil. Weigh your options carefully before deciding which finish is right for your project.
Recommended Posts:

