A Dado Joint is one of the strongest and easiest types of joint construction used in woodworking. It’s definitely a joint for which any woodworker or woodworking enthusiast can find an application. There are so many varieties of wood joints you can use. Each style has a specific purpose and function that separates it from the others.
What is a dado joint used for? Dado Joints are commonly used in drawer dividers, cabinet shelves, bookcase shelves, partions, cupboards and any project needing to join two pieces at a 90° angle typically plywood or veneers. The lower shoulder of the joint supports the shelf and materials stored on it and the upper should prevents it from cupping.
Keep reading below to get a more in-depth look at Dado Joints and what they are used for.
What Is A Dado Joint Used For?
A dado joint is a type of joinery that is used to connect two pieces of wood. It is created by cutting a series of slots, or dadoes, in one piece of wood, and then mating it with another piece that has corresponding grooves. This type of joint can be used for a variety of purposes, such as creating shelves, connecting parts together, and more!
What Is A Dado?
A dado is a three-sided tough or trench. It is a slot, trench or U-shaped channel cut into the surface of a piece of wood. A dado is different from a groove because it is cut across or perpendicular to the grain. Cutting parallel to or with the grain would make it a groove.
Curious about What Is A Miter Joint Used For? Please consider reading our article about the topic at this link here https://topwoodworkingadvice.com/what-is-a-mitre-joint-used-for/
Types of Dado Joints:
Through Dado Joint
A through dado joint is one of the most common ways to join two pieces of wood together. It is made by cutting a groove into one piece of wood, and then fitting another piece of wood into that groove. The two pieces are then glued or nailed together.
One advantage of using a through dado joint is that it is very strong. This type of joint is often used to join two pieces of wood together that will be under a lot of stress, such as the rails and stiles of a door.
Another advantage of using a through dado joint is that it is relatively easy to make. You can cut the dadoes with a router or a table saw.
A disadvantage of using a through dado joint is that it can be difficult to align the two pieces of wood perfectly. If the joint is not aligned correctly, it will be very visible.
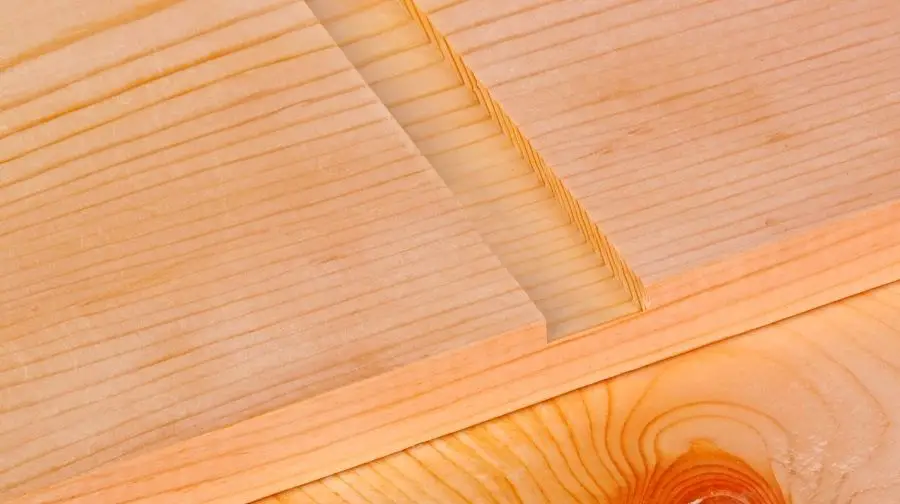
Stopped Dado Joint
A stopped dado joint is a type of woodworking joint used to join two pieces of wood together. Stopped dado joints are similar to regular dado joints, except that they have a stop at the end of the cut. This stop prevents the blade from cutting through the entire piece of wood.
There are several benefits to using stopped dado joints. First, they are much stronger than regular dado joints. Stopped dado joints are also less likely to loosen over time. Finally, stopped dado joints can be used to create rabbets, which are essential for many woodworking projects.
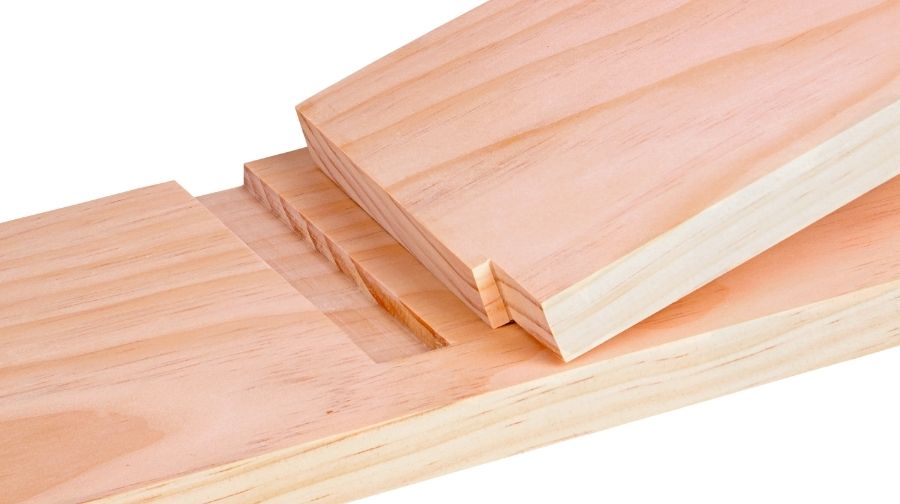
Rabbet and dado joint
A rabbet and dado joint is one of the most versatile and commonly used woodworking joints. It’s used to join two pieces of wood together at right angles, it is similar to a through dado joint but has a rabbet on the bottom lip of the dado and can be found in everything from cabinets and bookshelves to picture frames and boxes.
There are a few different ways to cut a rabbet and dado joint, but the most common is with a table saw. You can also use a router, but it’s more difficult to get a clean, precise cut.
Dado Joints Can Be Used For
Dado joints can be used for a variety of different projects. Some of the most common uses for dado joints include:
– Cabinet construction
– Bookcases
– Picture frames
– Boxes
-Bookshelves
-Drawers
How To Cut A Dado
There are many different techniques for cutting a dado. Perhaps the easiest and most expedient method would be using our trusty table saw.
To use the table saw, you’ll need what’s called a dado stack or dado blade. The dado stack is essentially a sandwich of two fairly typical-looking saw blades with square teeth. These two blades go the outside edges and are separated by a number of what are called chipper blades. The teeth of the chipper blades are cut to various thicknesses. The number of chipper blades required is determined by the width of the Dado you need to cut.
PRO TIP: For every star in the heavens, there is a different way of finding the correct spacing for your dado blades. We recommend that you lay whatever piece of material you want to fit into your Dado down on your work table, then lay your two outer dado stack blades on top of each other, and then stack your chipper blades up in the right combination until the stack is the same height as the material. After trying different combinations, and you still can’t find the right thickness, most dado sets come with a set of metal or plastic shims to help you achieve the thickness you need.
Remember, when stacking your chipper blades make sure there is enough space that the teeth do not touch.
Once you’ve established the necessary width of your dado stack, you’ll need your saw’s miter gauge to ensure that your Dado stays straight and true across the entire length. You’ll want to find a scrap piece of wood to use for a test cut. It’s always a best practice to test any cuts on scrap wood before attempting it with your project material.
Test your Dado cut by inserting your project piece into the cut to make sure it fits snuggly. If your test Dado is to your liking, then attach your project material to your miter gauge, making sure of your measurements. Using the same piece of scratch wood as a fence, push your piece evenly across the table saw.
You should end up with a Dado that is almost perfect. If you have any bumps or rough spots, you may need to sand them out a bit, but once you’ve done this, you’ll be left with a smooth three-sided trench that fits snuggly with your other pieces.
Curious about What Is A Biscuit Joint Used For? Please consider reading our article about the topic at this link here https://topwoodworkingadvice.com/what-is-a-biscuit-joint-used-for/
How To Cut A Dado With A Table Saw
Subscribe to WoodworkersJournal on Youtube
How To Cut A Dado Using A Router
When your board is too large to cut on a table saw or a table mounted router you can use a portable router. Clamp a straightedge to the workpiece to guide the router across the grain of your board to cut the dado. Use a T-square to make sure your straightedge is at 90° to the edge of your board. If you are going to be using your portable router quite often it is a good idea to create a jig to help make cuts quickly and efficiently.
Router Joinery Basics: Dado
Subscribe to WoodworkersJournal on Youtube
How To Cut A Dado Using A Saw.
In a pinch, you can cut a dado with an ordinary saw blade and some hand tools. Saw the sides of the dado to the property depth and remove most of the waster with a chisel. Then clean up the bottom of the dado with a router plane.
Curious about What Is A Knapp joint? Please consider reading our article about the topic at this link here https://topwoodworkingadvice.com/what-is-a-knapp-joint/
How To Cut a Dado With Hand Tools
Subscribe to Wood By Wright on Youtube
To wraps things up, a Dado is just a three-sided trench or groove cut into a piece of wood that can be used to create what’s called a Dado Joint.
Dados can be used in conjunction with a tongue, a rabbet, or simply the uncut edge of another piece of wood to create a joint that suits your desired finish.
Dado Joints are simple to make if you have the time and the right tools and can help strengthen any piece and give it that professional aesthetic, we all want.
You can learn more about Rabbets Joints on this website by clicking on, A Rabbet Joint and Its Uses.
How Does the Dado Joint Compare to Other Joints?
The dado joint compares to other joints in a few ways. The dado is much wider, so it can support more weight. It is also stronger than other joints because of the way the pieces fit together. The Dado can be used for both indoor and outdoor projects, making it a versatile joint.
The Dado joint is not without its drawbacks though. One of the big drawbacks is that the Dado is not as easy to make as some of the other joints. It can be made with hand tools, but it will take more time than other joints.
Another drawback is that the Dado does not allow for any movement between the two pieces of wood. This means that if the Dado joint is not made correctly, it can be very difficult to fix.
Overall, the Dado is a strong and versatile joint that can be used for a variety of projects. It is important to take the time to make the Dado correctly, as it can be difficult to fix if it is not made correctly.
What Is The Difference Between A Dado And A Rabbet?
The difference between a dado and a rabbet is that a dado is cut into the wood, while a rabbet is cut into the edge of the wood.
What Is A Blind Dado?
Blind dados are not visible from the outside, which makes them ideal for hiding joints in furniture or cabinets. Blind dados are also stronger than other types of woodworking joints, making them ideal for joining large pieces of wood together.