Polyurethane is a popular finish for wood furniture. It is durable and can be applied in a variety of ways. However, it is important to apply polyurethane correctly so that you get the best results.
In this blog post, we will discuss the proper way to apply polyurethane and answer the question: can you put polyurethane on too thick?
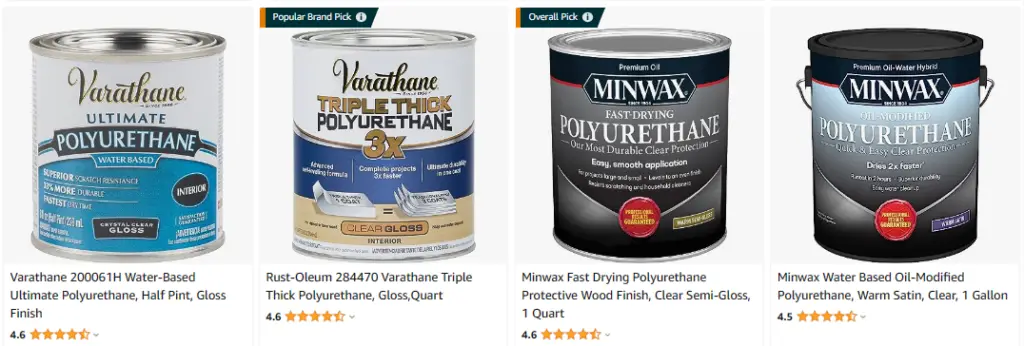
Click Here To Check The Pricing On Amazon
Can You Put Polyurethane On Too Thick?
Yes, you can put polyurethane on too thick. If you do, it will take forever to dry and will be prone to runs and puddles. Applying several thin coats is always best.
Generally speaking, you should never apply more than three coats of polyurethane at one time. If you need more protection or a higher gloss finish, sand down to bare wood and start over.
What Is Polyurethane And What Are Its Benefits
Polyurethane is a type of synthetic resin. It is durable and has a variety of uses, including in flooring, furniture, and automotive applications. Polyurethane can be applied as a coating to surfaces to protect them from wear and tear. It is also used as an adhesive.
Polyurethane has many benefits and these includes:
- Durability: Polyurethane is a very tough and durable material. It is resistant to scratches, dents, and other types of damage. This makes it ideal for use in areas with high traffic or in places where there is a risk of damage.
- Versatility: Polyurethane can be used in a variety of applications. It can be used as a coating, adhesive, or sealant. It is also available in different colors and finishes.
- Ease of cleaning: Polyurethane is easy to clean and does not require special cleaners or treatments.
- Water resistance: Polyurethane is resistant to water and moisture. This makes it ideal for use in bathrooms, kitchens, and other wet areas.
- Stain resistance: Polyurethane is resistant to stains and spills.
- Appearance: Polyurethane has a high-gloss finish that can make surfaces look new
- Affordability: Polyurethane is a very affordable material.
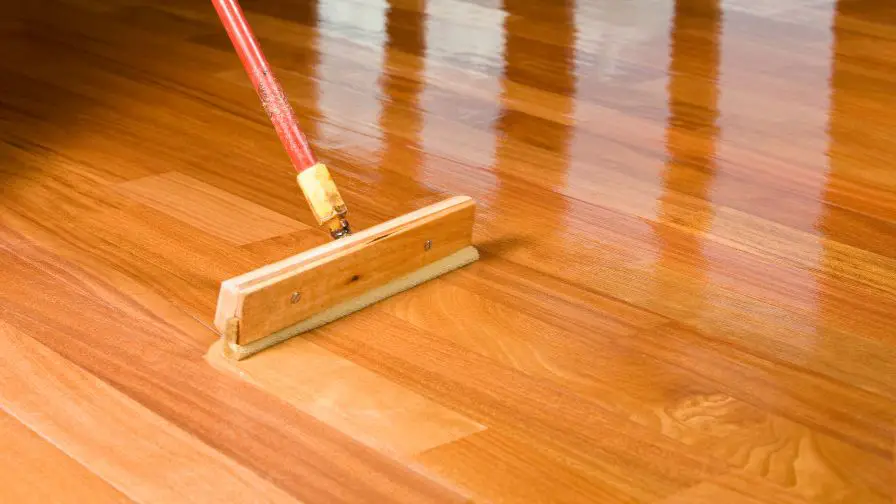
How To Apply Polyurethane For A Smooth, Even Finish
You can apply polyurethane with a brush, cloth, or roller. For best results, pour a small amount of polyurethane into a bowl before applying it to your project surface. This will help ensure an even application.
Using a brush, start by applying the polyurethane to the edges of your project surface. Then, use a roller or cloth to apply the polyurethane to the rest of the surface. Be sure to work in small sections and brush out any bubbles that form.
Once you’ve applied the polyurethane, for water-based allow it to dry for at least 2 hours before applying the second coat and 24 hours using your project surface. While waiting for oil-based Polyurethane to dry for at least 8 hours and best results, wait 48 hours before using the surface. After the polyurethane has dried, you can apply a second coat if desired.
Now that you know how to apply polyurethane, you can protect your projects and surfaces with this durable finish. Be sure to follow the manufacturer’s instructions for the best results.
Subscribe to Darbin Orvar on YouTube
The Difference Between Satin, Semi-Gloss, And Gloss Finishes
There are three common types of polyurethane finishes satin, semi-gloss, and gloss. The type of finish you choose will depend on the look you want to achieve and the level of durability you need.
Satin Finishes:
There is a degree of luster in satin finishes and their glossiness highlights the imperfections on walls such as cracks or poorly patched areas which makes them ideal for busy families with small children or pets. They are also more durable than semi-gloss finishes, so they’re perfect for high-traffic areas like kitchens and bathrooms.
Semi-gloss Finishes
Semi-gloss finishes have a bit more shine as compared to satin and are better at resisting stains and scratches. They’re also easier to clean, so they’re a good choice for areas that see a lot of activity.
Gloss Finishes
Gloss finishes have the highest shine and are the most resistant to stains and scratches. They’re also the easiest to clean, so they’re a good choice for areas that see a lot of activity. However, their high shine can highlight the imperfections on walls such as cracks or poorly patched areas.
If you’re not sure which finish to choose, ask a professional painter or visit your local home improvement store for advice.
Now that you know the difference between the three common types of polyurethane finishes, you can now decide which one is right for your project.
How To Remove Old Polyurethane From Furniture
To remove old polyurethane from furniture, you’ll need to create a remover using denatured alcohol and lacquer thinner.
- First, start by sanding down the surface of your furniture to rough it up a bit. This will help the remover to penetrate the polyurethane and break it down.
- Next, mix equal parts denatured alcohol and lacquer thinner.
- Apply the remover to the surface of your furniture with a clean cloth, working in small sections. You should see the old polyurethane start to dissolve and become gummy.
- Once it’s completely dissolved, wipe away any residue with a clean cloth.
- Repeat the process until all of the old polyurethane has been removed.
- Once you’re finished, sand down the surface of your furniture again to smooth it out.
- Then, you can apply a new coat of polyurethane if desired.
Removing old polyurethane can be a messy and time-consuming process, but it’s worth it in the end. Your furniture will look good as new!
Tips For Keeping Your Furniture Looking Beautiful With A Polyurethane Finish
Applying a polyurethane finish is one of the best ways to protect your furniture and keep it looking beautiful for years to come.
Here are a few tips for keeping your furniture looking beautiful with a polyurethane finish:
- Wipe up spills immediately: Polyurethane is very forgiving, but it’s always best to clean up any spills as soon as they happen. This will help prevent any staining or damage to the finish.
- Dust regularly: Dusting your furniture regularly will help keep the finish looking fresh and new. Be sure to use a soft, dry cloth to avoid scratching the finish.
- Polish periodically: In addition to dusting, you should also polish your furniture periodically. This will help keep the finish looking shiny and new. Be sure to use a quality furniture polish that is designed for use on polyurethane finishes.
- Avoid excessive heat: Excessive heat can damage the finish of your furniture. Be sure to keep your furniture away from direct sunlight and heat sources.
- Avoid harsh cleaning products: Harsh cleaning products can damage the finish of your furniture. Stick to mild, soap-free cleaners that are designed for use on wood surfaces.
These are just a few tips for keeping your furniture looking beautiful with a polyurethane finish. By following these tips, you can help keep your furniture looking its best for years to come.
Subscribe to Angela Marie Made on YouTube
How Do You Fix Thick Polyurethane?
You can fix thick polyurethane by sanding it down and starting over. You’ll need to remove the excess polyurethane, sand the area smooth, and then apply a new coat of polyurethane. It’s important to follow the manufacturer’s instructions when applying polyurethane. If you put it on too thick, you’ll end up with a sticky mess.
If you’re having trouble getting the polyurethane to level out, you can try using a brush or roller designed for applying thick coatings. These products can help you apply an even layer of polyurethane without putting it on too thick. Just be sure to follow the manufacturer’s instructions for the best results.
Should Polyurethane Be Thinned?
You do have the option to thin your polyurethane prior to using it, but you don’t necessarily have to. If you do choose to thin it, use mineral spirits or naphtha. How much you thin it is dependent upon the climate conditions. For example, if it’s hot and humid where you are painting, you will want to thin the polyurethane more than if you were painting in cooler, drier conditions. The general rule of thumb is to add about 20% thinner to the polyurethane prior to applying it.
If you are going to be using a brush to apply the polyurethane, you will want to thin it slightly more than if you were going to use a roller or pad. The reason for this is because brushing on the polyurethane can cause bubbles and brush strokes. Thinning the polyurethane will help to avoid these problems.
One other thing to keep in mind is that thinning the polyurethane will also reduce the amount of protection it provides. So, if you are going to be using the polyurethane in an area that is prone to a lot of wear and tear, you may want to forgo thinning it.
In general, it is best to err on the side of not thinning the polyurethane too much. You can always add more thinner if you find that you need it, but you can’t take it out once it’s been added. So, start with a small amount of thinner and add more as needed.
Recommended Posts:

