White wood stain is a universal color used for interior wood stain as well as exterior wood stain. For example, it looks gorgeous when used for exterior wood stain projects like staining a gazebo, staining a deck, and other exterior staining projects. At the same time, when used for interior wood stain jobs like staining cabinets, doors, hardwood floors, stairs, it gives a stunning look to any wood. Let’s explore more about white wood stains in detail.
Is There a Wood Stain in White?
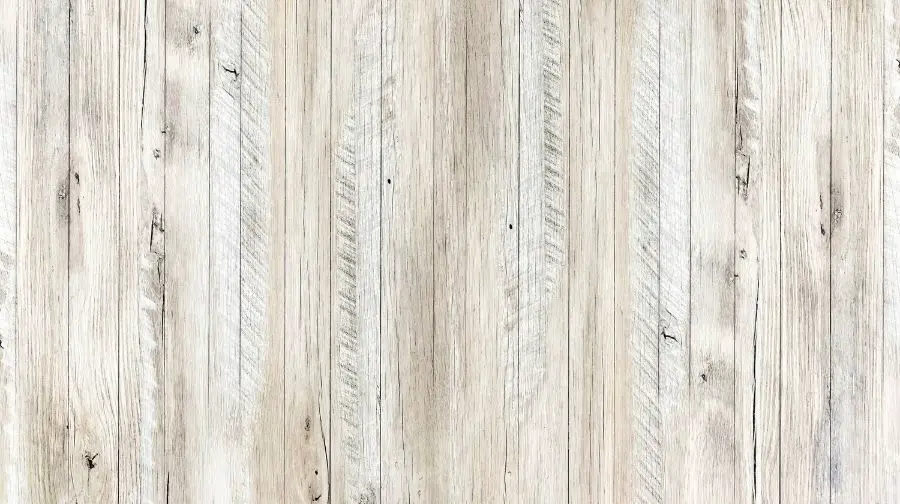
White wood stains are available in the market in a wide range of color options. Some common color options include simple white, white birch, pure white, western white, and many more.
What’s great about white wood stain is that it can be simultaneously used for interior and exterior wood staining projects because of its universal nature. These stains are available in oil-based and water-based forms. Mostly, water-based white wood stain is preferred as it produces less odor, and cleanup is easier.
Curious about The Ultimate Blue Wood Stain Guide Please consider reading our article about the topic at this link here https://topwoodworkingadvice.com/the-ultimate-blue-wood-stain-guide/
How to Apply General Finishes Whitewash Wood Stain
Subscribe to Suzanne Bagheri on Youtube
What is the Best White Stain for Wood?
When looking for the best white wood stain, there are tons of options, but not all offer stunning results in giving your wood a glamorous look. That’s why we took time to gather some of the best white stains for wood to help you out in giving your furniture and house a better look. Consider these stains and help your DIY projects stand out.
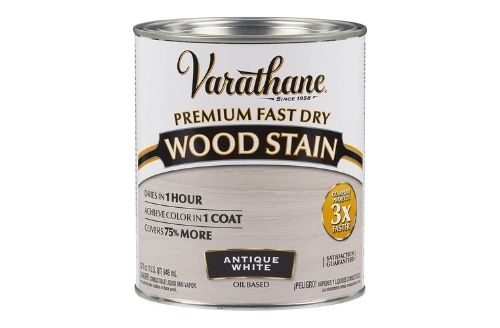
Varathane Fast Dry Wood Stain is ideal for interior as well as exterior woodworking projects like doors, decks, furniture, cabinets, and many more. It features a fast-dry formula to take less time in drying up and making the staining process a lot easier. Also, the stain features nano pigments that get to the inside of the wood while enhancing the overall performance.
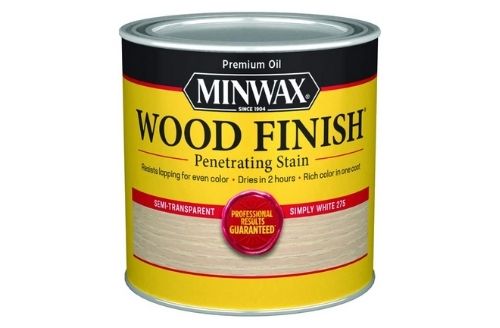
Minwax Wood Finish Simply White Stain deeply penetrates into the wood pores that prevent blotchy areas. You can easily apply this stain using a cloth, brush, or foam applicator while making the process a lot more budget-friendly. All it takes is 15 minutes to penetrate deep into the wood pores to provide exceptional results.

General Finishes WIPT Wood Stain features rich, dark, high-quality pigments that you can either paint or spray. It contains low odor, low VOC and is perfect for indoor as well as outdoor woodworking projects. You can make the custom colors with this stain by mixing multiple stains or with water.
Curious about The Ultimate Red Wood Stain Guide Please consider reading our article about the topic at this link here https://topwoodworkingadvice.com/the-ultimate-red-wood-stain-guide/
5 DIY White Wash Finishes for Wood
Subscribe to HomeMadeModern on Youtube
How Do You Stain Wood White?
Staining your wood white can really transform materials to the next level as it gives a brand-new look. At the same time, you’re afraid of ruining the wood while doing DIY projects at home. That’s why we came up with the easiest way to stain wood white like a pro. Go through the steps orderly, and you won’t ruin the wood.
Tools Required
- Water-based or Oil-based White Stain
- Stainable Wood Filler
- Sandpaper
- Pre-Stained Conditioner
- White Stain
- Bristle Brush
Step #1: Choose the Right Stain Type
Before you go for staining, start with choosing the stain as there are two options in white wood stains; oil-based stain and water-based stain. However, both stains work well in their own way, and there’s no right and wrong stain, but it’s important to make a decision about the stain first.
Let us educate you about both types of stains, so you can make the final decision. First, oil-based stain penetrates deeper into the wood while perfectly settling for a long-lasting white look. However, it takes more time to dry, and you have to wait longer. Last, it smells strong and does not require additional sanding.
On the other hand, water-based white stains require additional sanding, are low odor, and are easy to clean. At the same time, it takes less time to dry and is widely used for DIY woodwork projects. Now you can make a decision about the type of stain you require for your project. Once you choose the stain, move to the next step.
Step #2: Fill the Holes
Get a stainable wood filler and make sure there’s no hole left in the wood. These holes always ruin the staining as they fill a lot of stains that spread to the entire wood when moved a little. Make sure you have a stainable wood filler rather than a paintable filler. Move to the next step after filling all the holes.
Step #3: Sand the Wood
Grab an 80 to 120 grit sandpaper and get to the sanding to remove already stains, scratches, even the filled holes, and remove excess wood glue. Once you’re done with lower grit sandpaper, move on to the higher grit of up to 220. Repeat the sanding for better smoothing the wood surface.
Step #4: Clean the Wood Surface
After sanding, precisely clean the wood surface to read it for staining. Get a tack cloth and wipe all the dust away. Tack cloth is recommended because it sticks to the dust and precisely carries it while making the surface clean.
Step #5: Apply Pre-Stain Wood Conditioner
If you are staining softwood such as pine that doesn’t consistently absorb the stain, apply a wood conditioner. It helps the wood absorb the stain and evenly settle without creating blotchiness. Get a pre-stain wood conditioner as per oil-based and water-based wood stain. Apply the conditioner and wipe using a brush for at least 2 minutes to perfectly settle on the wood. Wait for 15 minutes before you move to the next step.
Step #6: Stir and Apply the White Stain
Most of the time, pigments settle at the bottom, and stirring can bring the stain back to its original shape. That’s why it’s important to stir before you stain. For oil-based white wood stain, get a brush or rag and apply the stain. Rag is a lot better for oil-based and helps in preventing blotchiness. If the wood is grain, let the stain settle and fill the holes. Dip the rag again when it starts giving lighter color on the wood.
For water-based white wood stain, get a bristle brush or foam brush. Both work well, but a bristle brush is recommended because it’s more effective in giving better staining. Water-based stain is more like paint and spreads it all over the wood. Brush the stain in one direction and make sure it reaches the entire wood.
Step #7: Wipe Off Excess Stain
Oil-based stain requires at least 15 minutes, but it takes 2 minutes to get dry for water-based white stain. Wait the specified time and remove the extra stain, or it will make blotchy areas. You can give the wood multiple coats, and it’s all your choice, depending on the darkness of color you desire.
Curious about The Ultimate Black Wood Stain Guide Please consider reading our article about the topic at this link here https://topwoodworkingadvice.com/the-ultimate-black-wood-stain-guide/
White Wood Stain Options | How to Whitewash Wood with Stain
Subscribe to Angela Marie Made on Youtube
White Stain vs. White Paint
- Absorption
White stain gets absorbed into the wood surface, but the paint never settles and sits on the surface. You can’t recoat the paint surface, but when it comes to re-staining, it’s quite easy. This difference is due to the absorption of each material by the wood.
- Whitewash
You can whitewash paint is preferred on the paint as a stain over paint is not possible because the painted surface never lets the stain absorb into the wood. Still, results would be different depending on the type of wood.
- Price
White paint costs a lot more than white stain. The main reason is that it takes less paint to give the same color as compared to stain. Also, there’s no double or triple coating required in the case of paint. So, white pain takes less consumption and costs more. It is totally different for the stain, and that’s why it costs comparatively less.
- Ease of Use
It takes more effort to stain white wood, while painting requires less effort. You have to double or triple coat for the stain, which is not the case for white paint, making it a lot more convenient than white stain. Also, no sanding is required for white paint.
How to Whitewash Wood?
Whitewashing wood with ‘water and paint’ and ‘wax and paint’ is common, but we will discuss how you can whitewash wood with the stain. It is just the same as staining wood white. All you need is to get a white stain of any desired shade, bristle brush, pre-stained conditioner, cloth, and multiple sandpapers. Let’s start whitewashing wood with the stain following these steps:
- Start with filling the cracks and holes in the wood to make the surface even that prevents blotchiness in the future.
- Sand the wood using lower grit of up to 120 sandpaper and end up sanding with 220 grit sandpaper.
- Clean the wood surface and wipe off the dust using a cloth.
- Apply the pre-stain conditioner that lets the stain easily absorb and evenly settle all over the wood.
- Stir the white stain as most of the time pigments settle at the bottom that actually gives the color to the wood.
- Apply the stain all over the wood and make sure you move the brush in one direction.
- Remove the excess stain, or it may lead to blotchy areas.
- Double or triple the coat as per your desired look.